

You've laid out what looks like an easy fleece throw, but the first seam starts to ripple and the fabric seems to creep under the presser foot. The fix is to stop treating fleece like quilting cotton: it's a soft knit with a lofty surface, so a few small changes to cutting, feeding, and stitching make a big difference. This guide to how to sew fleece fabric starts with those basics, then walks you through seams, edges, and beginner-friendly projects.
Why Fleece Is Not Your Average Fabric
Before cutting, brush the fleece with your hand in both directions. One direction will feel smoother, while the other may feel rougher or make the fabric look darker. That change comes from the nap, the direction of the brushed pile. Mark the smoother direction with an arrow, then place every pattern piece so the nap runs the same way. A quick check now helps prevent a jacket front or blanket panel from looking like mismatched shades later.
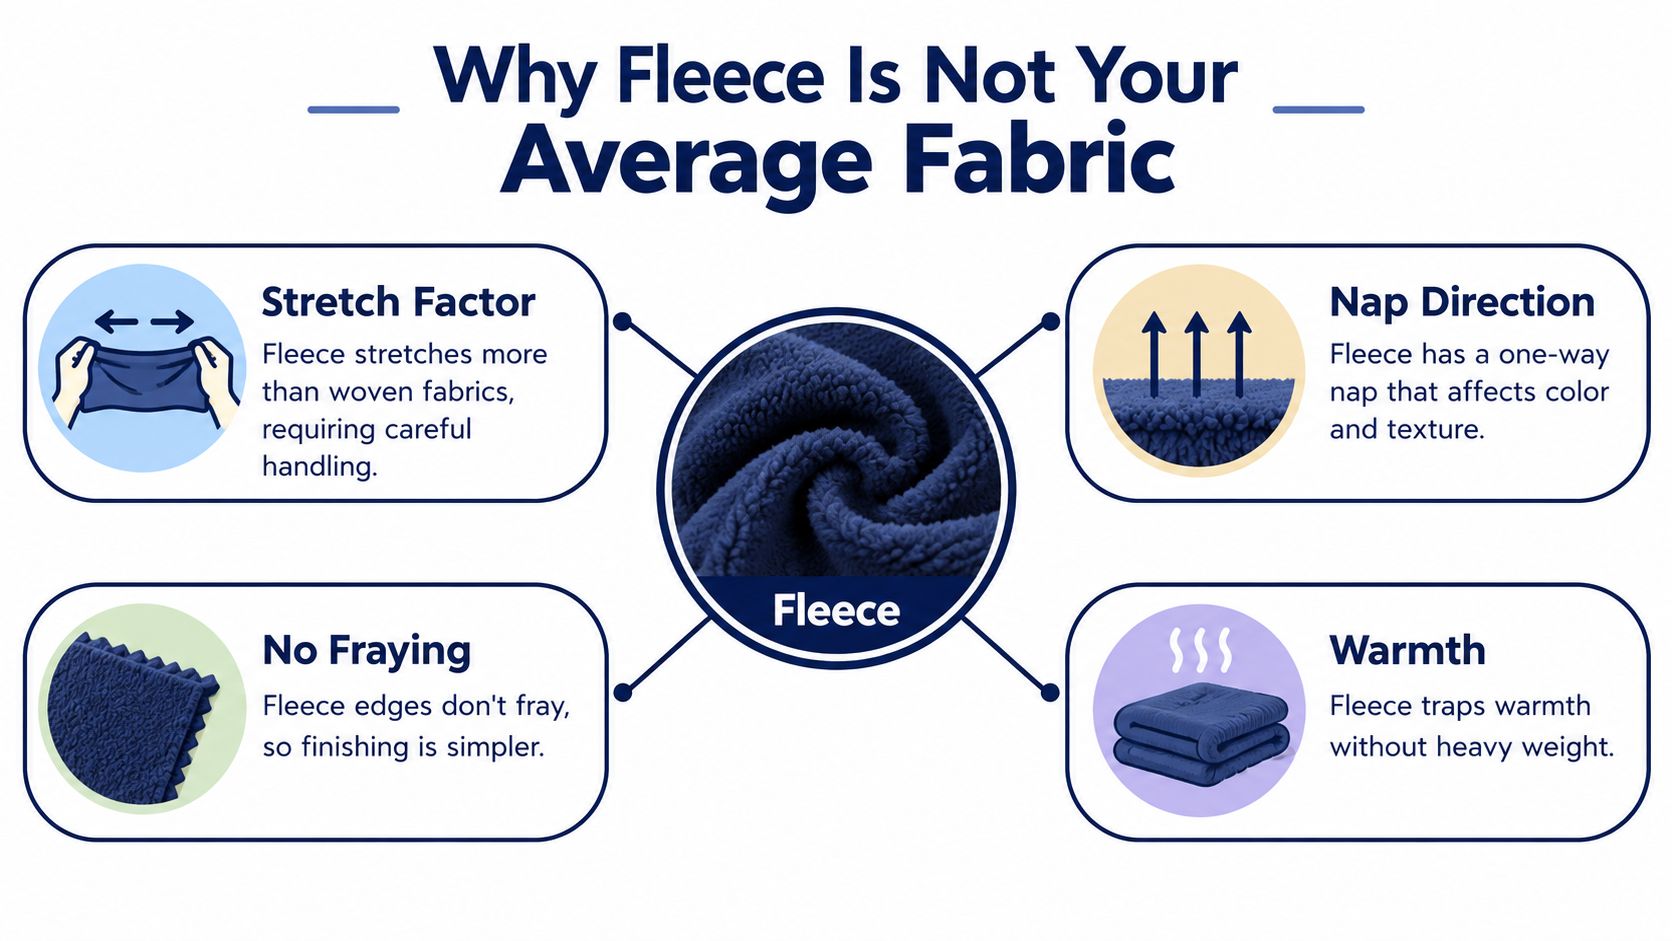
Fleece can look like a thick, stable fabric, but it's generally a knitted structure, not a plain woven one. Polar fleece was developed in Massachusetts in 1979 by Malden Mills in collaboration with Patagonia as a lightweight, durable synthetic alternative to wool and chinchilla. Its polyester fibers form a soft pile, and that knit construction is why fleece can stretch and shift more than quilting cotton. The history and sewing characteristics are described in this overview of fleece fabric by the yard.
That changes how you handle it. Instead of pressing and pinning it like a stable woven, let the fabric rest flat, avoid pulling it as you sew, and choose a needle and stitch that can tolerate modest movement. Fleece also usually doesn't fray, which makes edge finishing simpler, though you may still want a hem or binding for a tidy finish.
Quick nap test: Brush the fabric, mark the direction that feels smooth, and keep that arrow pointing the same way on every piece.
Cutting and Preparing Fleece Without Stretching It Out
Lay the fleece on a large, flat surface and smooth it gently with your hands. Don't tug the edges to make them line up. If the fabric is folded, check that both layers sit flat without ripples before placing a pattern piece. Keep the nap arrows pointing in the same direction, and align pattern pieces with the stretch direction in mind, especially for clothing.
A sharp rotary blade can make a clean cut through thick fleece without lifting the fabric as much as scissors may. Use a cutting mat and let the blade do the work. If you're cutting with scissors, keep the lower blade close to the table so you're not raising and stretching the fleece with every snip.
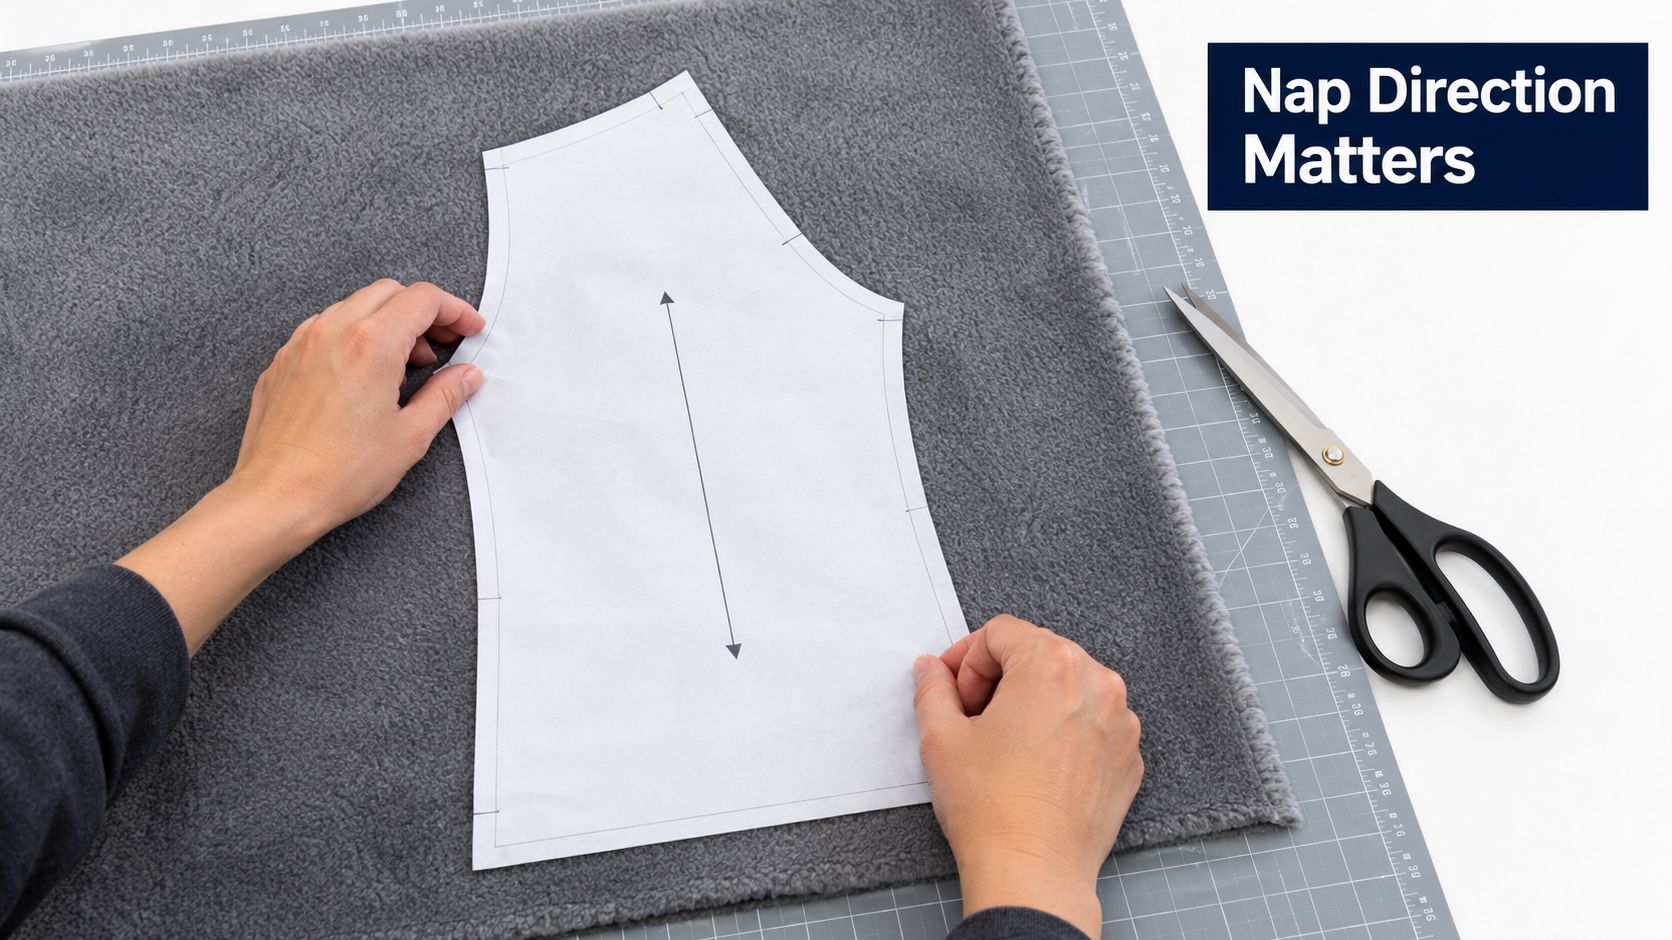
For holding pieces together, use fabric clips on thick layers. Clips grip the pile without pushing pins through a stack, and they're easy to move as you sew. If you prefer pins, place them within the seam allowance and avoid packing them closely, which can make bulky spots harder to feed beneath the presser foot.
Mark with chalk or a washable fabric marker, testing first on a scrap because the pile can hide fine lines. You can also make a small notch at the selvage or use clips to keep track of corresponding edges. If you're buying fabric in person, ask for the cut to be folded neatly and check the nap before leaving. For a refresher on fabric handling and preparation, see how to preshrink fabric. Fleece is synthetic and doesn't need the same preparation as cotton, but the guide is useful when your project combines fabrics.
Needles, Thread, and Stitch Settings That Actually Work
A needle that works well on woven cotton may not be the right choice for fleece. A rounded ballpoint or stretch needle can move between knit loops rather than catching them, while a universal needle is also a practical option. Match its size to the thickness of the fabric, then test before you start the actual seam.
| Fleece Weight | Needle Size | Thread | Stitch |
|---|---|---|---|
| Thin fleece | 70/10 | 100% polyester | Straight, about 3–4 mm |
| Medium or printed fleece | 80/12 | 100% polyester | Straight, about 3–4 mm |
| Heavy fleece or thick layers | 90/14 | 100% polyester | Straight for stable seams, narrow zigzag where stretch is needed |
Use 100% polyester thread in both the needle and bobbin. It has the flexibility to work with fleece's modest stretch, while cotton thread may be less forgiving. For most seams, begin with a straight stitch around 3–4 mm, then adjust after testing. Utah State University Extension recommends approximately 7–9 stitches per inch for fleece; stitch length and fabric density can affect how those settings behave, so trust the test seam as well as the dial. The range is included in the sewing guidance in the needle selection guide.
Choose a straight stitch for a stable blanket seam or panel. Use a narrow zigzag or stretch stitch where the seam needs to move with the garment, such as a side seam or cuff. Before sewing your project, run a test seam about 10–15 cm long on a scrap, check that the fabric lies flat, and gently stretch the seam if it needs to flex. Change one setting at a time so you can tell what helped.
Building Seams and Finishing Edges Without Bulk
Thick seams can hesitate beneath the presser foot, and fleece's pile may compress as the machine feeds it. Start with a test on scraps, then reduce presser-foot pressure if your machine allows it. Support the fabric's weight on the table and guide it with your hands. Don't pull it toward or away from the needle, because that can stretch the seam out of shape.
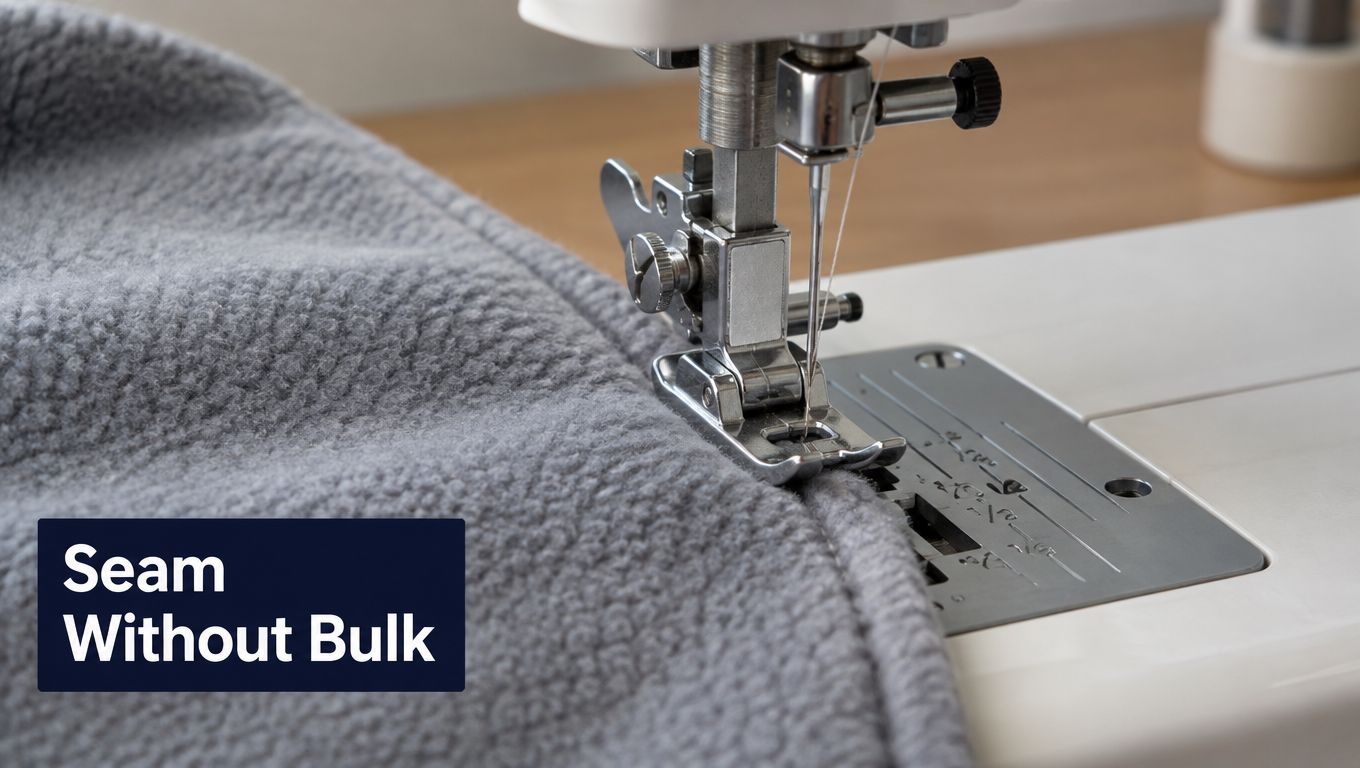
A walking foot or dual-feed system can help move the top and bottom layers together. If you don't have one, slow down and check that the layers stay aligned as they pass under the foot. On bulky intersections, place clips on opposite sides of the seam rather than stacking them at one point. That staggers the thickness and can help prevent a ridge from catching at the needle.
A serger can trim and finish an edge in one pass. A 3- or 4-thread setup is suitable for fleece, with a 4-thread seam adding security and helping compact the fabric. If thick layers feed unevenly through the serger, sew a conventional-machine seam first. Since fleece generally doesn't ravel, a serged finish is optional. It's most useful when you want a compact edge on a garment or a clean finish on a project that will see frequent handling.
For a blanket, a turned hem or bound edge can give the perimeter a more finished look. For a jacket, trim or grade allowances where several layers meet so they don't form a bulky lump. Press with care: high heat can flatten or damage synthetic fleece, so test first and use minimal heat through a protective cloth. If you're making a cap from fleece, this guide to sewing a cap yourself offers useful context on working around curved pieces and managing layers.
Here's a video demonstration to watch after you've tried a scrap seam:
Three Fleece Projects to Practice These Skills
Start with the project that matches the kind of seam you want to practice. A blanket keeps the sewing line simple; clothing asks you to think about stretch; a hat gives you a small, curved project where bulk can show up quickly.
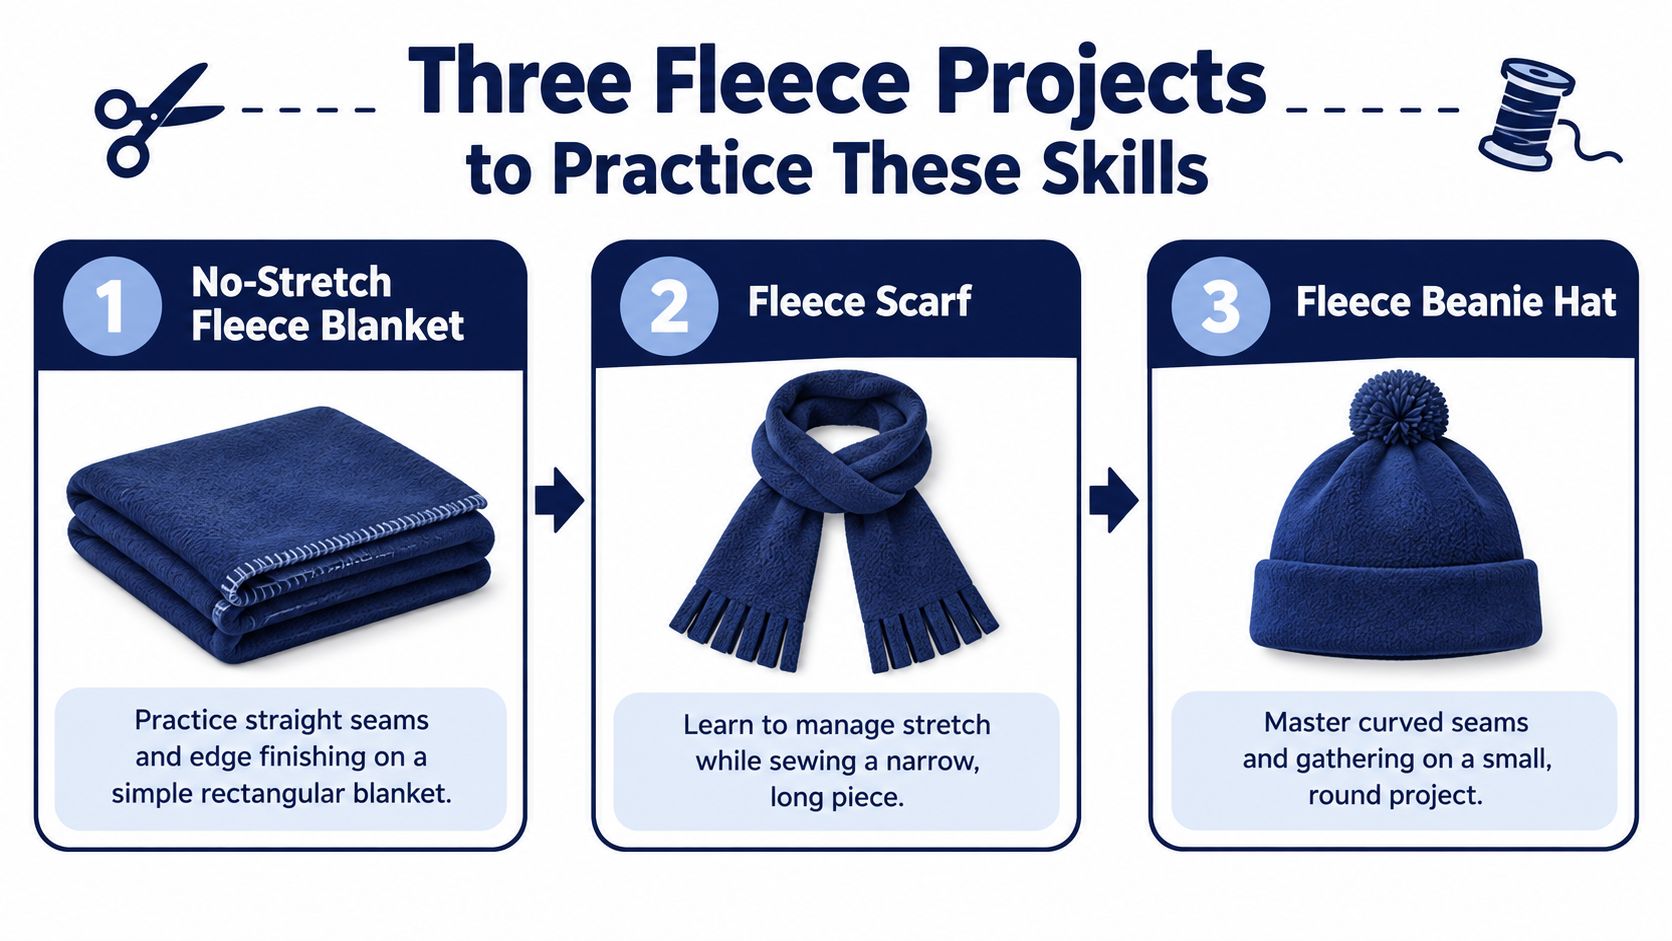
Fleece blanket
For a simple throw, use fleece, matching polyester thread, clips, and a machine needle suited to the fabric's weight. Sew a long straight stitch on a scrap first, then use that setting for the blanket's stable seams. You can leave the edge raw because fleece usually doesn't fray, or turn it under or add a binding for a more finished border. A fleece blanket kit can help you begin with project materials chosen to work together.
Pullover jacket or vest
A jacket or vest adds seams that need to move as you wear it. Use a narrow zigzag or stretch stitch on side seams and cuffs, and test the stitch by gently stretching the sample seam. Keep the nap consistent across the garment pieces, too. For a reference point on fleece jacket styling and construction, browse SwagglyLife's contrast fleece jacket.
Fleece hat
A hat is a useful way to practice curved seams and control a thicker stack in a small area. Gather fleece, matching thread, a weight-appropriate needle, and clips. Sew slowly around the curve, keeping the fabric flat rather than stretching it to fit. A lining adds another layer, so test how the full stack feeds before sewing the finished piece.
Choose the blanket if you want to build confidence with straightforward seams. Try the jacket when you're ready to test stretch stitches, and save the hat for practicing curved construction and careful layer handling.
Troubleshooting Puckering, Skipped Stitches, and Feeding Woes
As you sew a fleece throw, the seam may start to ripple even though the machine seems to be stitching normally. That usually points to feeding distortion, so watch how the fabric moves before changing settings. Fleece stretches like a knit, while its thick pile can drag or compress under the presser foot. Test a short seam on a scrap, changing one setting at a time.
If the fabric ripples, support its weight and check presser-foot pressure. Lower it if your machine allows, then test again. Let the fleece feed without pulling. A stitch that is too short can press the pile into a ridge and make unpicking harder; one that is too long may leave a loose seam that gaps when handled.
For skipped stitches, check the needle before adjusting tension. Make sure it is fresh, installed correctly, and suited to the fleece weight. If the fabric jams, stop and remove the work without yanking. Clear the area, spread the seam allowance flat, and test how the layers feed before continuing.
For a seam that needs to stretch, try a narrow zigzag, about 1 mm wide and 3 mm long, or a designated stretch stitch. A stable blanket seam is usually easier to control with a long straight stitch. If a seam looks wavy after sewing, stretch it gently flat. When the wave disappears, feeding may have stretched the fabric; if the pile looks crushed and the ripple stays, the surface may have been flattened. For another example of handling a soft, lofty fabric, see how to sew minky fabric.
Keep this troubleshooting list by your machine:
- Wavy seam: Reduce presser-foot pressure if possible and support the fabric instead of pulling it.
- Skipped stitches: Check the needle's type, size, and installation.
- Bulky feeding: Flatten or stagger seam allowances, and clip thick layers where needed.
- Seam that won't stretch: Test a narrow zigzag or stretch stitch.
- Flattened pile: Check whether the ripple remains after gently stretching the seam flat.
Save These Tips and Stock Up for Your Next Fleece Project
Fleece gets easier once you replace woven-cotton habits with knit-friendly handling. Before starting, use this quick checklist:
- Align the nap: Brush the pile, mark its direction, and keep pattern pieces consistent.
- Test on a scrap: Check the needle, thread tension, stitch length, and seam movement before construction.
- Match the needle to the weight: Choose a suitable ballpoint, stretch, or universal needle.
- Ease up on thick seams: Lower presser-foot pressure if available, and support the fabric rather than pulling it.
- Press gently: Use minimal heat through a protective cloth, and test first.
Our Springfield, Tennessee showroom is a place to compare midweight and heavyweight fleece by feel, ask sewing questions, and pick up supplies in person. If you're shopping online, look for fleece, polyester thread, needles, and the right tools for your machine. A walking foot or dual-feed system can be helpful on bulky projects, and the PFAFF sewing machine collection and SINGER sewing machines offer machine options to explore. You can also browse batting rolls for other sewing and quilting projects, along with 108-inch quilt backings.
When you're ready to make a throw, choose fabric that feels right for the project, cut with the nap aligned, and sew a test seam before committing. Shop our latest fleece fabric collection and join The Weekly Thread for sewing tips and 10% off your first order.
The Fabric Company offers fleece, sewing supplies, batting, and machine options for projects from a beginner throw to a lined hat. Visit The Fabric Company to shop online or stop by Our Springfield, Tennessee showroom to compare fleece and get help choosing supplies.