

You're standing in front of three sewing machines, holding a quilt pattern and wondering why one costs more than the others. The stitch-count display looks impressive, but it doesn't answer the useful questions: Can it sew an accurate quarter-inch seam? Can it handle a batting sandwich? Will you still enjoy using it after the first project?
TL;DR: Choose a beginner quilting sewing machine for the stage of quilting you'll do, not for decorative-stitch totals. For most new quilters, a reliable domestic machine with controllable speed, walking-foot compatibility, needle-up/needle-down, and enough table support is the right starting point.
What a Beginner Quilting Sewing Machine Has to Do
You finish a neat stack of quilt blocks, then discover that the true test begins when three layers reach the needle. A beginner quilting sewing machine must piece flat cotton with accurate quarter-inch seams, then handle the quilt top, batting, and backing as one bulky sandwich.
These stages place different demands on the machine. Piecing depends on steady fabric feeding and easy seam control. Quilting needs stable feeding, space around the needle, a suitable presser foot, and a work surface that prevents the quilt from dragging.
A domestic machine can finish a throw-sized quilt. Choose the quilting method first, prepare the sandwich carefully, and support the fabric so its weight does not pull against the needle. You do not need a longarm for your first year of projects.
Rank the machine by project stage
Decide what you will sew during your first twelve months, then judge machines against that work:
- Piecing small blocks: Choose a dependable quarter-inch foot, steady feeding, and simple stitch selection.
- Straight-line quilting: Require a compatible walking foot, needle-up/needle-down, and controlled speed.
- Free-motion quilting: Look for feed-dog drop or cover capability, adjustable speed, and useful presser-foot clearance.
- Larger quilt sandwiches: Favor more throat space, a wide extension table, and a stable machine bed.
This stage-based approach matters more than decorative-stitch totals. A machine with dozens of ornamental stitches still makes a poor first choice if it cannot feed blocks accurately or keep a quilt sandwich manageable.
The Fabric Company's Springfield, Tennessee showroom lets you sit at a machine, test the pedal, inspect the needle area, and check whether the controls make sense. Online dimensions can seem comfortable until a quilt gathers beneath the arm.
For a practical demonstration, follow this guide to how to quilt on a regular sewing machine. The right beginner machine lets you make the next quilt without fighting the equipment.
Five Features That Matter on a Beginner Quilting Sewing Machine
A beginner machine should earn its place at each project stage. Judge it first for accurate piecing, then for quilting the sandwich you will handle in months one through twelve. Decorative-stitch counts come last.
Throat space controls quilt handling
Domestic machines commonly offer roughly 6 to 7 inches from the needle to the machine body. That works for baby quilts and wall hangings, but larger quilts become harder to compress and reposition (independent comparison of affordable quilting machines). At least 8 inches gives bulky projects more breathing room, while an 8.7-inch throat can feel like a useful upgrade.
Throat space does not decide whether quilting is possible. It determines how often you must roll, bunch, and move the quilt beneath the arm. More room reduces handling frustration, but a supportive table and careful fabric control still matter.
Match feeding features to your method
For piecing, reliable feed dogs should move fabric evenly and keep narrow pieces aligned. For straight-line quilting, a walking foot helps synchronize the upper and lower layers, limiting movement across the sandwich.
Free-motion quilting requires feed dogs that can be lowered or covered, so your hands control the fabric path. A machine with both walking-foot compatibility and feed-dog control gives you room to progress from blocks to quilted sandwiches without replacing the machine too soon.
Controlled speed matters more than headline speed
Many domestic quilting machines reach roughly 750 to 1,000 stitches per minute, while about 850 stitches per minute paired with a speed slider or start/stop control suits a beginner's mix of careful seams and longer quilting lines (quilting machine speed comparison). Use a slower setting for corners and free-motion practice, then raise it when the fabric is stable.
A machine rated at 1,500 stitches per minute is fast, but that figure does not make it easier to use. A responsive foot pedal helps. A speed slider is better when you want a dependable maximum speed.
Choose stitch settings for piecing and quilting
Piecing and quilting call for different settings. For ordinary seams, begin around 2 to 2.5 for stitch length (sewing machine use guidance). Straight-stitch quilting often uses 6 to 10 stitches per inch, depending on the materials and the finish you want (machine quilting guidance).
Needle-up/needle-down earns its keep at corners. Leave the needle in the fabric, lift the presser foot, turn the quilt, and continue without shifting your position.
Presser-foot pressure helps at bulky seams
Adjustable presser-foot pressure matters when several seams meet. Reducing the pressure can help thick layers pass beneath the foot without excessive compression or dragging.
Shop-floor rule: If flat cotton feeds beautifully but bulky intersections stall, check foot pressure, presser-foot clearance, and fabric support before blaming your technique.
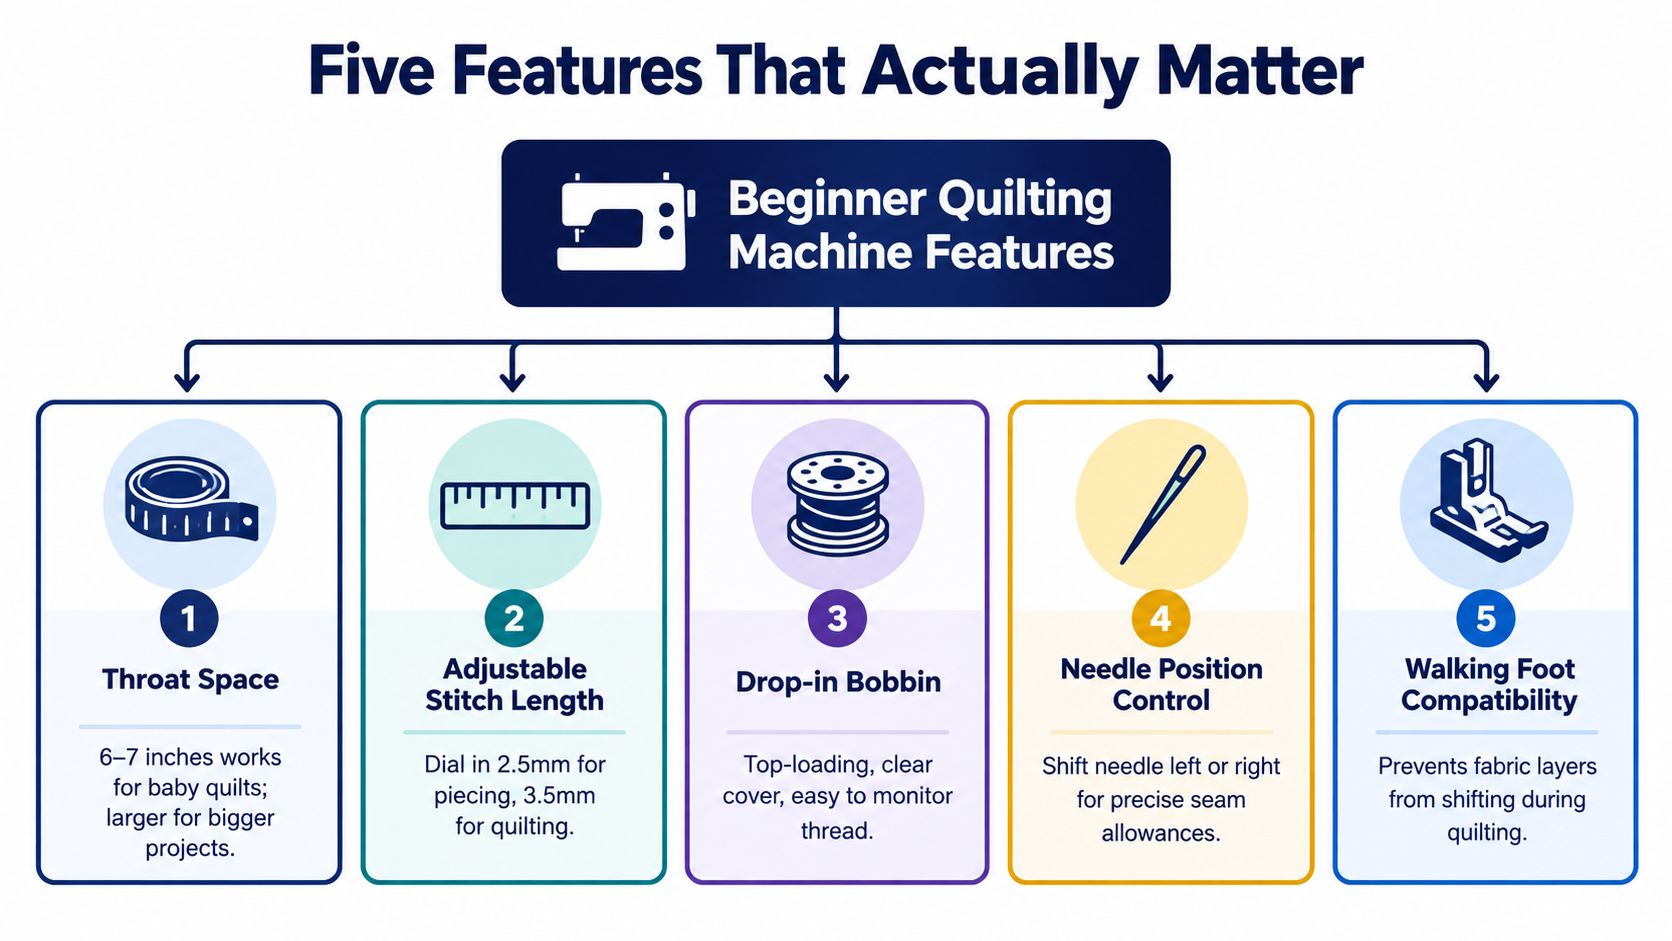
For straight-line quilting, follow this guide to using a walking foot for quilting. The accessory often matters more than a cabinet full of decorative stitches.
Side-by-Side Comparison of Beginner Quilting Machines
Don't treat beginner machines as a single ranking. They serve different quilters. A mechanical machine may be exactly right for someone who wants to piece and send large quilts to a longarmer, while a computerized step-up may suit someone who already expects to try free-motion quilting.
The categories below are representative buying profiles, not claims about one named model. Match the machine to the work you expect to do.
Category one for piecing-first beginners
This is the straightforward mechanical option. Expect about 6 to 7 inches of throat space, manual stitch selection, and compatibility with a walking foot. Feed-dog drop may be absent or handled with a cover, so check the exact machine rather than assuming.
Speed control usually comes from the foot pedal. That can work well for careful piecing, but it gives you less control when you move into free-motion work. Choose this category if your first quilts will use small blocks, precuts, and straight seams, and you don't expect to quilt large sandwiches yourself soon.
Category two for free-motion curious quilters
This computerized category adds a feed-dog drop, speed slider, and often a start/stop button. Throat space may remain in the domestic range, but the controls make practice less intimidating.
It's a sensible choice when you want to explore free-motion quilting without immediately paying for a larger machine. The trade-off is more electronic complexity and a higher purchase cost than a basic mechanical model.
Category three for the value step-up
The value step-up combines useful controls with a stronger quilting setup. Look for walking-foot compatibility, needle-up/needle-down, a speed limiter, and an extension table or a compatible table option.
This category is often the sweet spot for a quilter who plans to make several quilts and wants to grow beyond piecing. It still fits a home sewing space, yet it removes several frustrations that appear when a beginner starts quilting the sandwich.
Category four for larger-project planners
A wider-throat domestic machine is the right direction for someone already planning full-size quilts. More throat space and a generous work surface make the rolled quilt easier to manage, though they don't eliminate the need to reposition and support the bulk.
This is not automatically the best first purchase. If your immediate plan is a baby quilt and a few cushion covers, the extra size may sit unused.
Read the sewing machine buying guide before comparing individual models. It helps separate useful quilting functions from features that merely make a specification sheet look impressive.
Beginner Quilting Machine Categories at a Glance
| Category | Throat Space | Feed-Dog Drop | Speed Control | Best For |
|---|---|---|---|---|
| Piecing-first mechanical | About 6 to 7 inches | May be limited or use a cover | Foot pedal | Accurate piecing and outsourced quilting |
| Free-motion curious computerized | Domestic range | Usually included | Slider, foot pedal, or start/stop | Learning free-motion techniques |
| Value step-up | Moderate domestic space | Usually included | Slider and needle control | Piecing plus regular straight-line quilting |
| Larger-project step-up | At least 8 inches preferred | Included | Slider, pedal, and often start/stop | Quilters planning larger sandwiches |
Matching Your Machine to the Quilts You Want to Make
Quilt size changes the machine conversation, but it doesn't turn domestic sewing into industrial sewing. The key question is how much fabric must sit inside the throat and how well the table supports the project.
Baby quilt
A baby quilt around 36 by 52 inches is a friendly first project. The smallest domestic machine can piece the blocks, and a walking foot can handle straight-line quilting when the quilt is supported on the table.
Mandatory features are basic reliability, a quarter-inch foot, and a walking-foot option. A large throat, embroidery capability, and industrial speed are irrelevant at this stage. Needle-up/needle-down is convenient, but you can finish the quilt without it.
Throw quilt
A throw around 60 by 72 inches begins to tax a machine with a small throat, especially when the quilt is rolled for quilting. An extension table becomes far more valuable because it reduces drag and keeps the sandwich flatter near the needle.
The machine doesn't need to be industrial. It needs stable feeding, controlled speed, a walking foot, and enough table support to prevent the quilt from pulling sideways. A domestic machine can finish this scale, but the operator must manage the bulk deliberately.
Bed quilt
A bed quilt measuring 80 inches or more square places greater demands on throat space and work area. Aim for at least 8 inches between the needle and body when possible, and prioritize a generous extension table over extra decorative stitches.
You can still use a domestic machine, but the project requires more rolling, repositioning, and patience. If you plan to make bed quilts repeatedly, the wider-throat category makes more sense than buying a compact machine and hoping you'll never notice the limitation.
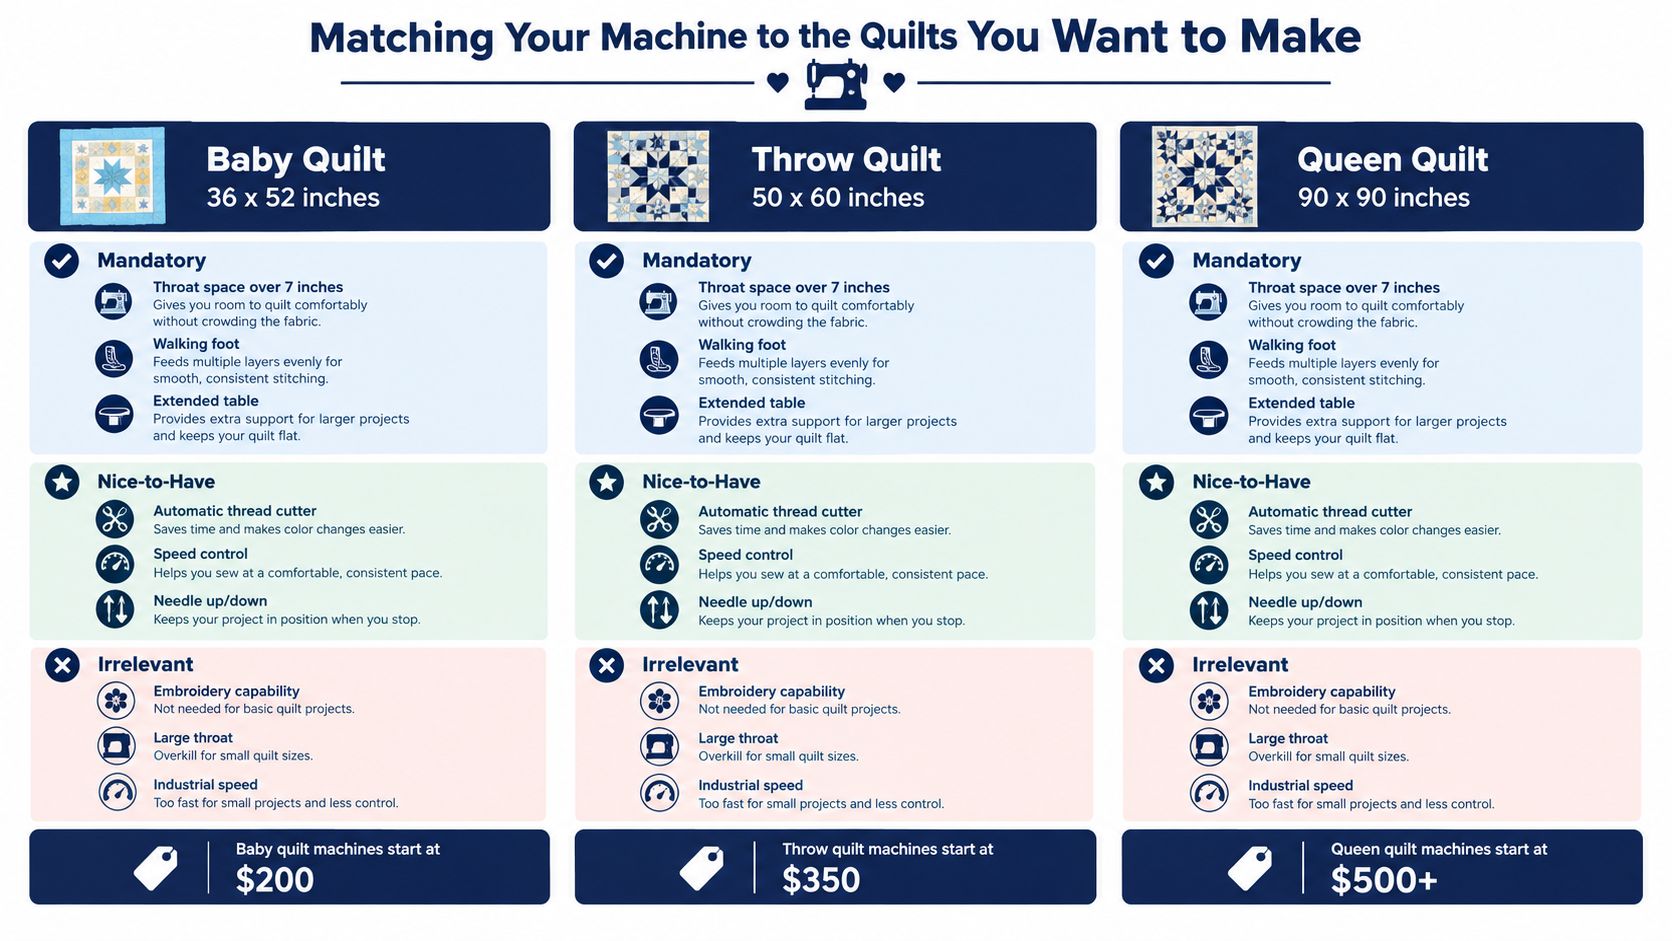
The important distinction is between capacity and capability. A compact machine may have the capability to quilt a larger project, while a wider machine gives you more capacity to manage it comfortably. Choose based on the projects you'll finish, not the largest quilt you might make someday.
Budget Versus Upgrade Pick for a First Machine
Price matters, but the useful question is what each budget makes possible. A cheap machine that can't accept the foot or controls you need may cost more in frustration than a slightly better starting point.
Under $250
This band generally favors mechanical machines with manual stitch selection. They're suitable for piecing-first beginners who want to sew blocks and may send larger quilts out for finishing.
Spend your attention on:
- Quarter-inch compatibility: Confirm that the machine accepts a suitable piecing foot.
- Walking-foot support: Check that the correct foot is available for that model.
- Stable feeding: Sew several layers before committing.
- Service access: A machine that can be maintained locally is easier to live with.
$250 to $600
This range commonly adds a speed slider, more stitch options, and often built-in needle-up/needle-down positioning. Those features matter when you move from flat piecing to a quilt sandwich.
I usually steer a beginner who wants one machine for several stages here. You get more control without necessarily moving into a large studio machine.
$600 to $1,000
This band brings computerized controls, more throat space in some models, and construction that can support years of quilting. It makes sense for a quilter who already knows larger projects are part of the plan.
It doesn't make learning automatic. You still need to practice tension, fabric handling, thread choice, and basting. You're buying a broader runway, not a shortcut.
Our Springfield, Tennessee showroom lets local shoppers test adjacent price tiers with the same fabric layers. That hands-on comparison often tells you more than a specification page. You can feel the pedal, check whether the controls are readable, and see how much room a rolled quilt really has.
Use beginner sewing machine kits as a starting point for thinking about the machine, feet, needles, and supplies that belong together. If your budget is tight, buy the machine that performs your immediate work reliably and add accessories as your skills develop.
Your First Thirty Days With a New Quilting Machine
The first month tells you whether the machine earns a permanent place on your table or ends up pushed aside. Start with plain sewing, not a fancy block. Learn how the machine behaves under your hands.
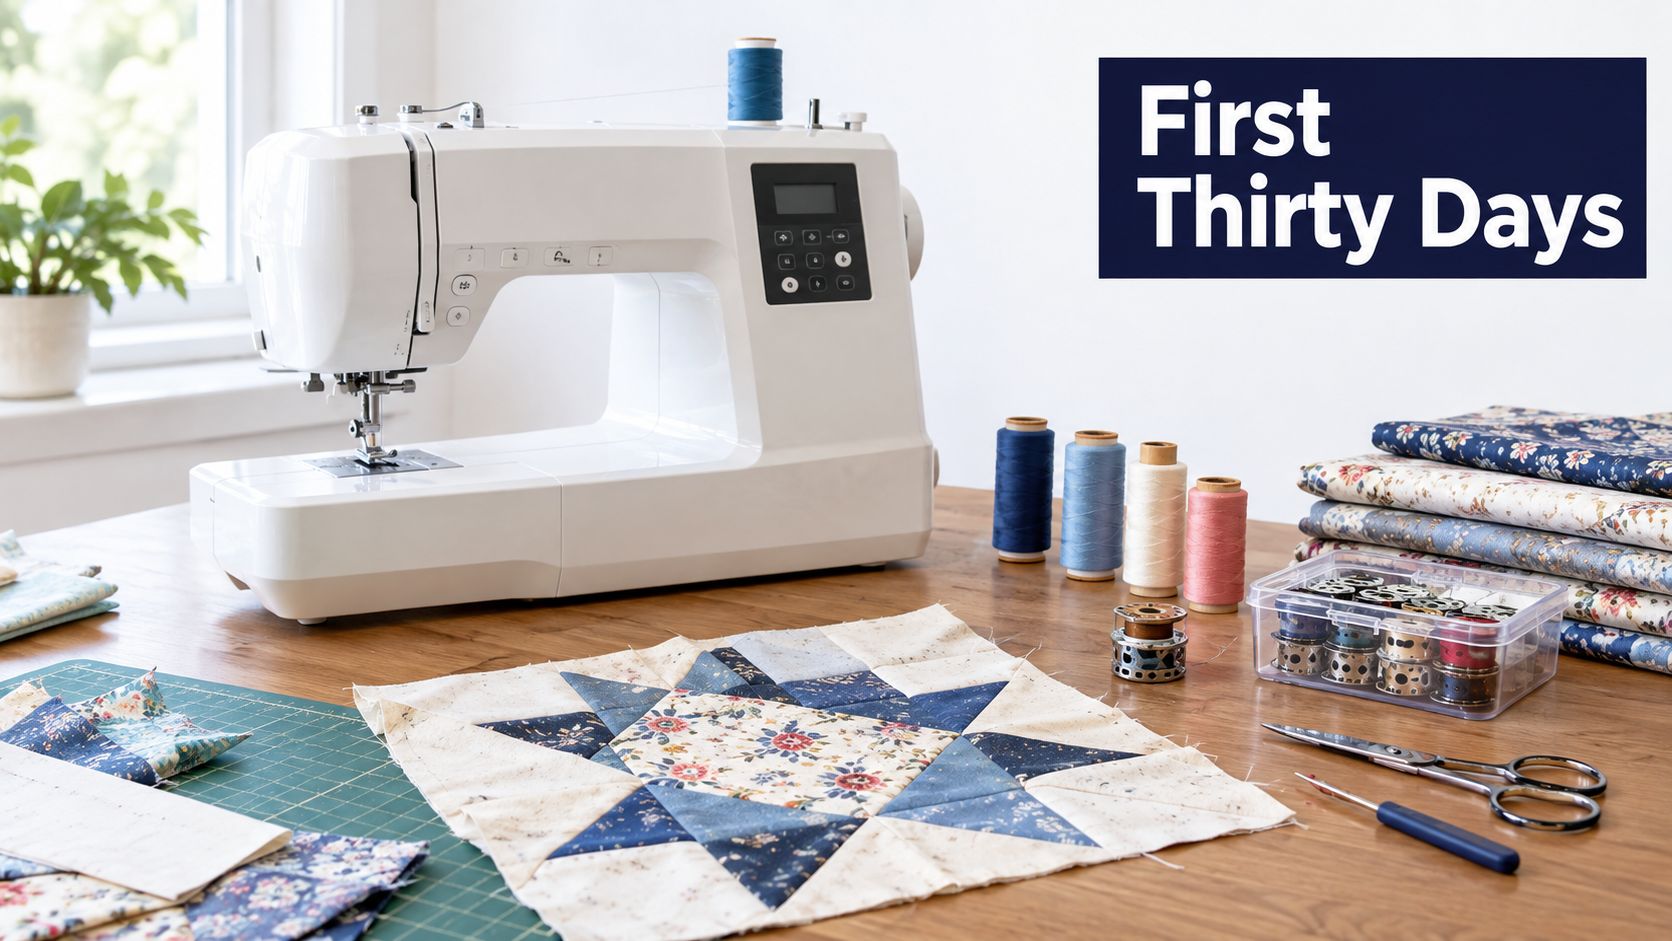
Days one through seven
Thread the machine slowly, wind the bobbin, and put in a quilting needle that matches your fabric. Start piecing at a stitch length around 2 to 2.5, then sew scrap cotton until the seam line looks even and your seam allowance stays steady.
Make muslin squares and join them with a quarter-inch foot. Do not chase a finished quilt yet. Learn how the fabric feeds, how the tension feels, and how lightly you need to guide the seam.
Your first accessories should be:
- Walking foot: Keeps quilt layers moving together.
- Quarter-inch piecing foot: Helps you build repeatable blocks.
- Rotary cutting setup: A cutter, ruler, and mat that give you accurate pieces.
For the rest of the basic kit, use quilting supplies for beginners as a checklist. Buy specialty feet later, after a project gives you a reason.
Days eight through thirty
Build a small quilt sandwich with your top, loft, batting, and backing. Put on the walking foot and quilt straight lines first. Keep the area near the needle flat and supported, and fold or roll the rest so it does not drag.
Start your lines cleanly. Take one stitch, raise the needle and presser foot, bring the bobbin thread up to the surface, then sew two forward stitches and two reverse stitches to lock the start. That habit keeps loose thread ends from creeping out later.
Use your local shop for troubleshooting. If a stitch skips, the problem usually shows up in the needle, the thread, the threading path, or the machine's limits. In-person help catches that faster than guessing at home, and it saves beginners from wasting fabric on the same mistake twice.
Watch this visual demonstration after you've practiced the basics:
Picking the Right Beginner Quilting Sewing Machine for You
The best choice depends on what you want to sew first, and what you expect to sew next.
If you're piecing first
Choose a reliable mechanical machine with a strong walking-foot option and a quarter-inch foot. This is the sensible pick for someone making patchwork blocks, Charm Packs, Layer Cakes, Jelly Rolls, or 2.5-inch strips, especially if larger quilts will go to a longarm quilter.
Don't pay for embroidery functions you won't use. Put that money toward accurate cutting tools, quality thread, and fabric that makes you want to return to the machine.
If you're curious about free-motion quilting
Choose the computerized step-up with feed-dog drop, a speed slider, and start/stop control. Free-motion stitch length comes from coordinating machine speed with how quickly you move the quilt, not from the ordinary stitch-length dial (beginner free-motion quilting guidance).
This category gives you a safer learning curve. You can slow the machine, practice curves on scraps, and develop hand control before committing to a finished quilt.
If you're buying a gift or planning larger projects
Choose the wider-throat step-up and add a wide extension table from day one. That combination gives a new quilter room to grow into throws and bed quilts instead of replacing the machine as soon as the first large project appears.
The Fabric Company carries quilting fabrics, 108-inch quilt backings, batting, precuts, and sewing machines from brands such as SINGER and PFAFF, so you can assemble the machine and project supplies in one place. Our Springfield, Tennessee showroom is the right place to test the feel of the machine before deciding, and The Weekly Thread can keep your learning moving after the first month.
For visual assets, use descriptive filenames and alt text, such as beginner-quilting-machine-walking-foot.jpg with alt text describing the visible foot and fabric layers. Google recommends specific image metadata because useful alt text supports image understanding and accessibility (Google Images documentation).
Visit The Fabric Company to compare beginner-friendly machines, batting, 108-inch backings, and project-ready precuts for your first quilt. Shop our latest quilting fabric collection here, and join The Weekly Thread for more tips and 10% off your first order.