

You're halfway through a project, your fabric is lined up, and the pin cushion is right there. Then one wrong pin bends, snags, or leaves a little trail of holes where you didn't want any. That's usually the moment sewists realize pins aren't interchangeable.
TL;DR: The right pin depends on fabric behavior, layer count, and how you plan to sew. If you learn to match pin thickness, length, and point style to the job, your seams stay straighter, your fabric stays calmer, and your project goes together with a lot less fuss.
Why Your Pin Choice Matters More Than You Think
A quilt top is spread out, batting underneath, backing smoothed across the table. You reach for a slim dressmaker pin because it's handy, push it through all those layers, and the shaft bends before you finish the pass. That little failure tells you something useful. A pin isn't just holding fabric still. It's interacting with loft, weave, drag, and pressure.
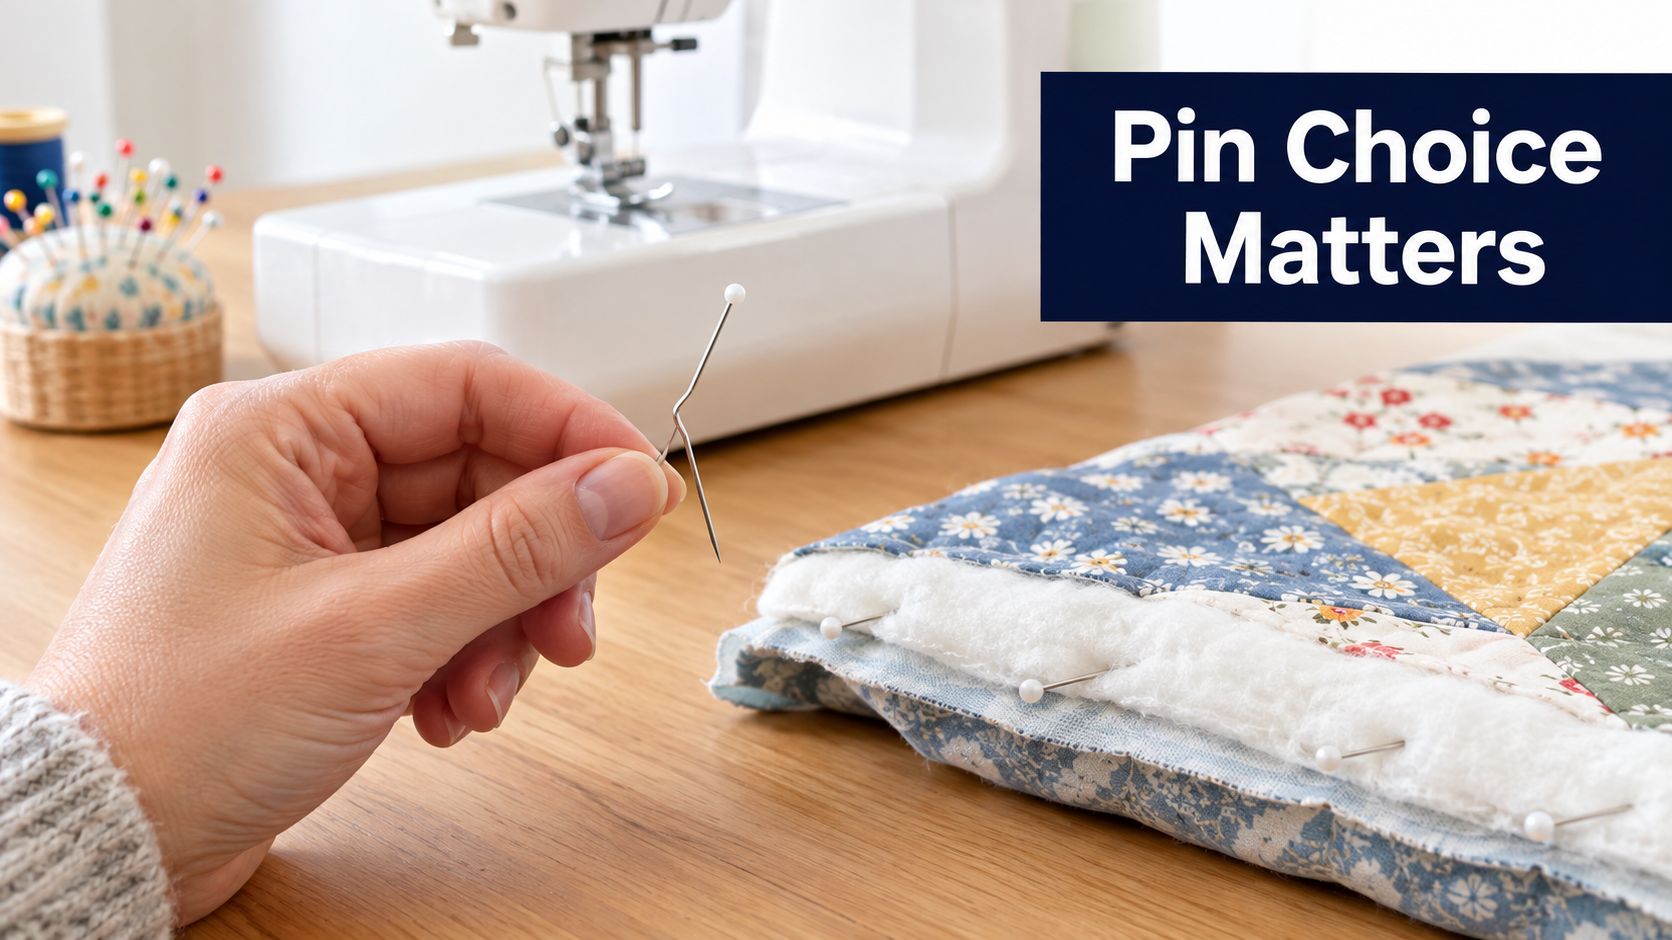
Pins affect the result long before stitching starts. A pin that's too thick can leave visible holes in a fine woven. A pin that's too short may not hold a quilt sandwich securely. A sharp pin used on a stretchy knit can catch fibers instead of sliding between them. If your fabric pills easily, surface damage and friction matter too, which is one reason fabric handling habits count alongside pin choice. The same care mindset shows up in guides on how to prevent pilling.
What the wrong pin looks like in real life
Beginners often buy one box of pins and use it for everything. Experienced sewists usually don't. They start noticing patterns:
- Delicate fabric: fine pins still may leave tiny holes, especially if the fabric shows every mark.
- Layered quilts: short or thin pins can slip, bend, or fail to keep the grid square.
- Knits: the wrong point can distort the fabric instead of holding it neatly.
- Fast workflows: head shape matters when you need to grab and remove pins quickly.
Practical rule: If the fabric shifts, dimples, snags, or keeps the memory of the pin after removal, the pin is wrong for that job.
Four questions solve most pin problems
When sewists say they need help with pin needles for sewing, they're usually asking one of four things:
- Which pin works with this fabric?
- Should I pin this, or would thread basting behave better?
- Is sewing over pins ever worth the risk?
- What do the size, length, and packaging terms mean?
Those questions matter whether you're piecing a baby quilt, sewing a linen dress, or easing a knit neckband. In Our Springfield, Tennessee showroom, these are the exact conversations that help people stop buying random pin packs and start choosing with confidence.
Pin Needles Versus Sewing Needles
Pins and needles sit in the same notions drawer, but they do different jobs. A pin holds fabric temporarily. A sewing needle makes the stitch, either by hand or in a machine. They may look similar at a glance, but they're not sized the same way and they're not meant to solve the same problem.
A quick visual rule helps: if it has a head and no eye, it's a pin. If it has an eye and no head, it's a needle.
The easiest way to tell them apart
Pin sizes are often discussed by thickness and length together, and straight pins themselves come in several lengths. The Sewing and Craft Alliance notes that straight pins are sold in lengths from 1/2 inch to 2 1/8 inches, and in one standard system the size number corresponds to length in 1/16-inch increments, so a size 20 pin is 1 1/4 inches long in that system (Sewing and Craft Alliance pin guidelines).
Sewing machine needles use a different logic entirely. In the European NM system, the number equals 100 times the blade diameter in millimeters, so an NM 90 needle is 0.90 mm and an NM 110 needle is 1.10 mm (Schmetz needle reference). That's why pin numbers and machine needle numbers should never be compared directly. If you want a fuller guide to machine choices, this overview of different types of needles for sewing is a useful companion.
| Feature | Pin Needles | Sewing Needles |
|---|---|---|
| Main job | Hold fabric temporarily | Pierce fabric for stitching |
| Key parts | Shaft, point, head | Shank, shaft, eye, point |
| Stays in project? | Only during setup or basting | Used while stitching |
| Sizing logic | Often described by length and thickness | Machine needle sizing follows systems like NM |
| Common confusion | People treat all pins as interchangeable | People assume pin size matches needle size |
Why the mix-up happens
Both tools are small, metallic, and stored near thread. That's enough to confuse a beginner at the notions counter. The fix is simple: ask what problem you're solving.
- Need to hold layers together before stitching? You need a pin.
- Need cleaner stitches through a certain fabric? You need the right sewing needle.
- Need both? Most projects do.
A pin controls alignment. A sewing needle controls penetration and stitch formation.
The Three Main Families of Sewing Pins
Shopping for pins gets easier when you stop thinking in brand names first and start thinking in families. Most sewing pins fall into three broad groups: straight pins, specialty pins, and safety or basting pins. Once you know which family solves the problem, the little differences inside that family make a lot more sense.
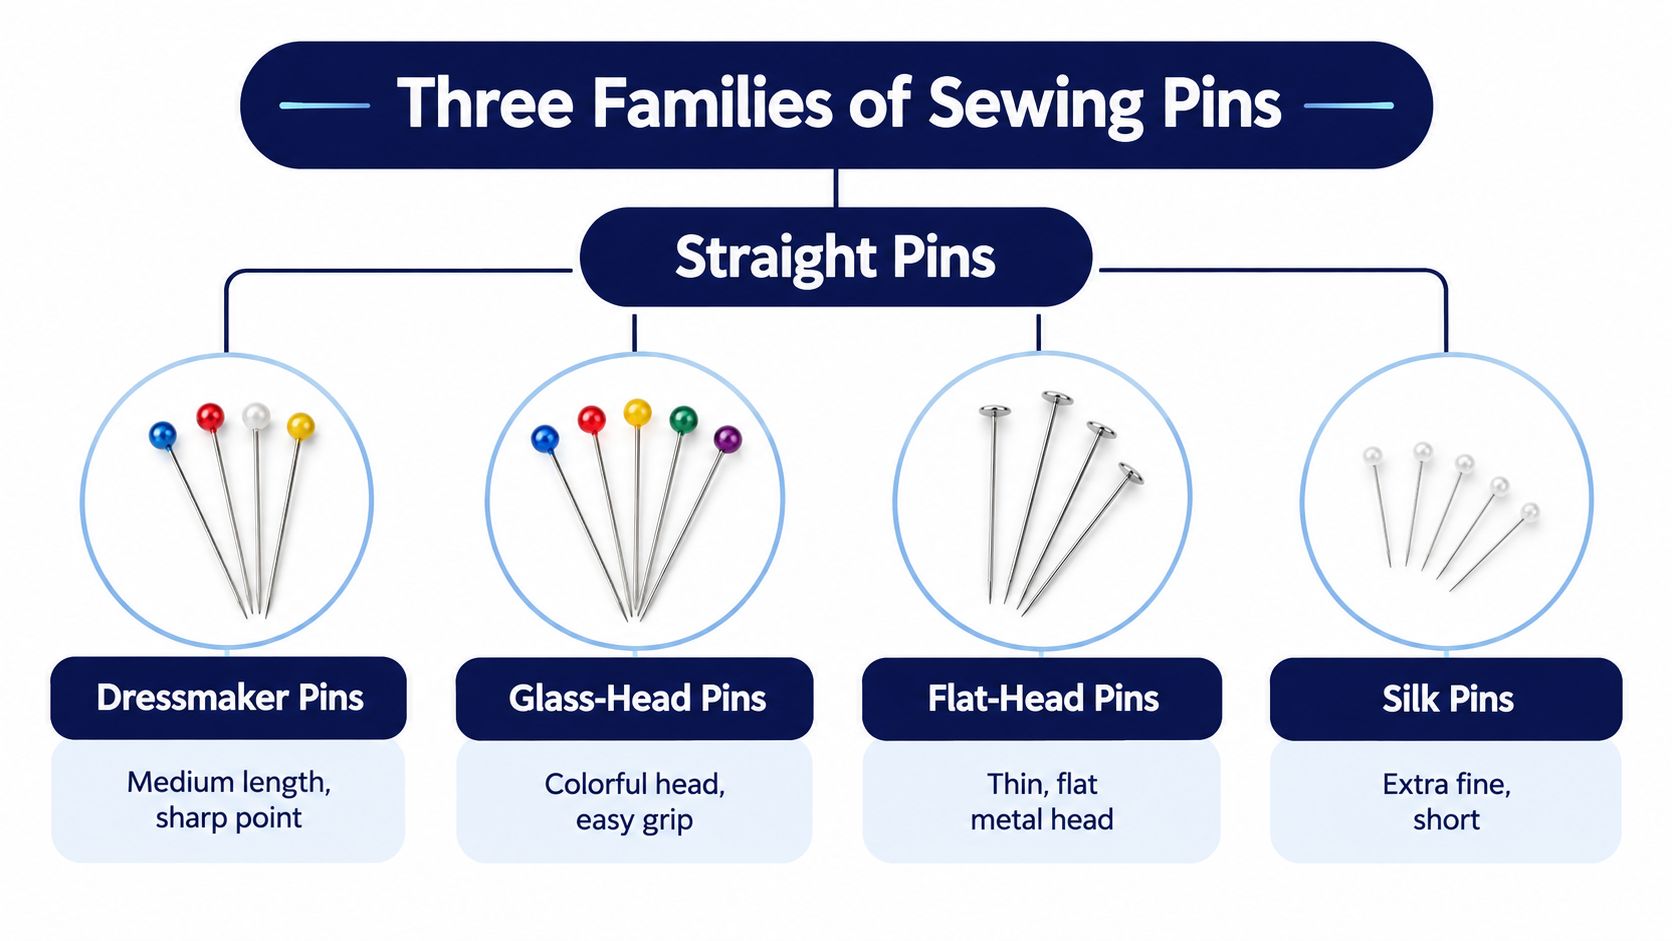
Straight pins for everyday sewing
This is the group that comes to mind first. Straight pins are your general holding tools for piecing, garment seams, hems, and layout work.
A few common types show up again and again:
- Dressmaker pins: good general-purpose pins for everyday woven fabrics.
- Glass-head pins: easier to see and usually a smart choice when pressing is part of the workflow.
- Flat-head pins: handy when the head needs to stay low and visible on the work surface.
- Silk pins: finer pins for fabrics that mark easily or don't like extra bulk.
The American Sewing Guild describes universal or dressmaker pins as usually 1 to 1 1/2 inches long for most fabrics and thicknesses, while quilting pins are longer at about 1 1/2 to 2 inches to manage multiple layers plus batting (American Sewing Guild sewing basics on pins).
If you do a lot of machine piecing and want a low-profile option for intersections, you can browse flat head pins to compare that style with round-head options.
Specialty pins for difficult fabric behavior
Specialty pins earn their place when fabric starts acting fussy.
Ballpoint pins are useful on knits because a rounded point moves between loops more gently than a sharp point. Appliqué pins are smaller and less intrusive when you're steering tight curves. T-pins hold heavier layers, stabilizer, or display work where a standard straight pin feels flimsy.
Point style matters just as much as thickness. Groz-Beckert notes that point geometry changes fabric damage and stitch quality. Round or cloth points are recommended for woven, knitted, or felted textiles because they displace yarns rather than cutting them, which helps reduce skipped stitches, yarn breakage, and enlarged holes in the finished seam (Groz-Beckert point geometry guide).
Safety pins and basting pins for thick layers
These don't get enough respect. They're practical, sturdy, and often the better answer for bulky work.
Use this family when you need to secure:
- Quilt sandwiches
- Fleece or lofty batting
- Bag panels
- Elastic channels or tube turning tasks
Curved basting pins can glide through layered quilts more comfortably than a straight shaft. Safety pins also stay put when a project has to be moved, folded, or stored between sewing sessions.
Good pins don't just hold fabric. They match the way that fabric resists, stretches, compresses, or shifts.
Sizes, Gauges, and Point Geometry Explained
Once you know the pin family, the next choice is size. Many sewists get stuck, because packaging may mention length, size number, or gauge without much explanation. The cleanest way to think about it is this: length controls reach, gauge controls hole size and stiffness, and point style controls how the pin enters the fabric.
Length solves layer depth
Short pins shine in detailed work. Long pins shine in thick work.
If you're folding a small appliqué edge or pinning a curved facing, a shorter pin stays out of your way. If you're holding quilt top, batting, and backing together, a longer shaft gives you enough span to enter and exit cleanly without bunching the layers.
The common range of straight pins includes very short options and much longer ones, and the right choice depends on how much fabric the pin must cross. For seam matching in quilting cotton, many sewists prefer a pin long enough to pass through both seam allowances without forcing the fabric into a hump.
Gauge affects marks and stability
Gauge is the pin's thickness. Thinner pins make smaller holes, but they also bend more easily. Thicker pins stand up to pressure better, but they can mark delicate cloth.
That trade-off matters more than most charts admit. One recent sewing guide points out that even silk pins can leave tiny holes in delicate silk habotai, especially if the fabric is sensitive, and suggests shallow insertion and quick removal rather than assuming any pin is universally safe (HandmadeLytics guide to sewing pin types).
| Fabric Type | Recommended Length | Suggested Gauge | Point Style |
|---|---|---|---|
| Lightweight silk or rayon | Short to medium | Fine | Sharp, very fine point |
| Quilting cotton | Medium | Medium-fine | Sharp or extra-sharp |
| Heavy denim or canvas | Medium to long | Sturdier | Sharp |
| Knit jersey | Medium to long | Medium | Ballpoint |
| Quilt sandwich with loft | Long | Sturdier | Sharp or curved basting style |
Point style changes the fabric response
A woven cotton usually tolerates a sharp point well. A knit often behaves better with a ballpoint style. Precision patchwork may benefit from a very sharp point that lands exactly where you place it.
This same logic is why thread and machine needle choices have to work together too. If you're balancing penetration, fabric weight, and stitch quality, a thread weight chart helps you pair the whole setup instead of treating pins as a separate afterthought.
Mental shortcut: The lighter and more delicate the fabric, the finer the pin. The thicker or loftier the project, the longer and sturdier the pin.
Matching Pins to Quilting, Garments, and Knits
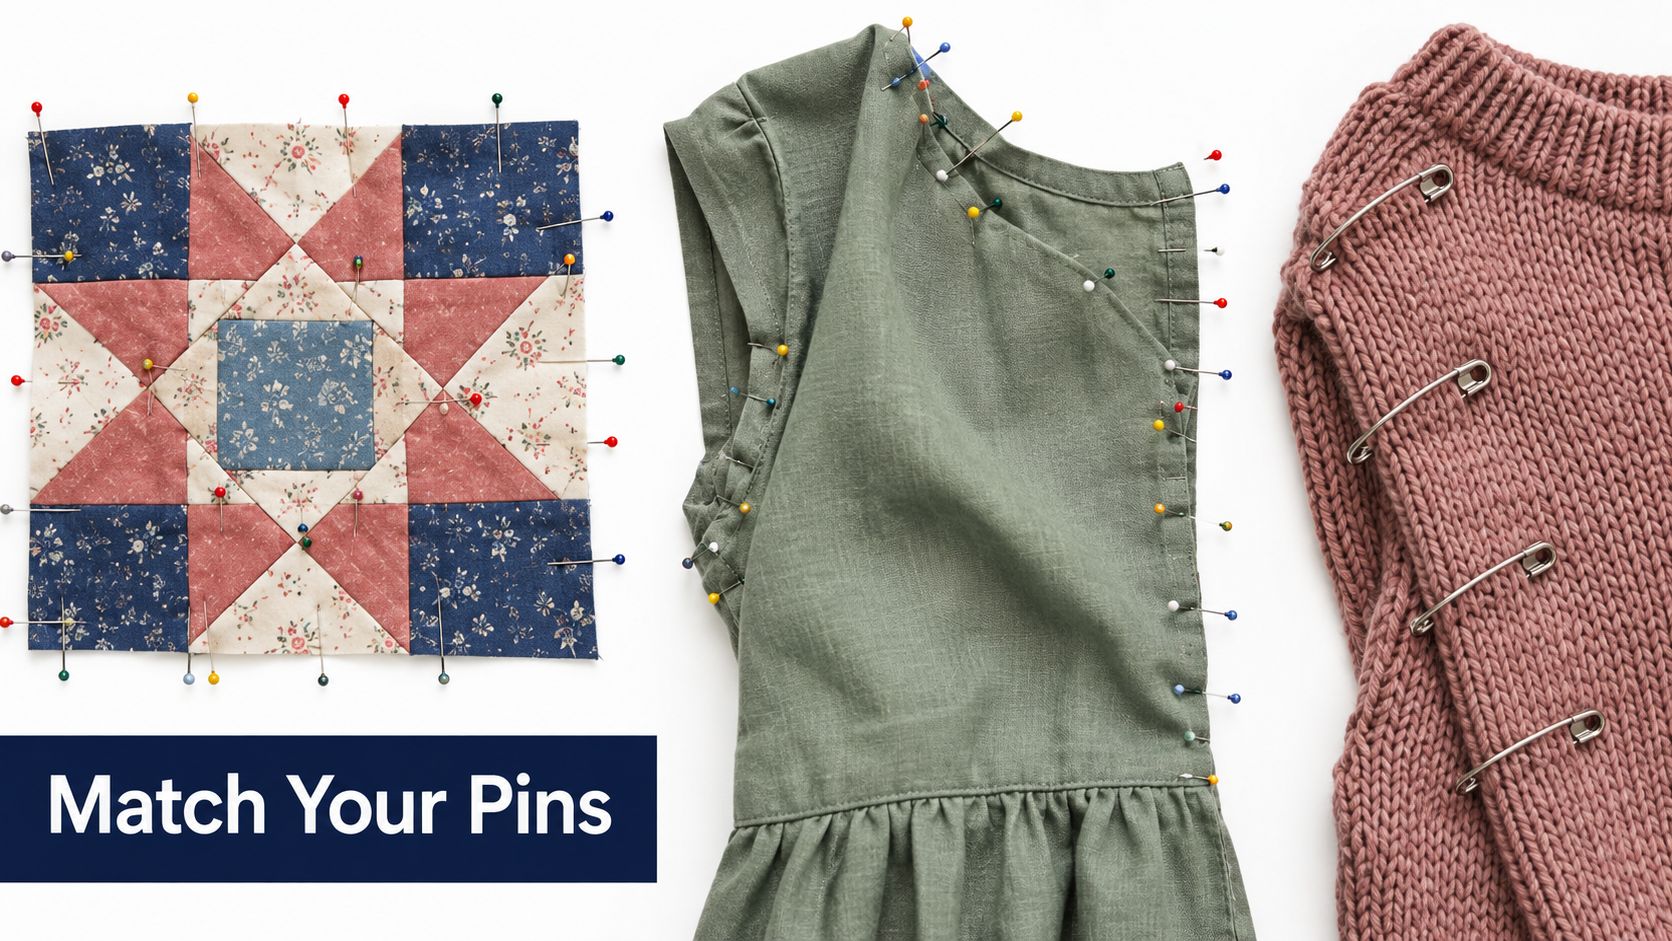
Different projects ask different things from your pins. A patchwork seam wants precision. A dress side seam wants hold without visible marking. A knit hem wants support without distortion. Pin needles for sewing stop being a supply list item and start becoming part of your workflow.
Quilting asks for more than one pin type
A quilt rarely uses one pin from start to finish. During piecing, many quilters like a fine, sharp pin that can anchor seam intersections without spreading the weave. During basting, the needs change completely. Now the pin must cross three layers and cope with loft.
For the sandwich stage, many sewists switch to curved basting pins or longer quilting pins. The goal isn't delicacy then. It's secure hold and even spacing across the surface. If you're building that layered setup, this guide on how to make a quilt sandwich shows how the pinning stage fits into the whole prep process.
A practical way to gather supplies in one order is to pair your pins with project materials such as Batting, 108-inch quilt backings, and Fat Quarters when you know the project is moving from piecing into basting.
Garment sewing on wovens rewards fine control
A woven blouse and a linen apron often need a different rhythm than quilting. You may pin inside seam allowances, remove pins quickly at the machine, and press often between steps.
For these jobs, many sewists prefer:
- Fine sharp pins for collar points, darts, and side seams
- Glass-head pins when pressing follows immediately
- Shorter pins in curved areas where long shafts get awkward
If you're cutting apparel from quilting cottons, fabric behavior matters more than the category name on the bolt. Crisp cotton can tolerate one type of pin very well, while a fluid rayon blend may show every poke.
Later in the project, a short demo can help you check your handling against another sewer's motion and spacing:
Knits need gentler entry
Knits don't just need holding power. They need a pin that won't stretch them out while you work. Ballpoint pins are often the safer starting place because they move between loops more smoothly than a sharp point.
If the knit is slippery, pin direction matters too. Insert pins so they stabilize the edge instead of dragging it longer. And if the fabric still ripples under the pin, clips or thread basting may outperform any pin.
Some projects improve the moment you stop asking one pin to do every job.
For modern garment makers shopping for Precuts, Jelly Rolls, or Layer Cakes, this is especially useful. A pieced patchwork garment, for example, may need fine pins for construction and sturdier options for final fitting or layered sections.
Handling, Storage, and Smart Basting Habits
Pins wear out slowly, then all at once. A tip gets dull, a shaft picks up a slight bend, or a rough spot starts catching fibers. Most of that damage doesn't happen while pins rest in the cushion. It happens when they're dropped, forced through too many layers, or left in places where heat and pressure work against them.
Storage habits that keep pins usable
A magnetic dish makes cleanup fast. A tomato pincushion or another soft cushion keeps points from knocking into each other. If your cushion includes emery, many sewists like to use it to clean and refresh the surface of the metal.
Simple habits help more than fancy storage:
- Return pins after each step: fewer lost pins, fewer bent ones underfoot.
- Retire rough pins fast: one damaged pin can snag fabric repeatedly.
- Sort by use: quilting, delicate fabrics, and knits shouldn't all live in one mixed-up pile.
If you're setting up a better work area, a magnetic pin cushion can make a noticeable difference in speed and cleanup.
Pressing and removal take more care than people think
Removing pins before pressing is often the safer move, especially if the pin head isn't meant for heat. Even when the head can tolerate heat, the pin itself can create ridges or impressions in the fabric. For narrow seam allowances and fabrics that mark easily, thread basting may be cleaner.
Pull pins out perpendicular to the fabric when possible instead of dragging them along the seam line. That reduces distortion and protects your fingers from the little jab that happens when a pin lets go unexpectedly.
Thread basting is often the better answer when accuracy matters more than speed, especially on stripes, checks, slippery layers, and fabrics that remember every pin mark.
The honest answer on sewing over pins
Many sewing teachers say “never,” and that's understandable. A machine needle can hit a pin, break, deflect, or damage the fabric. At the same time, some sewing guides acknowledge a more conditional reality. One source notes that a machine can technically sew over pins, while other guidance stresses the risk of breakage, damage, and flying fragments. It also notes a broader projection for the sewing supplies market, citing USD 5,450 million in 2025 and USD 7,303.52 million by 2031 as a projection for continued demand for practical guidance (SewingWorker discussion of quilting pins and workflow).
The practical studio rule is simpler than the debate. Remove pins a few inches before the presser foot unless you have a very specific reason not to, and you're willing to accept the risk. Speed isn't worth a broken needle near your face.
Buying the Right Pins for Your Next Project
Buying pins gets much easier when you shop by project pattern, not by whichever package is closest to the checkout. Most sewists fall into a few familiar groups, and each group benefits from a different starting mix.
In Our Springfield, Tennessee showroom, people usually relax. Once they realize they don't need every pin on the wall, the choices get clearer.
A simple buying framework
If your sewing rotates between quilts, mending, kids' clothes, and occasional gifts, a mixed pin kit makes sense. If you mostly sew one type of fabric, build around that.
Here's a practical comparison:
| Customer Segment | Best Pin Type | Gauge/Length | Suggested Quantity | Pair With |
|---|---|---|---|---|
| Stash builders | Mixed assortment of sharp, quilting, and ballpoint pins | Medium mix of lengths | One starter tin plus refills | Fabric by the yard |
| Precut enthusiasts | Fine pins for accurate piecing | Short to medium, fine | Extra refill pack | Charm Packs, Jelly Rolls, Layer Cakes |
| Beginners | Glass-head pins for visibility and pressing workflow | Medium length, easy-to-handle shaft | One visible everyday box | SINGER sewing machines, Scissors and rotary cutters |
| Longarmers and studio owners | Quilting pins, curved basting pins, clips | Longer, sturdier options | Bulk packs | Batting rolls, 108-inch quilt backings, Thread |
What to buy if you sew more than one kind of project
A well-rounded notions drawer usually includes:
- Fine sharp pins for piecing and lightweight wovens
- Ballpoint pins for knits
- Longer quilting or basting pins for loft and layered work
- A few clips for edges where pin holes or drag are a problem
The Fabric Company carries categories that fit naturally with this approach, including PFAFF sewing machines, Precuts, Hobbs batting, and Robert Kaufman fabrics, which makes it possible to build a project around fabric behavior instead of treating pins as an afterthought.
The shortest decision rule
Choose the finest pin that still holds the layers securely. If the fabric stretches, catches, or keeps the hole, go finer, change the point style, or switch to thread basting. If the pin bends or the layers shift, go longer or sturdier.
Our Springfield, Tennessee showroom is especially helpful for this kind of side-by-side comparison, because quilts, garment cottons, batting, and notions all create different pin needs in real hands, not just on the label.
If you're ready to match the right pins with the rest of your project supplies, visit The Fabric Company for quilting cottons, precuts, batting, backings, thread, and sewing tools that work together. Shop our latest notions and project-ready categories while you plan, and join The Weekly Thread for more tips and 10% off your first order.