

Cut 2.25-inch strips for a thin quilt sandwich and 2.5-inch strips when the batting is thicker. Use the full lookup table below to choose a starting width, then check it against a scrap made from your actual quilt layers.
Your quilt is trimmed, the binding fabric is pressed, and you're ready to finish. Before you cut the whole run, check the edge rather than the quilt's overall size. The binding has to fit the sandwich, not the bed.
Binding Strip Widths for Thin, Average and Thick Quilts
For standard double-fold binding, Utah State University Extension specifies 2.25-inch strips for thin batting and recommends 2.5-inch strips for thicker batting, attached with a wide 0.25-inch seam. Those are starting points, not a reason to ignore what happens when you fold the binding around your quilt.
The strip must cover the attachment seam, travel over the raw edge, and leave enough folded fabric to secure the reverse neatly. If you have to pull hard to make it reach, the fit isn't right. If the fold hangs loosely beyond the stitching, you may have more width than you need.
Double-fold strip widths by quilt sandwich
| Quilt sandwich | Typical batting | Strip width to cut | When to test first |
|---|---|---|---|
| Thin sandwich | Lightweight cotton or thin polyester | 2.25 inches | Rarely necessary with a flat top and light batting, though a sample still helps |
| Average sandwich | Standard cotton or 80/20 cotton-poly blend | 2.25 to 2.5 inches | When heavy quilting or a puffy edge changes the wrap |
| Thick sandwich | High-loft cotton such as Warm & Plush Luxury Loft | 2.5 inches | Always, because the edge needs extra wrap |
| Minky or fleece top | Minky front over thick or needle-punched batting | 2.5 inches to start | Always, because stretch and loft change the wrap |
Treat the table as a cutting recommendation to test, not a guarantee of finished width. Cotton batting names alone don't tell you how bulky the finished edge will be. Warm & White and Warm & Natural cotton battings still need to be judged with the top, backing, and quilting included.
Our guide to choosing quilt batting can help you sort out loft and fiber before you build the sample. Check the actual edge after quilting, especially where seams or dense piecing meet the binding.
Practical rule: A large throw with thin batting can take a narrow binding, while a small wall hanging with lofty batting may need a wider cut.
Don't confuse cut strip width with finished binding width. Folding, seam allowance, and the depth of the quilt edge all use part of the strip. That's why a wider cut doesn't automatically produce a better-looking finish.
What You'll Need Before You Measure and Cut
Gather the tools before you clear the cutting table. A slipping ruler or dull blade can leave you with uneven strips even when you've chosen the right width.
- Measuring tools: A flexible tape for the perimeter and a 24-by-6-inch acrylic ruler for cutting.
- Cutting tools: A rotary cutter with a fresh blade and a self-healing mat.
- Pressing tools: An iron and press cloth suited to your fabrics.
- Prepared quilt: A pressed top with the finished sandwich trimmed square.
- Test materials: A 12-inch scrap sandwich using the same top fabric, batting, and backing as the quilt.
- Finishing supplies: Thread, binding clips, and the needle or machine foot you'll use for the final attachment.
Choose a ruler whose markings are easy to read against your fabric. The acrylic quilting ruler guide explains the tool choices that matter for repeat cuts.
Check your fabric before counting strips
For crosswise straight-grain binding, measure the usable fabric width after removing the selvages. Don't count a tight, printed, or perforated selvage as usable binding length.
Jelly Rolls provide precut strips, but their convenience doesn't replace a wrap test. Fat Quarters and remnants can also work, though shorter pieces mean more joins. Charm Packs and Layer Cakes usually introduce more seams than necessary for a continuous binding.
A 108-inch quilt backing can reduce backing joins when it suits the quilt's dimensions. Whatever backing you choose, include that exact fabric in the sample.
How to Test Strip Width on a Sample
A sample gives you a reliable answer to how wide to cut quilt binding without risking your binding fabric. Construction, batting depth, backing thickness, and the finishing method all affect the fit, considerations addressed in Brother's quilt-binding guide.
Build the test around the finished edge
Use scraps that behave like the quilt, not whatever happens to be closest to the machine. If the quilt has dense quilting, add comparable stitching to the sample so you're testing compressed layers rather than loose batting.
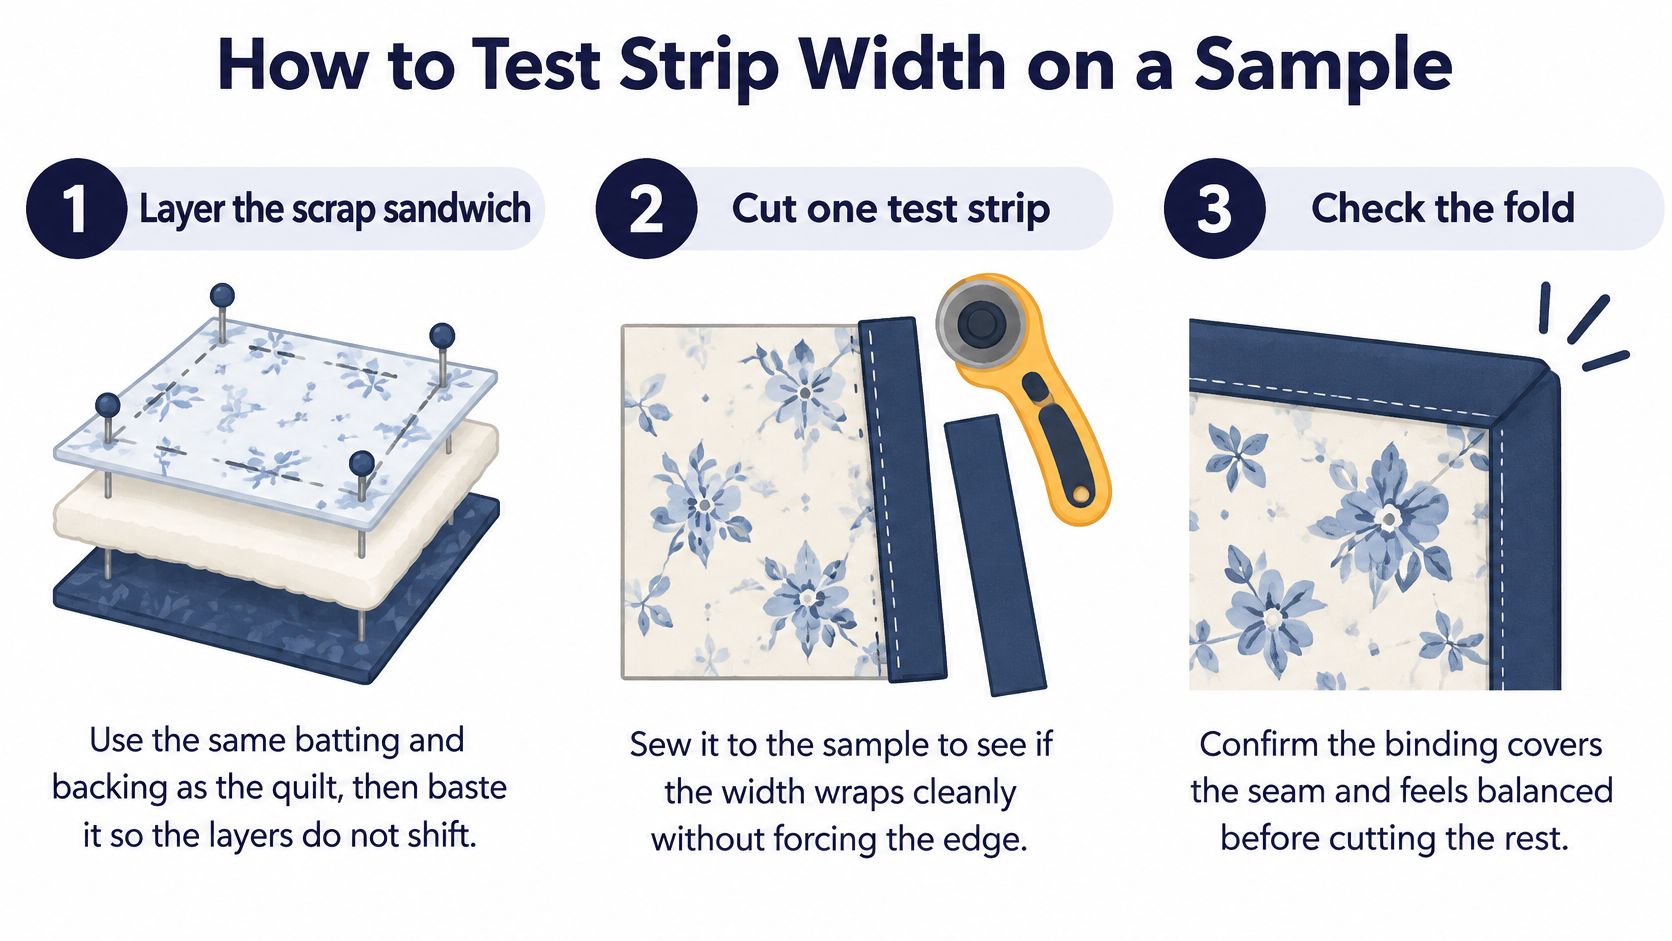
- Layer and baste the scrap sandwich. Use the actual batting and backing, then secure the layers so they won't slide. Pinch the basted edge gently and read its depth against a ruler without crushing the loft; use that observation to choose the thin, average, or thick starting row.
- Cut comparison strips. Cut one at 2.25 inches and another at 2.5 inches, using the same binding fabric. Keeping the fabric constant lets you judge width rather than differences in weave or weight.
- Attach the binding as you intend to sew it. Fold each strip lengthwise, wrong sides together, and attach it to a sample edge with a 1/4-inch seam. Use your intended foot and seam guide, because an inconsistent seam can make a suitable strip look wrong.
- Wrap and secure the reverse. Fold the binding around the edge and press appropriately for the fabric. Stitch it down using your planned hand or machine method, checking that the fold covers the attachment stitching without tension.
- Test a corner. Turn and finish a corner rather than judging only a straight section. Look for a flat miter, an adequately filled edge, and no thick lump where the folds overlap.
- Record the winner. Choose the narrowest strip that wraps comfortably and finishes cleanly. Write the width and seam setting on your cutting list before cutting the remaining fabric.
Use this visual reminder beside your sample.
Judge the method you'll actually use
For machine finishing, check where the final stitching lands on both faces. A fold that's easy to catch by hand may not give you the same margin when stitching from the front.
Don't choose the wider strip just because it feels safer. Excess fabric can create an empty fold or a clumsy corner, while a narrower strip can sit neatly against a flatter sandwich.
The sample result overrides the table. You're testing the fabric that must wrap around the edge, not estimating from the quilt's name or size.
Straight Grain Versus Bias for Length and Yardage
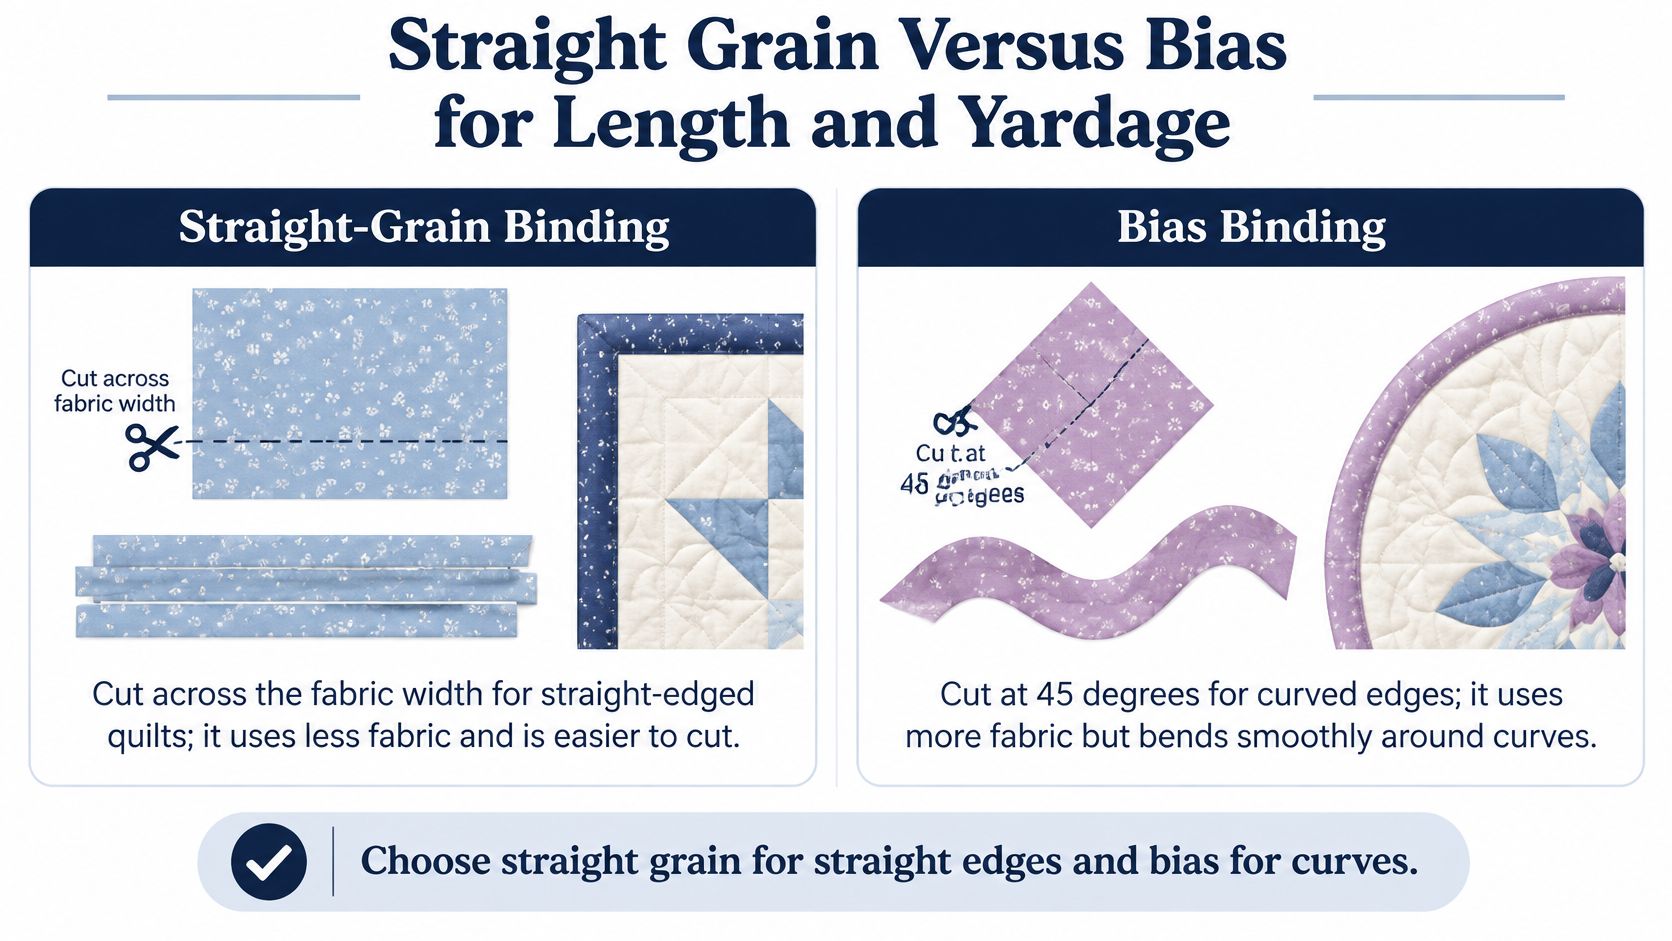
Choose crosswise straight-grain binding for straight edges and bias binding for curves. Bias is cut diagonally at 45 degrees, which lets it bend around shaped edges; the American Quilter's Society binding guide discusses cutting choices and an added 7 to 12 inches for joins and corner turning.
Crosswise strips are straightforward to cut and generally use fabric efficiently. Bias requires a different layout and stretches more during handling. Don't pull it taut as you sew, or you can distort an otherwise well-prepared edge.
Straight grain versus bias binding by edge type
| Edge type | Grain to cut | Fabric use | Extra length to add |
|---|---|---|---|
| Straight edges | Straight grain, cut across the width | Generally less fabric with a simple cutting layout | 7 to 12 inches for joins and corners |
| Gently curved edges | Bias, cut at 45 degrees | Different layout with more handling stretch | 7 to 12 inches after measuring the actual curved perimeter; verify on a sample |
| Scalloped edges | Bias, cut and pressed carefully | Plan the layout before estimating yardage | 7 to 12 inches after measuring every scallop; confirm the working allowance on a sample |
Measure along the actual curves rather than across them. There isn't a universal extra allowance for every scallop, and adding arbitrary lengths won't fix an inaccurate perimeter measurement.
Use the comparison below when choosing your cutting layout.
Calculate strips from usable length
The working formula is:
Binding strips needed = perimeter plus working allowance, divided by usable strip length, rounded up.
For a hypothetical 60-by-72-inch quilt, the perimeter is 264 inches. Add 10 inches for joins and corners to get 274 inches; with 40 usable inches per strip, the calculation is 274 ÷ 40 = 6.85, so you'd cut 7 strips.
If your tested width is 2.5 inches, those strips require 17.5 inches of fabric depth before allowing for squaring the fabric. Check the actual joining method too, since diagonal joins consume strip length.
The fabric yardage calculation guide helps turn that cutting plan into a fabric requirement. Bias isn't a premium default. Use it where the edge needs flexibility, not because it sounds more advanced.
Special Cases for Minky, Thick Loft and Faced Binding
Some quilts need more than a change in strip width. Slippery fabric, deep loft, and a facing each call for a different adjustment.
Keep the quilt supported beside the machine so its weight doesn't drag against the feed.
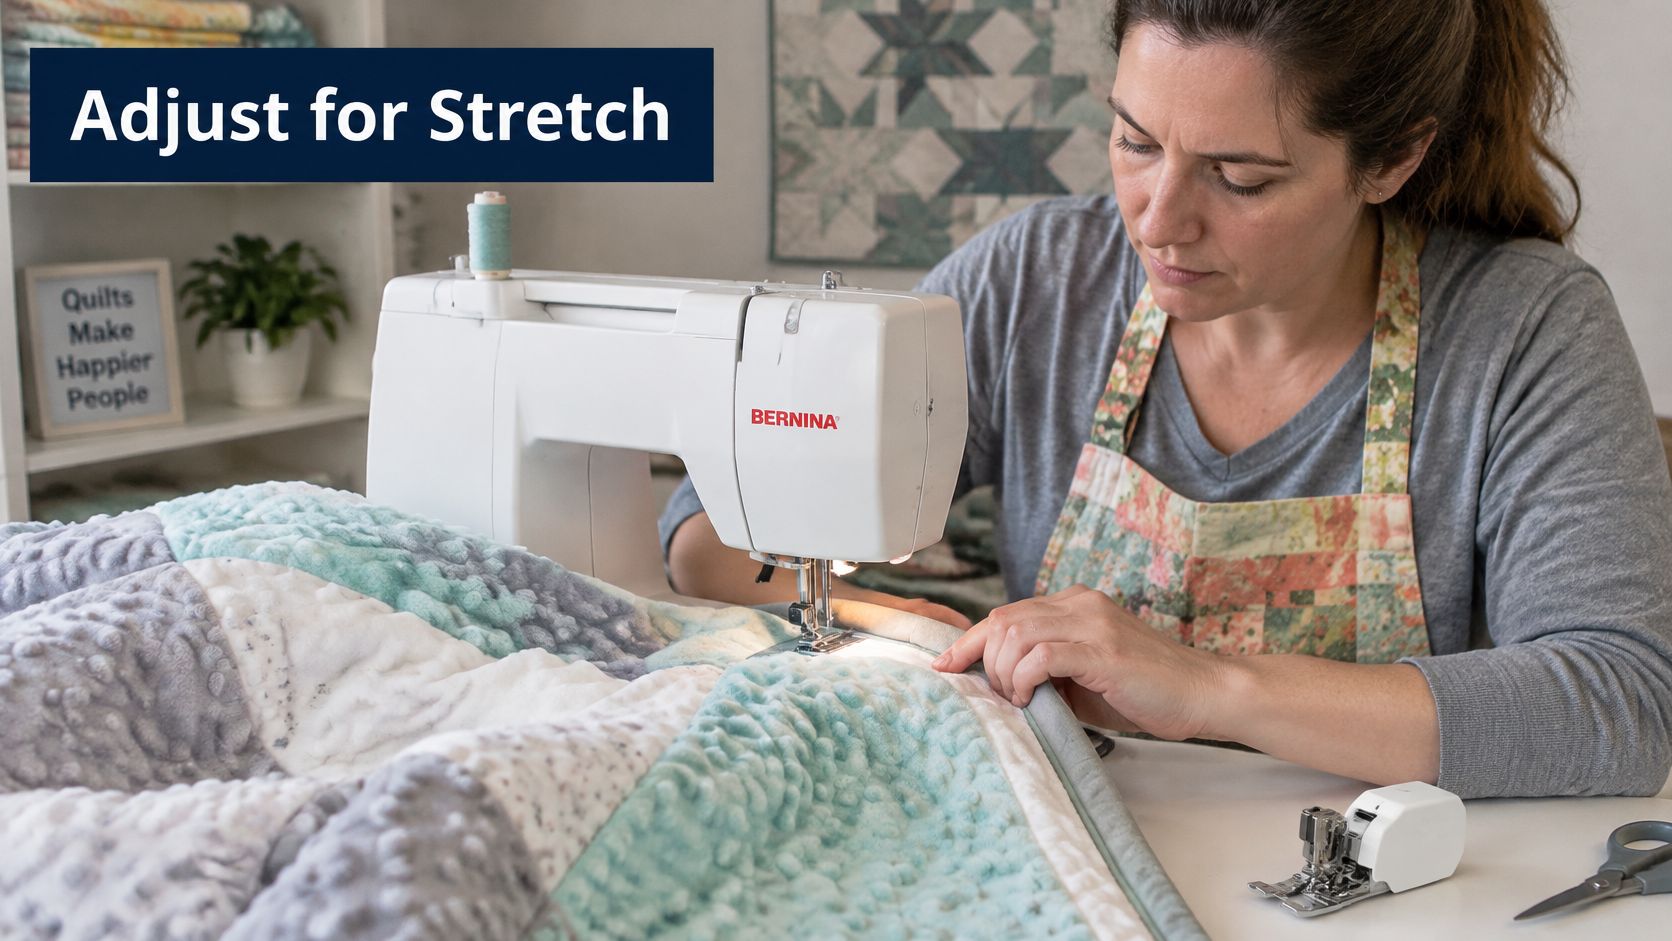
Support the quilt's weight while guiding the edge through the BERNINA.
Minky and fleece
Minky and fleece can slide or stretch while you attach the binding. Use a walking foot when appropriate for your machine, support the quilt, and let the feed dogs move the layers rather than pulling from behind.
Our minky sewing guide covers handling this fabric. More Sewing's advice on making baby blankets with minky is another useful preparation resource. For a slippery top, test both the wrap and the feed before committing.
High loft and faced edges
Warm & Plush Luxury Loft 100% Cotton Quilt Batting adds depth that a flatter cotton sandwich doesn't have. Thick needle-punched batting can also need more wrap, but the construction label alone isn't enough to choose a width. Start with the thick-sandwich recommendation and widen only when the sample won't cover the reverse comfortably.
A faced binding is a different construction: the facing turns to the back rather than forming a visible folded border. The Crafty Quilter's 2024 faced-binding tutorial uses 2.5-inch strips and notes that 2-inch or 2.25-inch strips can also work.
Follow the facing width and corner treatment in the pattern. The important measurement is how the facing lies on the reverse, not the same wrap calculation used for double-fold binding.
For a moving demonstration to accompany your practice, use the video below.
Fixing Binding That Is Too Narrow or Too Bulky
If the binding won't reach the back, don't stretch it into place or tighten the stitches. First release a short section and check the attachment seam. If the seam is correct and the fold still won't reach, the strip needs more width for that edge.
A skimpy reverse isn't always a cutting error. An overly deep seam uses up wrapping fabric, while an inconsistent seam creates an uneven finish even when every strip was cut accurately.
Binding problems, causes and fixes
| Symptom | Likely cause | Fix |
|---|---|---|
| Binding does not reach the back | Strip too narrow for the batting loft | Recut at the next width up and resew |
| Binding looks thin on the back | Seam allowance wider or narrower than 1/4 inch | Reset the seam guide and resew one test section |
| Corners pucker or bulk | Strip too wide for a thin sandwich, or crowded folds | Test 2.25-inch strips and remove only excess corner batting beyond the squared edge |
| Edge looks wavy on bias | Bias stretched during sewing | Press lightly with steam if the fabric permits; choose straight grain for future straight-edged binding |
| Batting shows at the front edge | Uneven trimming or an incompletely wrapped edge | Square the edge, then check the wrap on a sample |
Use finished-width examples cautiously. Yarnspirations describes cutting 2.5-inch strips to make binding approximately 0.5 inch after folding and pressing. That's a reference point, not a promise for every batting depth or attachment method.
Repair the cause before recutting
A seam-guide error often needs only a section unpicked and resewn. A corner may need its folds rearranged rather than the entire binding replaced. Don't cut away batting inside the intended quilt edge just to force an undersized strip to fit, since that can leave the binding hollow.
If the whole run is too narrow, recutting is the dependable fix. Test the replacement strip before removing all the existing binding, then decide whether the original strips can return to your stash for a thinner project.
Before you unpick everything: Check one straight section and one corner. A local sewing problem doesn't always require a whole new binding run.
Confirm Your Width and Start Binding
Write the successful width, grain choice, and seam setting on your cutting list. Cut the required strips, join them, and press without stretching. Keep the sample beside the machine so you can compare the first finished section with the result you approved.
Leave binding joins away from corners where possible. Before stitching the full perimeter, lay the binding around the quilt and shift its starting position if a join would land directly in a miter.
Match the materials to the finish
Our batting selection includes cotton, polyester, and 80/20 blends in pre-cut sizes for baby, throw, twin, queen, and king quilts. Warm & Natural Needled Cotton Batting in queen size, 90 by 108 inches, is offered at a sale price of $32.13; Warm & Plush Luxury Loft 100% Cotton Quilt Batting is another option when you want a loftier sandwich.
The Precuts & Kits range includes 5-inch Squares, 10-inch Squares, Jelly Rolls, Fat Eighth, Fat Quarters, 3-Yard Packs, and Quilt Kits. Choose binding fabric for a comfortable wrap and a manageable number of joins, not just because a precut is already in your stash.
Visit Our Springfield, Tennessee showroom to feel batting before choosing. When you're ready to close the final join and secure the reverse, use our guide to finishing quilt binding alongside your tested sample.
Shop our latest Precuts & Kits collection here at The Fabric Company, where you can choose binding fabric and batting for your next finished edge. Join The Weekly Thread for more tips and 10% off your first order.