

You've got a pattern printed, a small pile of fabric, and one big question. What foundation paper piecing supplies do you need to start? The short answer is this: you need the right paper, a reliable trimming setup, and stitch settings that help the paper come off cleanly later. Everything else can wait until you know you enjoy the process.
What Foundation Paper Piecing Actually Requires
Foundation paper piecing looks unusual the first time you try it because you don't build the block the same way you would with standard patchwork. Instead, you sew fabric directly onto a printed foundation, usually in numbered order, and the printed lines guide every seam. That's why this technique can produce very sharp points and tidy geometric shapes that are harder to get with regular piecing.
The method has deep roots. Quilter By Design's history of paper piecing notes documented use going back to the 19th century, including a quilt top dated January 1889 in a museum collection. That same history also shows that earlier makers used muslin, newspapers, and other stabilizers before paper became common. The supply stack has changed, but the idea hasn't. A stable base plus accurate cutting and trimming still matters most.
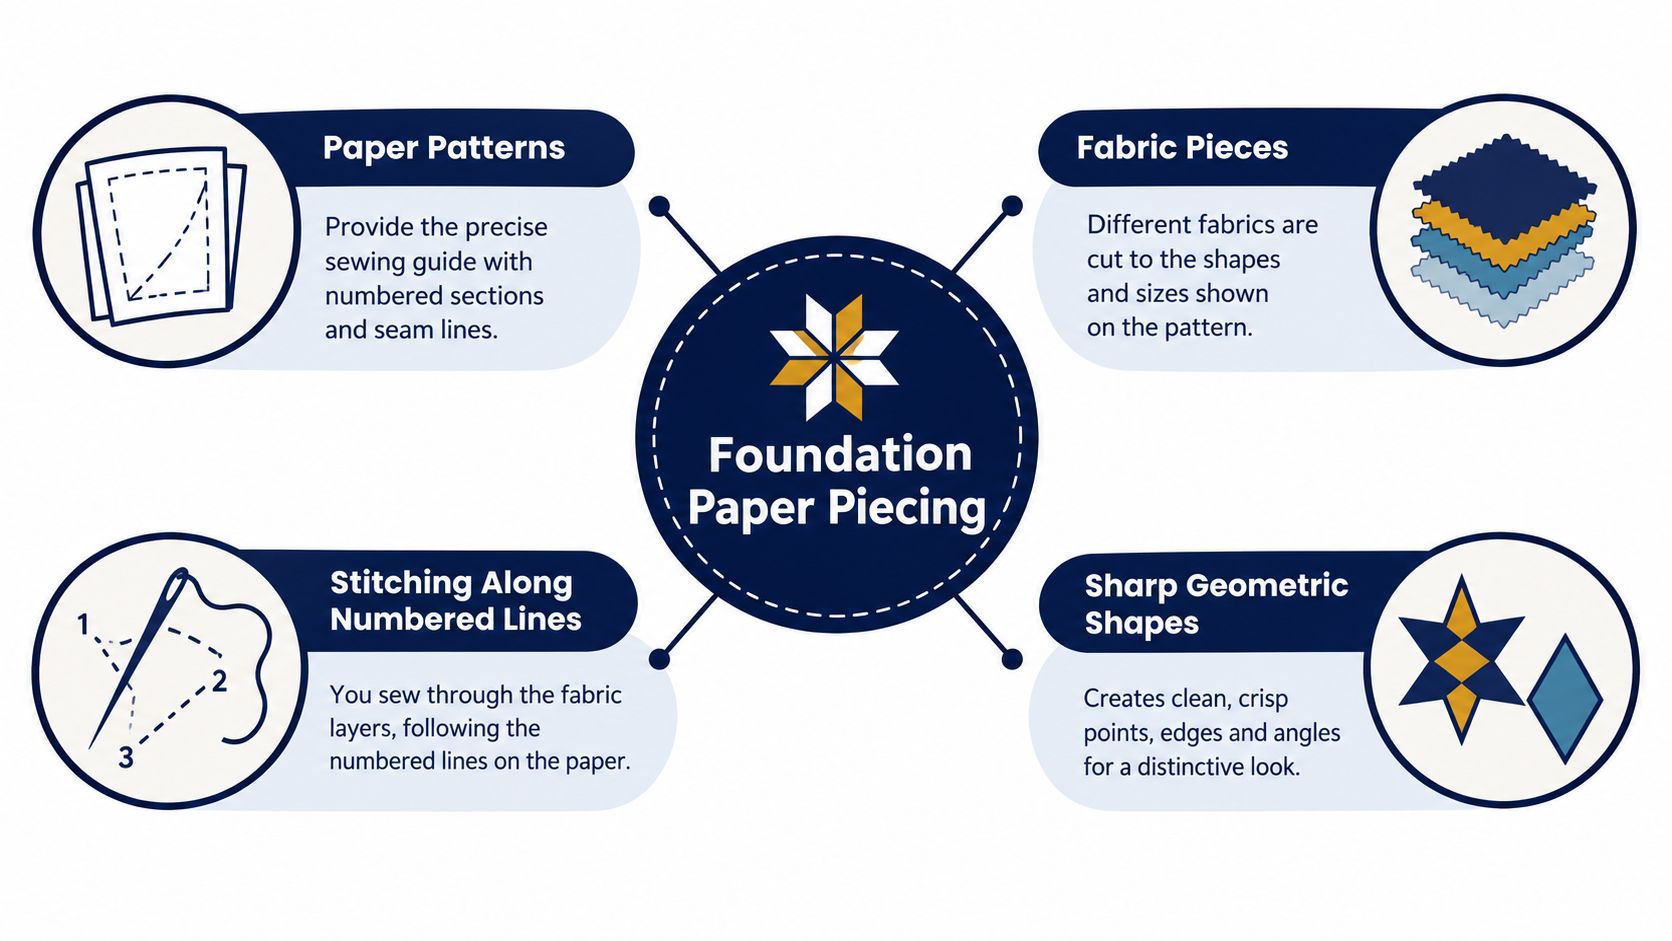
The three supply groups that matter most
If you're sorting through a long shopping list, group your foundation paper piecing supplies into these buckets:
-
Foundation media
This is the printed base. It controls placement, seam order, and final shape. -
Cutting and measuring tools
You trim after nearly every seam, so rulers, cutters, and a mat affect accuracy more than many beginners expect. -
Stitching supplies
Needle choice, thread, and stitch length decide how neatly the paper sews and how easily it tears away later.
The beginner priority stack
Here's the simplest way to avoid overbuying:
-
Start with the essentials
Paper, a way to trim accurately, and your machine set for short stitches. -
Add one convenience tool
For many quilters, that's an Add-A-Quarter ruler or a glue pen. -
Hold off on specialty extras
Light boxes, mini irons, rotating mats, and specialty feet are helpful, but they aren't required for a first block.
Practical rule: If a tool doesn't help you print, trim, or stitch more accurately, it probably belongs in the “later” pile for your first project.
For readers shopping locally, Our Springfield, Tennessee showroom is often the kind of place new quilters look for hands-on comparisons between basic and specialty tools.
Foundation Papers and Printable Templates
The paper is the backbone of the whole method. If the sheet is too heavy, it adds bulk and fights you at tear-out time. If it's too flimsy, it can wrinkle, tear too soon, or feed badly through your printer.
One useful point from HandmadeLytics' paper selection guide is that quilting-specific foundation paper is commonly around 18 to 22 lb, while laser-printer vellum is often 30 to 35 lb for finer detail. That same guidance says regular copier stock is usually heavier and less ideal because it adds bulk and is harder to remove cleanly. In plain terms, lighter tear-away paper usually behaves better for dense blocks.
What beginners usually try first
Many new quilters test the technique with whatever will run through the home printer. That's understandable. It lets you practice folding, stitching, and trimming before you commit to specialty paper.
The decision isn't just “what works.” Joe June and Mae's guide points out a common gap in quilting advice: most tutorials name paper options but stop short of helping quilters compare printer compatibility, seam visibility, cost, and removal difficulty in a practical way. That's exactly where beginners get stuck.
Foundation Paper Comparison for FPP
| Paper Type | Weight | Printer Compatibility | Tear Behavior | Best For |
|---|---|---|---|---|
| Specialty foundation paper | About 18 to 22 lb | Usually printer-friendly | Tears away cleanly with less bulk | Finished blocks, dense seams, detailed designs |
| Laser-printer vellum | About 30 to 35 lb | Best with laser printers | More stable, less tear-away friendly than lighter paper | Fine detail where visibility matters |
| Regular copier paper | Heavier than ideal | Feeds reliably in many home printers | Harder to remove cleanly, adds bulk | Practice blocks and learning passes |
A simple buying framework
Use this checklist when choosing paper:
-
For first practice blocks
Use paper that prints cleanly and lets you test scale accurately. -
For detailed or seam-heavy blocks
Choose lighter foundation paper that tears away more easily. -
For temporary placement methods
Freezer paper can help when iron-on adhesion matters, but it behaves differently from tear-away foundations.
Also check your print settings. Print at actual size, then confirm the pattern measures correctly before sewing. Borderless printing and automatic page scaling can throw off your block size fast.
Cutting Mats Rotary Cutters and Basic Rulers
Foundation paper piecing becomes repetitive in the best possible way. You sew a seam, fold on the printed line, trim the seam allowance, and repeat. If your trimming tools are awkward, the whole project feels harder than it needs to.
The trimming trio
Three tools carry most of the workload:
-
Cutting mat
A self-healing mat gives you a stable trimming surface. A cramped mat forces more repositioning, which slows you down. -
Rotary cutter
A sharp cutter trims seam allowances neatly. Dull blades drag the fabric and nick the paper edge. -
Acrylic ruler
A straight ruler helps you trim cleanly along the folded paper edge.
The basic supply list in this beginner tutorial from See Kate Sew includes a printed or copied foundation pattern, scrap fabric, a rotary cutter, an acrylic ruler, and a cutting mat. It also calls out specialty foundation paper and an Add-A-Quarter ruler as especially useful.
What's enough for a first project
If you already quilt, you may not need to buy much here. Your current mat, rotary cutter, and straight ruler can absolutely get you started. A specialty ruler can come later.
A good beginner setup usually looks like this:
- One dependable mat you can keep next to the machine
- One sharp rotary cutter for repeated trimming
- One clear ruler with easy-to-read markings
If you want a better feel for mat sizing and care, this cutting mat guide is worth a look.
The best cutting setup is the one you can reach without standing up after every seam.
You'll notice the rhythm quickly. Small trimming mistakes add up in FPP, so this is one area where “good enough” still needs to be reasonably precise.
Needles Thread and Stitch Settings for FPP
Needle, thread, and stitch length work as one system. If one part is off, the others can't fully save you. A thick needle may punch larger holes than you want. A long stitch may hold the block together but make paper removal annoying. Heavy thread can build extra bulk right where you want clean perforations.
What settings help paper release cleanly
Diary of a Quilter's technique guidance notes that one pattern instruction set specifies a size 80 needle and 16 stitches per inch, which is about 1.5 mm stitch length. That same source also notes that fine, sharp needles such as Microtex 80/12 are favored for accuracy, and that stitch lengths around 1.3 to 1.4 mm are often used in practice.
A second source, Patchpieces' FPP demo guide, says foundation paper piecing typically uses a very short stitch length, commonly around 1.5 mm or 15 to 18 stitches per inch, because shorter stitches perforate the paper and make removal easier.
Needle, Thread, and Stitch Settings for Foundation Paper Piecing
| Component | Recommended Choice | Why It Matters |
|---|---|---|
| Needle | Fine, sharp needle such as Microtex 80/12 or a size 80 needle | Pierces paper neatly and helps maintain accuracy |
| Thread | Fine piecing thread | Keeps seams tidy and reduces buildup along perforations |
| Stitch length | Around 1.5 mm, often in the 1.3 to 1.5 mm range | Creates perforations that help the paper tear away cleanly |
A practical way to test before sewing the block
Before starting a real unit, stitch across a scrap of paper and fabric, then tear the paper away from the seam. You're looking for two things:
- The stitches hold while you sew and press
- The paper releases without a wrestling match
If you'd like a refresher on sharp versus universal options, this guide to different types of needles for sewing helps sort out what belongs in your machine.
For local quilters comparing tools in person, Our Springfield, Tennessee showroom is the kind of stop many makers appreciate before buying needles in several styles they may not need yet.
Glues Adhesives and Basting Tools
Some quilters pin almost everything. Others prefer a glue stick and never look back. Both approaches can work, but they solve different problems.
When basting helps most
Basting tools are useful when a piece wants to slide before it reaches the needle. That happens often with small shapes, sharp angles, or fabrics that don't finger-press crisply.
Here are the most common choices:
-
Water-soluble glue stick
Good for tacking the first piece in place or holding a folded edge briefly. -
Pins
Reliable and familiar, though they can distort the paper if overused. -
Repositionable spray adhesive
Better for larger sections than tiny patchwork areas. -
Tape
Handy for holding a fold or stabilizing a paper edge outside the stitching line.
What to skip
Permanent adhesives usually create more trouble than help. They can gum up the needle, stiffen the unit, and make cleanup frustrating.
A safer approach is to use the lightest hold that keeps the fabric from shifting.
If the piece stays put while you walk it to the machine and stitch the seam, that's enough. You don't need industrial-strength stickiness for FPP.
For quilters curious about spray options, this overview of 505 spray adhesive is a helpful starting point.
If you're choosing only one basting aid, a washable glue stick or fine-tip glue pen usually gives the biggest payoff for beginners without adding much complexity.
Add-A-Quarter Rulers and Specialty Measuring Tools
Many quilting tools are optional. The Add-A-Quarter ruler is one of the few specialty tools that earns its reputation in foundation paper piecing because it solves a very specific, repeated task. You fold the paper on the seam line, butt the ruler lip against that fold, and trim a consistent quarter-inch seam allowance.
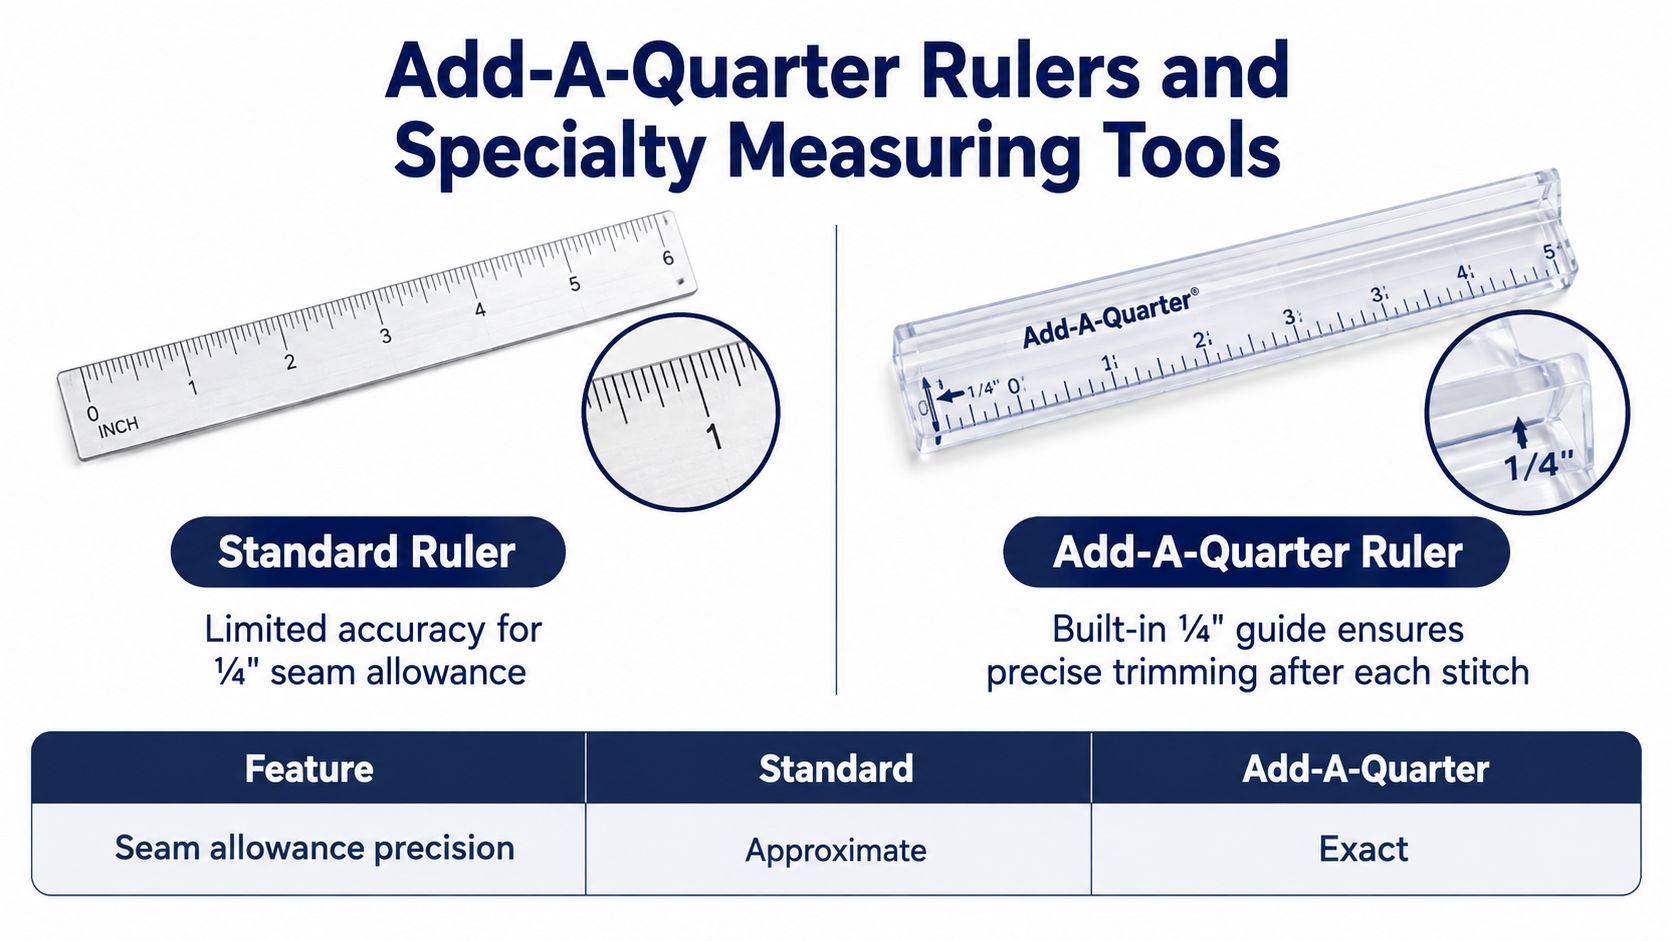
Why this ruler stands out
A standard acrylic ruler can trim seam allowances just fine if you're careful. The Add-A-Quarter makes the process faster and more repeatable.
That matters because quilters often get mixed messages about what's essential versus optional. Village Bound Quilts highlights this exact confusion. Many tutorials list long supply stacks, but the more useful question is which few tools deliver the biggest improvement for a first project. In practice, this ruler is often near the top of that list.
Which specialty measuring tools help first
If you're deciding where to spend next, think in order of payoff:
-
Highest payoff
Add-A-Quarter ruler for repeat trimming -
Helpful after that
A smaller ruler for tight spaces or small blocks -
Useful later
Rotating mats, seam guides, and angle-specific rulers for more advanced patterns
A straight ruler still belongs in your kit. The Add-A-Quarter doesn't replace all measuring. It just handles one repeated task unusually well.
If you want a broader primer on ruler types and markings, this acrylic quilting rulers guide gives good background.
Best Fabric Choices for Paper Piecing Accuracy
Fabric choice changes how calm or chaotic your sewing session feels. A stable quilting cotton tends to fold cleanly, stay where you place it, and press flat after each seam. Slick, drapey, or heavy fabrics can still work, but they ask more from your hands and your trimming.
What behaves well on the foundation
For most first projects, quilting cotton is the safest pick. It has enough body to hold a crease, enough stability to resist shifting, and enough flexibility to turn and trim without fighting the paper.
Busy prints can also hide mistakes, which is both good and bad. They may camouflage slight wonkiness, but they can also make it harder to spot direction, placement, or value issues while you sew.
Fabric Types for Foundation Paper Piecing
| Fabric Type | Weight | FPP Suitability | Best Use |
|---|---|---|---|
| Quilting cotton | Medium, stable | Excellent | First projects, precise patchwork, most blocks |
| Lightweight drapey fabric | Light, shifty | Fair | Advanced work when soft hand matters |
| Heavy decor-style fabric | Heavier, bulky | Poor to fair | Limited use in simple, less intricate units |
Smart fabric habits for cleaner blocks
A few habits help right away:
-
Use stash pieces generously cut
FPP often needs a little extra around each shape so the patch fully covers the area after flipping. -
Start with solids or simple prints
They make it easier to see how the block is developing. -
Press for control
Crisp pressing helps every new piece lie flat before the next seam.
If you want a useful refresher on why quilting cotton behaves so well, this cotton fabric for quilting guide covers the basics clearly.
For shoppers who like to compare feel and print scale in person, Our Springfield, Tennessee showroom can be especially helpful when choosing between stash-building cottons, precuts like Fat Quarters, and project-specific yardage. It's also smart to remember the broader market context. The quilting and sewing category is large, with a 2025 quilting-industry survey estimating annualized U.S. quilting revenue at $4.5 billion, which helps explain why project-specific fabrics, papers, threads, and tools remain a mature specialty category rather than a tiny niche.
Sewing Machine Setup and Presser Foot Options
Your machine setup decides whether foundation paper piecing feels controlled or fussy. The goal is simple. You want stitches short enough to perforate the paper well, but stable enough that the unit doesn't fall apart while you handle it.
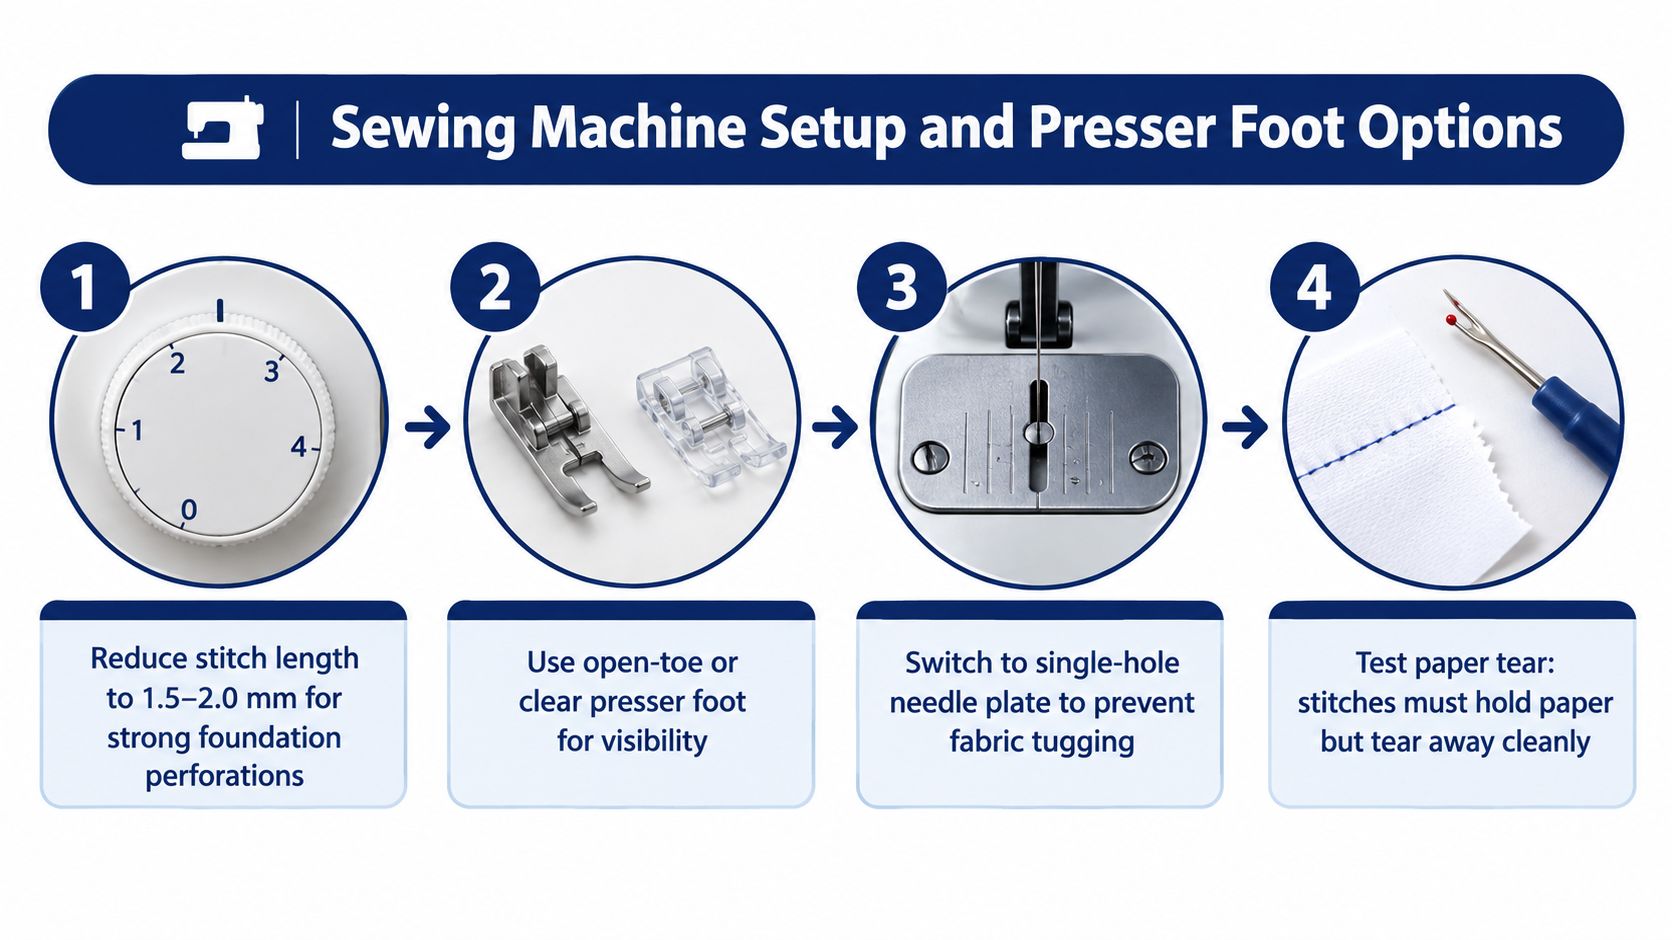
Settings to check before the first seam
Start with a short stitch length. Keep your tension in a normal piecing range unless test stitches show a problem. Then choose a foot that lets you see the line clearly.
Many quilters like these options:
-
Standard piecing foot
Fine for most patterns if visibility is decent. -
Open-toe foot
Easier to see printed lines and seam starts. -
Clear foot
Helpful if you prefer maximum visibility over the paper.
A test seam tells you more than a long list of machine settings ever will.
Give yourself a sample foundation and scrap fabric before moving to the block.
This video gives a useful visual walk-through of setup and handling:
What to watch as you sew
Watch the paper, not just the fabric edge. Since the line is your map, visibility matters more than speed. If the fabric tries to dip into the needle plate opening or the paper feels draggy, stop and test another foot or a fresh needle before continuing.
That small adjustment can make the entire block calmer.
Optional and Advanced Tools Worth Adding Later
Once you've made a few blocks, some upgrades start to feel less like luxuries and more like real workflow helpers. The key is to buy the tools that solve a problem you've already run into.
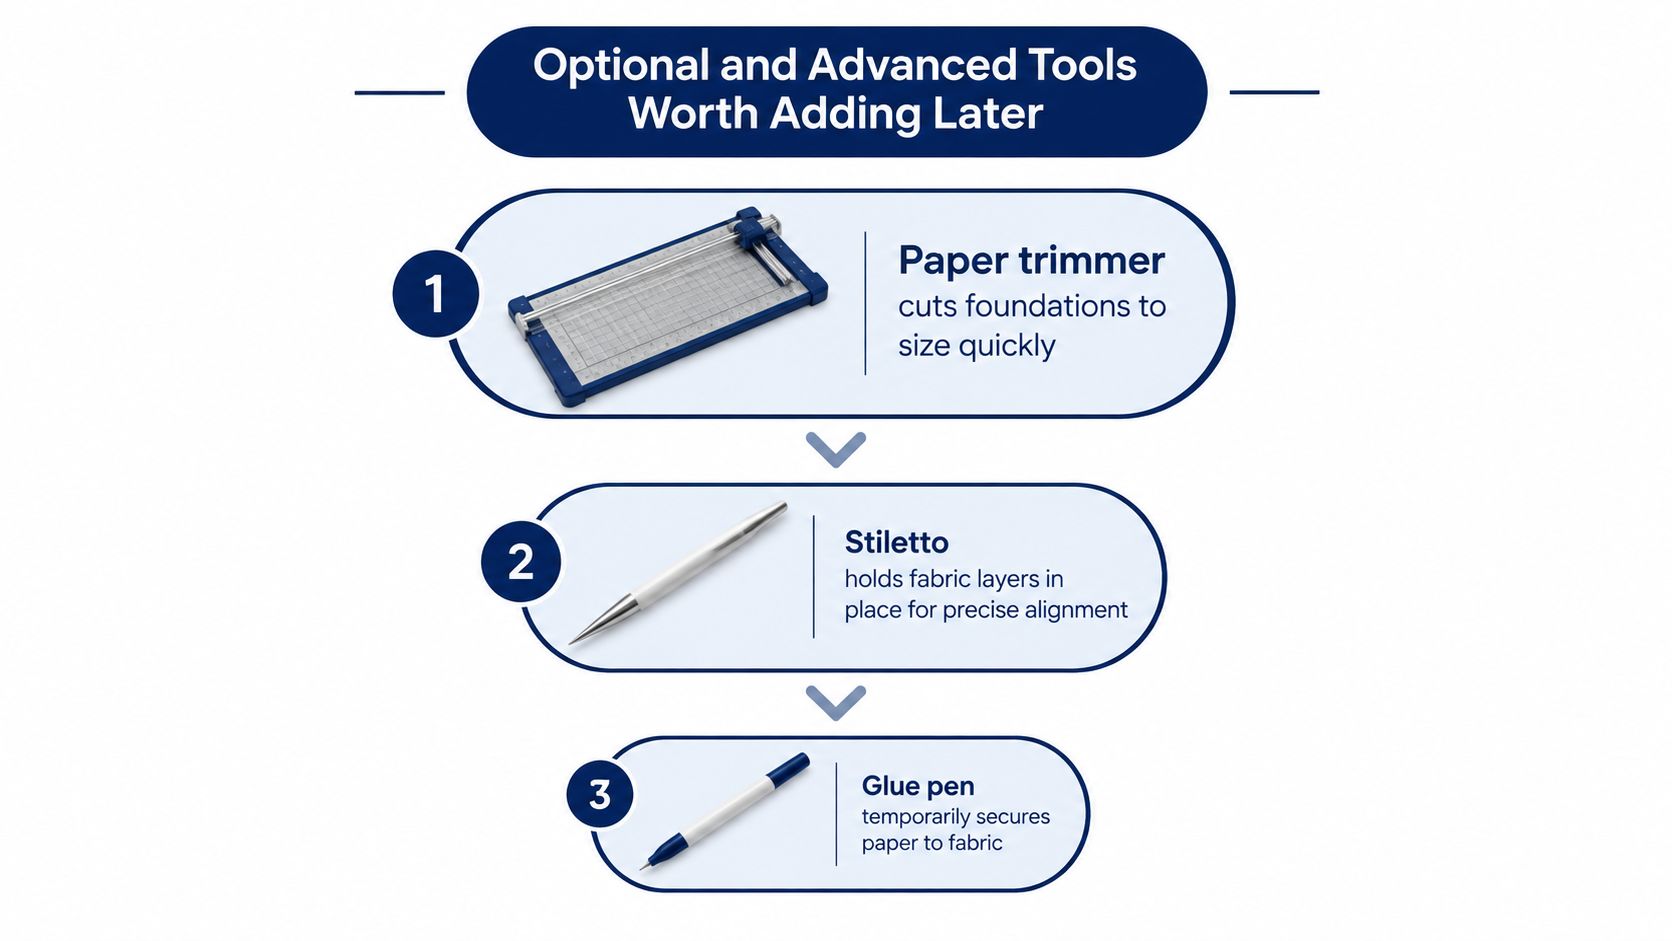
Top tier upgrades
These are the first upgrades I'd consider after the essentials:
-
Paper trimmer
Fast for cutting printed foundations apart neatly. -
Stiletto
Great for guiding tiny pieces near the needle without using your fingertips. -
Seam roller
Handy when you want a quick press before walking to the iron.
Mid-tier helpers
These become useful when your patterns get more detailed:
-
Light box
Helps check whether the next patch fully covers the area before sewing. -
Mini pressing station
Speeds the trim-and-press rhythm if you do a lot of FPP. -
Specialty templates or rulers
Better once you know which shapes you enjoy making.
Nice, but not urgent
Some tools are satisfying to own but won't change much for a first project:
- Magnetic pin holder
- Thread stand
- Design wall
- Extra ruler variations
The most useful lens is this one: does the tool save time, improve visibility, or improve trimming accuracy? If the answer is no, it's probably a later purchase.
Quick Reference Shopping Checklist by Budget
Beginners usually need permission to buy less, not more. Foundation paper piecing can look tool-heavy because experienced quilters often build highly personalized setups. Your first shopping list should stay focused.
Starter budget
Keep this list centered on the three essentials:
- Foundation paper or printable template sheets
- A sharp needle suitable for paper piecing
- Fine piecing thread
- Rotary cutter
- Acrylic ruler
- Cutting mat
If you already quilt, you may own most of this. In that case, your first true FPP purchase might be only the paper.
Intermediate budget
This level adds the convenience tools that tend to improve speed and consistency:
- Add-A-Quarter ruler
- Washable glue stick or glue pen
- Extra sharp needles
- A second small ruler for close trimming
- A compact pressing setup
Full setup budget
This tier is for quilters who know they enjoy the method and want a smoother workflow:
- Dedicated foundation paper stash
- Specialty presser foot for visibility
- Paper trimmer
- Stiletto
- Light box
- Mini ironing station
- Additional rulers for angle work
What You'll Need
For related project planning, many quilters also keep these categories in mind:
- Precuts like Jelly Rolls, Fat Quarters, Charm Packs, and Layer Cakes
- Batting options such as batting packages and rolls
- Machine brands including PFAFF sewing machines
Even though FPP is a piecing technique, it helps to think ahead to finishing. If your block becomes a full quilt, terms like 108-inch quilt backings and batting rolls start to matter too.
For readers nearby, Our Springfield, Tennessee showroom can be helpful when you want to compare a nice-to-have tool against one that's worth the spend.
Frequently Asked Questions About FPP Supplies
Can I use regular printer paper
Yes, for practice. It's a reasonable way to learn the sequence and test whether you enjoy the process. Lighter foundation paper usually removes more cleanly, so many quilters switch once they move from practice blocks to finished work.
Why is my paper hard to remove
Usually one of three things is happening:
- Your stitch length is too long
- The paper is heavier than ideal
- The seam area has too much bulk
Short stitches help create a cleaner tear line. A fresh sharp needle also makes a difference.
Do I need an Add-A-Quarter ruler right away
No. It helps a lot, but a regular acrylic ruler can work for your first project if you trim carefully. It becomes more valuable when you start making multiple blocks or more intricate designs.
What fabric is easiest for a beginner
Stable quilting cotton. It presses well, flips cleanly, and doesn't shift as much as drapey fabric.
How often should I change my needle
More often than you would for regular piecing. Sewing through paper dulls a point faster, so pay attention if the machine starts punching less cleanly or dragging through the layers.
What's the shortest supply list that still works
If you want the true minimum, start here:
- Foundation paper or printed template
- Fabric
- Sharp needle
- Thread
- Rotary cutter
- Ruler
- Cutting mat
- Iron or pressing tool
That's enough to make a clean first block and decide what upgrades would help you most.
The Fabric Company carries the kinds of quilting cottons, batting, backings, notions, and machine options that make foundation paper piecing easier from the first practice block to the final quilt finish. If you're building your kit or planning your next project, visit The Fabric Company and join The Weekly Thread for more tips and 10% off your first order.