

Yes, flannel and quilting cotton can share a quilt if both are prewashed and dried the same way and their weights stay within about 1–2 ounces per square yard. If both labels say cotton, why can one fabric still pull a carefully pieced block out of shape?
Fiber content doesn't tell you how tightly a fabric is woven, how much it will shrink, or how it will feed through your machine. The useful test is simple: measure matched swatches, then decide whether your flannel belongs in the top, on the back, or on a reversible side.
Yes You Can Mix Flannel and Cotton
Choose fabrics that behave alike, not just fabrics with matching labels. Lightweight patchwork flannel is usually a more manageable partner for quilting cotton than a thick shirt flannel.
The Sewing With Ease flannel guide places quilting cotton and lightweight patchwork flannel at about 4–5 ounces per square yard, compared with 6–8 ounces for heavier shirt-weight or Portuguese flannel. It recommends keeping patches within roughly 1–2 ounces of one another when possible and identifies 4–6-ounce flannel as an easier partner for standard quilting cotton.
Flannel and quilting cotton side by side
| Property | Quilting cotton | Cotton flannel | Practical limit |
|---|---|---|---|
| First-wash shrinkage | About 2–5 percent | Commonly 4–7 percent; up to 10 percent in hot water | Prewash and dry both the same way |
| Weight | About 4–5 oz per square yard | 4–5 oz patchwork flannel; 6–8 oz shirt-weight or Portuguese | Stay within about 1–2 ounces |
| Hand and drape | Crisp and stable | Softer, with nap and more give | Choose 4–6 oz flannel for easier piecing |
| Seam bulk | Low | Higher at intersections | Use fine piecing thread and a consistent patchwork seam |
| Role in the sandwich | Flat patchwork top | Extra thickness and nap | Consider loftier batting to cushion joins |
For the shrinkage comparison, SewingTrip's fabric-mixing guide gives quilting cotton a first-wash range of about 2–5 percent. Flannel estimates differ among fabrics and wash conditions, so treat the table as a planning guide rather than a prediction for your bolt.
A flannel plaid might look perfect beside a Riley Blake print, yet feel much heavier when you fold them together. Stack the fabrics, pinch a mock seam intersection, and let the stack hang over your hand. If the flannel dominates the fold, it may also dominate the finished quilt's drape.
Why the cotton label isn't enough
Nap is the brushed, fuzzy surface that makes flannel feel soft. That surface also creates friction, while a loose weave can let a cut edge stretch before you notice.
Say you're making a simple throw from cotton squares and flannel accents. Broad squares give you room to control the flannel. Tiny triangles, tight points, and crowded seam intersections ask more of the same fabric.
A fabric can be lovely to touch and still be the wrong partner for a particular block.
Batting matters, too. Some loft can cushion thick joins, but a very lofty batt also makes the whole sandwich harder to fit under a domestic machine. Choose enough cushion for the seams without building an unnecessarily bulky quilt.
Use the guide to choosing quilt fabric to sort your fabric choices by purpose. Before cutting yardage or opening a treasured bundle of Precuts, test the actual fabrics together.
How to Measure Shrinkage Before Cutting
Prewashing is a preparation step, not proof that two fabrics are compatible. Measuring tells you whether your chosen fabrics respond similarly to the care they'll receive.
TextileTuts' flannel shrinkage guide describes flannel shrinkage around 5–7 percent, with some references reporting 4–6 percent in warm water and up to 10 percent or more in hot water. Its practical example is a marked 10-inch square that becomes 9.5 inches, representing 5 percent shrinkage.
Use this process to keep your measurements organized.
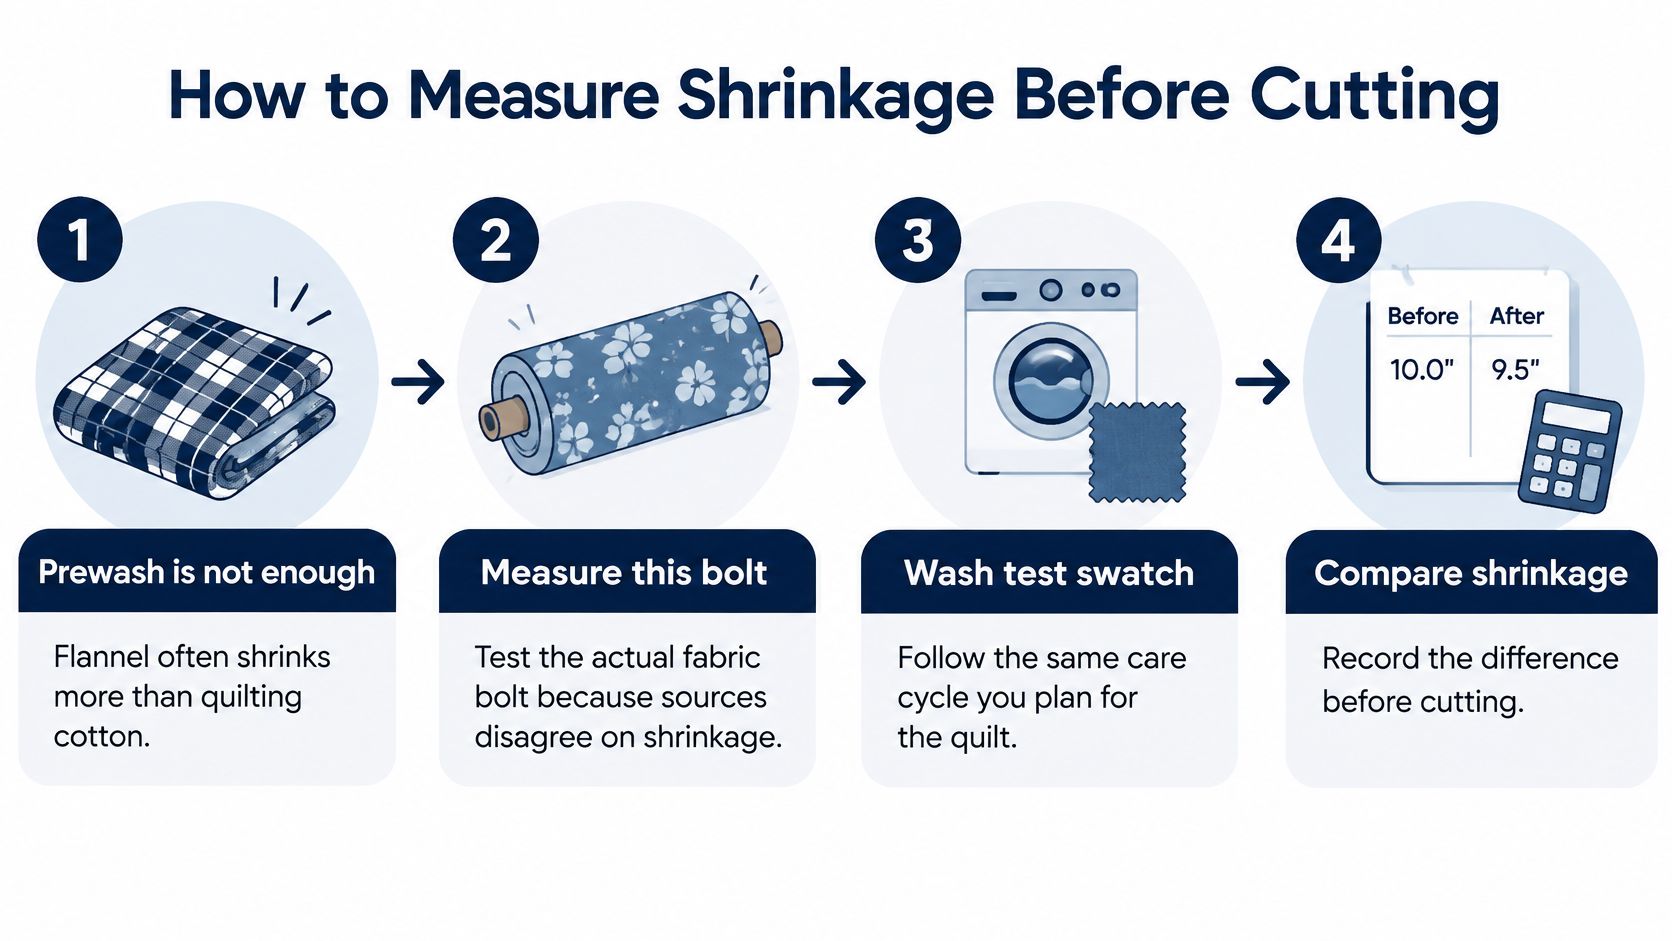
Test the fabric you'll actually sew
- Prepare matched swatches. Cut generous samples from the flannel and quilting cotton. Mark a square inside each sample, leaving fabric outside the marked boundary so fraying won't erase your measurement points.
- Mark the lengthwise and crosswise grain directions with a washable fabric marker that remains visible through your test. Record the original dimensions and fabric names before laundering.
- Wash and dry for the quilt's real future. Use the cycle the recipient will use. If a charity requires hot laundering, test that treatment rather than a gentler cycle that makes the samples look better.
- Lay the dry samples flat and remeasure without stretching. Measure both directions separately because a fabric can shrink more along its length than across its width.
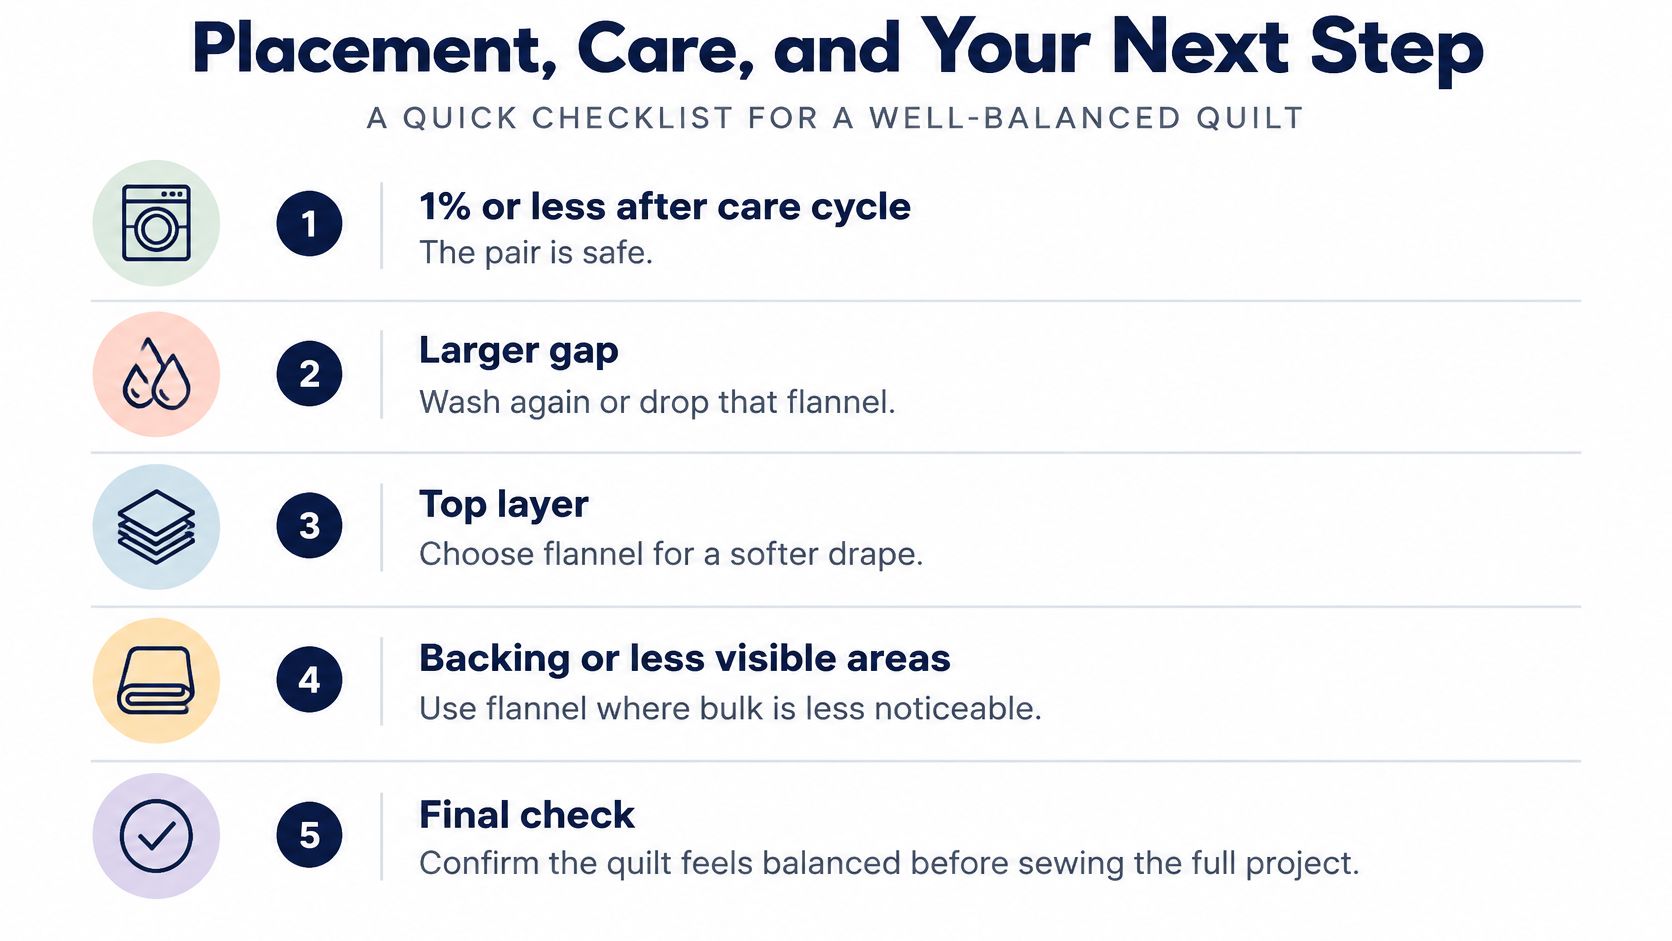
Accept the pairing only when the remaining dimensional changes are close and a sewn sample stays flat. If the gap remains noticeable, wash again or choose another flannel.
There isn't a universal safe percentage gap established by these guides. For example, you might use about one percentage point or less as your own trial target, but that's a workshop decision, not a guarantee that every quilt design will tolerate it.
- Check color as well as size. Inspect dark or saturated fabrics for bleeding. If dye transfers during the test, resolve that before placing the fabric beside pale cotton.
- Repeat the intended care cycle when the quilt will be washed frequently or the samples still change shape. Compare each sample with its own previous measurement, not just with its original size.
- Press, square, and then cut. Lift and lower the iron instead of pushing it across the cloth. Straighten the grain gently, trim unstable edges, and cut only after the fabric lies naturally flat.
Keep a small swatch record
A notebook entry can be as simple as this:
- Fabric identity: Brand, print, and a small attached scrap.
- Care method: Washer cycle, water setting, and dryer setting.
- Directional change: Original and finished measurements along each grain.
- Handling notes: Bleeding, fraying, skewed grain, or a surface that stretched during pressing.
Avoid the half-prewash trap: Washing only the flannel leaves the cotton free to shrink later and pull against it.
Testing costs a little fabric. Expect frayed edges, possible color loss, and some unusable Selvage scrap, especially with loosely woven flannel. Leave room in your purchase for those losses rather than assuming every cut edge will remain usable.
The fabric-preshrinking guide can help you prepare the remaining yardage. Don't use a smaller-than-pattern swatch or precut just because it survived the wash. Measure it before assigning it to a block.
What You Will Need for This Quilt
For a first mixed-fabric project, plan a cotton throw with scattered flannel accents. A straightforward patchwork layout lets you enjoy the texture without making every seam a handling challenge.
What You'll Need
Build your project list around fabrics you can test and tools you already know how to use.
- Quilting cotton from your Stash: Robert Kaufman or Cloud9 cottons and Riley Blake prints are useful starting points for a coordinated palette. Choose similar fabric weights rather than relying on the brand name alone.
- Precuts or cut-your-own patches: Fat Quarters give you room to wash, square, and recut. Charm Packs and Layer Cakes need more caution because shrinkage can leave them too small for the pattern. Yardage is often the more forgiving choice when stable finished dimensions matter.
- Cotton flannel yardage: Choose a piece you can prewash and test. Allow extra for shrinkage, squaring, and frayed edges instead of buying only the pattern's exact cutting requirement.
- Batting with suitable loft: Compare the thickness and flexibility of a Hobbs batting with your pressed sample block. If you prefer needle-punched cotton with Scrim, check the package for scrim orientation and recommended quilting distance.
- Backing fabric: A wide cotton backing can simplify assembly by reducing seams. A flannel back is optional, not an automatic requirement for a soft throw.
- Piecing and preparation tools: Gather fine piecing thread, sharp machine needles, light starch or sizing, pins, a rotary cutter, a clear ruler, and a cutting mat.
- Layer-control tools: Have a walking foot, your preferred basting supplies, and quilting gloves ready before assembling the sandwich.
Use the beginner quilting supplies guide to check what's already in your sewing basket before buying duplicates.
Choose supplies for the whole sandwich
A domestic machine such as a PFAFF can quilt this combination when the sandwich is well basted and supported. The available throat space, quilt size, and your ability to move the layers matter more than the logo on the machine.
For a smaller throw, packaged batting is convenient. Batting rolls make more sense when you regularly finish larger tops or make donation quilts in batches. Keep the batting's care instructions with the project so they don't get separated from the finished quilt.
Don't choose batting by softness alone. Fold your test sandwich, feel the intersections, and check whether the needle moves through without strain.
Wash the chosen yardage before opening the Precuts. Then confirm that any precut pieces will still meet the pattern's cutting dimensions after the preparation you've chosen.
How to Piece and Quilt the Mixed Layers
Needle and stitch settings for mixed flannel
| Job | Needle | Stitch length | Extra control |
|---|---|---|---|
| Piecing lightweight flannel with cotton | 75/11 to 90/14 | 2.0–2.5 mm | Light starch and a true 1/4-inch seam |
| Heavier flannel seams and points | 90/14 | 2.5–3.0 mm | Extra pins at intersections |
| Quilting the sandwich | 90/14 | 2.5–3.0 mm | Walking foot and suitable batting loft |
| Binding over a bulky edge | 75/11 to 90/14 | 2.5–3.0 mm | Baste so the nap doesn't drag |
These are sample starting settings within the 75/11–90/14 needle range and approximately 2.0–3.0 mm stitch range listed in Brother's medium-weight fabric guidance. Test the combination on your machine; use 50-weight piecing thread and a consistent 1/4-inch seam allowance to keep patchwork joins manageable.
Arrange the pieces on a flat surface before sewing so you can spot stretched edges and crowded intersections.
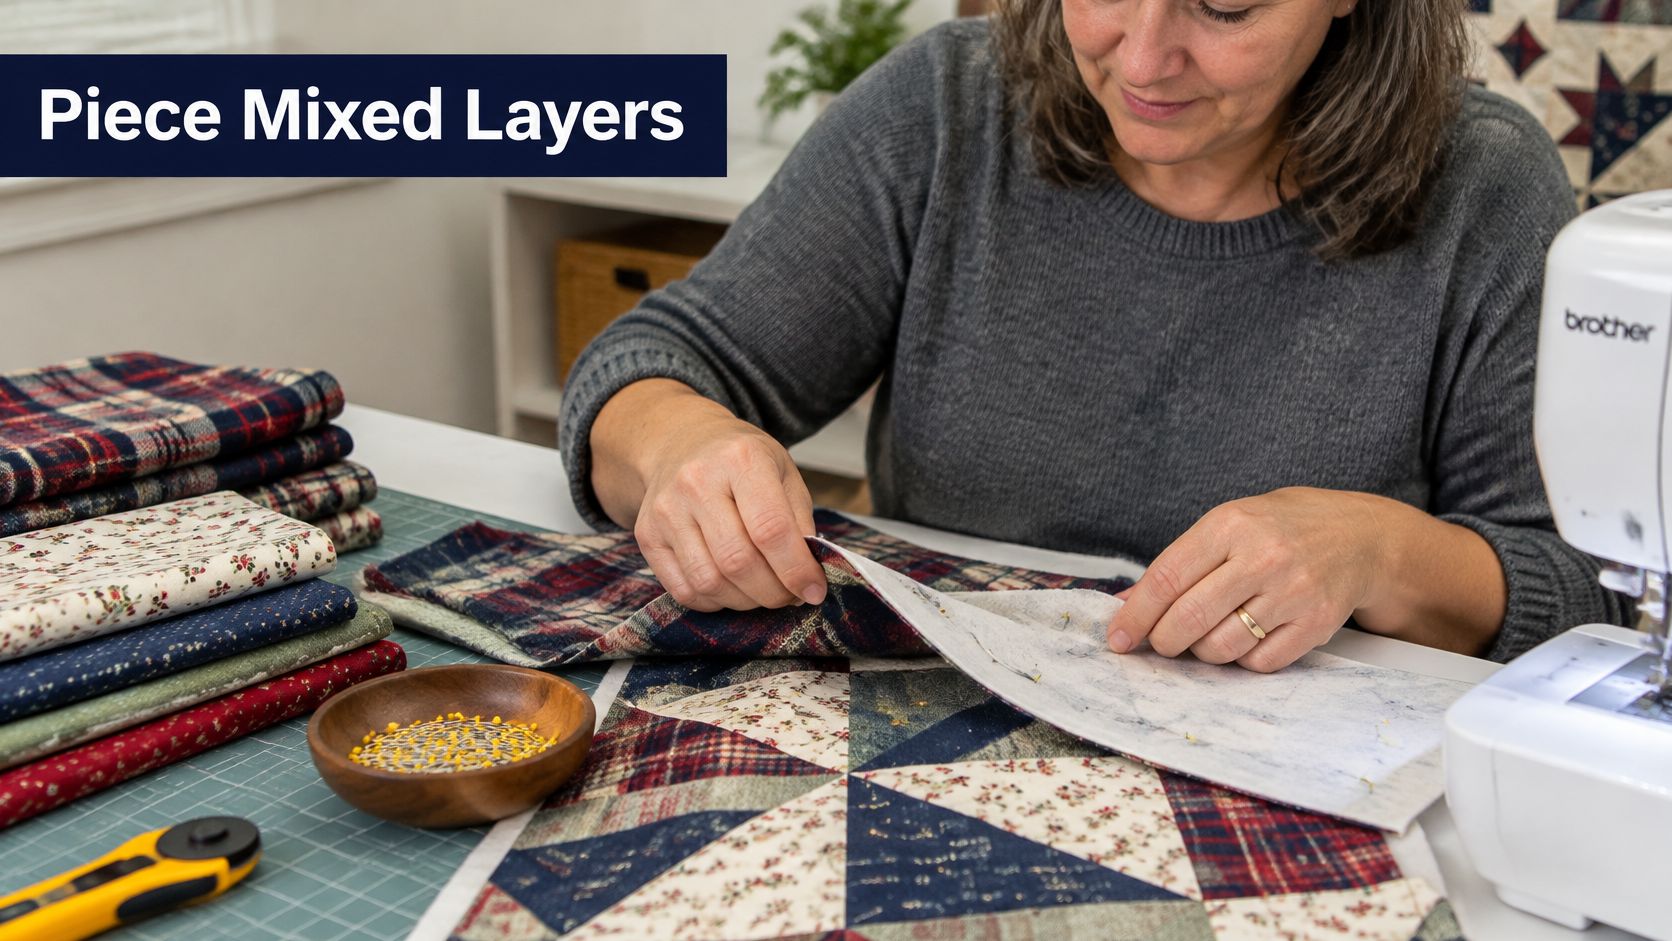
Robert Kaufman flannel or Riley Blake quilting cotton should lie relaxed on the worktable, without tension along the cut edges.
Build a representative block first
- Stabilize only where needed. If the flannel stretches as you handle it, apply light starch or sizing and let it dry before cutting. A stiff coating isn't the goal; you want an edge that holds its shape under the ruler.
- Cut on grain with a sharp rotary blade. Press before measuring, then let the fabric cool flat so you aren't cutting warm cloth that's still relaxing.
- Test the seam on scraps. Sew the fabrics in the same order they'll appear in the block. Check that the lower layer hasn't crept ahead and that the seam finishes at the correct width.
- Add pins at intersections, particularly on half-square triangles and tight points. Avoid pulling the top patch to make mismatched edges meet; check the cutting and seam accuracy instead.
- Press for the actual seam stack. Press toward the cotton when that gives a flatter join. Where several bulky seams converge, test pressing open, making sure the stitching remains secure and the block stays square.
- Sew and press the complete sample block. Include the fussiest feature in the design, whether that's a curve, a point, or an intersection with several flannel patches.
A plain square won't tell you how a crowded star center will behave. Your test block should reproduce the part of the quilt most likely to cause trouble.
Let the feed dogs move the fabric. Your hands should guide the edge, not stretch the seam into agreement.
Control the layers during quilting
Baste the sandwich thoroughly before quilting. Flannel's nap can grip the batting in one area while dragging against the machine bed in another, so check both surfaces for folds.
Support the quilt beside and behind the machine. If the weight hangs off the table, you'll fight that weight instead of guiding the stitching.
For help with attachment setup and layer control, use the walking-foot quilting guide. Begin near the center and work outward in a balanced sequence, checking the underside regularly.
This video offers another way to observe the quilting process.
Keep the quilting open enough that the finished throw can bend comfortably, while staying within the batting manufacturer's maximum spacing. Dense quilting over thick flannel intersections can create a stiff patch even when the stitching looks tidy.
If you hear repeated needle deflection or see skipped stitches, stop and inspect the needle, seam stack, and threading. Don't push harder on the quilt to force it through.
Placement, Care, and Your Next Step
Choose placement from the sewn-and-washed sample, not from softness alone. Fabrics that finish close in size are promising partners, but you still need a sandwich that stays flat, feeds evenly, and feels comfortable.
If the samples continue changing by noticeably different amounts, wash again or choose another flannel. Moving an unstable fabric to the back doesn't remove the shrinkage problem.
Use this checklist when choosing where the flannel belongs.
Flannel accents in a cotton top
Choose accents when you want texture without a heavy quilt. Broad patches let the flannel contribute softness while the surrounding cotton keeps the design familiar to piece.
For a gift-driven beginner, this is usually the easiest place to start. A cotton patchwork throw with occasional flannel squares is simpler to control than a tightly pieced top with flannel at every point.
Keep heavily textured patches away from areas where the design already creates a large seam stack. A soft flannel square doesn't need an elaborate block around it to feel special.
- Choose this placement for: A first mixed-fabric quilt, a Stash project, or a throw that needs only a little added texture.
- Check before committing: The test block's corners, seam strength, and finished size after laundering.
- Change course if: The flannel stretches out of square during ordinary handling despite light stabilization.
A full flannel backing
A flannel back gives you a soft surface across the whole quilt. It also adds weight and a large area of fabric that must stay smooth during basting.
This isn't automatically the easiest choice for a beginner. You may have a simple cotton top and still struggle to move a bulky, grippy sandwich through a domestic machine.
Read the flannel quilt-backing guide before committing your yardage. If a longarmer will finish the quilt, ask about backing preparation and required margins before trimming anything.
A wide cotton backing is the simpler alternative when fewer seams and easier handling matter more than a fuzzy surface. For larger projects, a Hobbs batting roll can help you prepare a continuous batting layer, but choose the batting type for the quilt's intended feel rather than the convenience of the roll.
Backing decision: Choose flannel because you want its feel and weight, not because every cozy quilt needs a flannel back.
A reversible cotton-and-flannel quilt
A reversible quilt asks you to think of both sides as finished surfaces. Place seams deliberately, check how the quilting looks from either side, and avoid a design that depends on hiding uneven tension underneath.
Both sides need to be prepared before assembly. The quilting must support the batting without making the flannel side feel board-like.
Make a sample that includes the proposed top, batting, and reverse fabric. Fold it over your forearm and scrunch it gently in your hands. If it feels too stiff at sample size, changing the quilting plan now is much easier than changing a finished throw.
Don't treat flannel backing as interchangeable with batting. Flannel adds fabric and nap, while batting supplies loft and has its own requirements for quilting support.
Care for the more vulnerable layer
Sewing Machines Plus' quilting-fabric guide recommends caring for cotton flannel with cool or warm water and low or medium drying heat. Follow the compatible care limits of the fabric, batting, and thread rather than assuming all cotton materials tolerate the same treatment.
For a baby or charity quilt, find out the likely laundry routine before choosing the fabric. If frequent hot washing is unavoidable, repeat that treatment during preparation and favor lighter, easier-handling flannel.
Include a care note with the gift. A recipient shouldn't have to guess whether a handmade quilt can go into a hot dryer.
Troubleshoot before the next seam
- Wavy blocks after washing: Check for differential shrinkage, stretched piecing, or uneven quilting tension. Don't assume the cause is only shrinkage, and don't press the quilt aggressively to hide the wave.
- Ripples during cutting: Let the fabric relax, apply light sizing if needed, and press without pulling. Recheck the grain before recutting.
- Binding that won't feed: Inspect the basting and seam bulk at the edge. Secure a shifting backing, support the quilt's weight, and test the needle before sewing farther.
Our Springfield, Tennessee showroom gives you a place to compare fabric hand and batting loft in person. If you're choosing online, compare fabric descriptions and ask about weight, care, and intended use before purchasing.
So, can you mix flannel and cotton in a quilt? Choose accents for manageable texture, a backing for an all-over soft surface, or a reversible side when the complete sample proves comfortable and stable.
Find fabrics, batting, thread, and sewing tools for your tested combination at The Fabric Company. Shop our latest flannel and quilting cotton collection here, choosing fabrics that suit your sample and placement plan. Join The Weekly Thread for more tips and 10% off your first order.