

The quilt is finished, the top is pressed, and you're holding a soft flannel print that would make the back feel wonderfully warm. Then the practical questions arrive: Will it shrink? Is it wide enough? Will the brushed surface drag on the frame or leave bulky seams under the rollers? Backing a quilt with flannel works best when you treat it as a measurement and compatibility problem first, and a softness choice second.
Why Flannel Changes How You Plan a Quilt Back
A flannel back can make a quilt feel substantial and comfortable, but it doesn't behave like smooth quilting cotton. Its brushed surface creates more drag, its looser structure can move off-grain, and its shrinkage may not match the cotton used in the quilt top. Those differences matter before you cut a single strip.
A quilting-focused guide reports that flannel can shrink by as much as 3% during washing. On a 100-inch measurement, that could reduce the finished dimension to approximately 97 inches. The same guidance notes that preshrinking can remove at least 1.5 to 2 percentage points of that shrinkage. These are planning benchmarks, not guarantees, because weave density, fiber content, finishing, water temperature, agitation, and dryer heat all affect the result. Read more about fabric selection in this guide to choosing fabric for quilts.
Measure for movement, not just coverage
The familiar rule of adding 4 inches on every side may be adequate for a stable cotton backing, but flannel needs a more deliberate check. The overhang has to cover frame attachment, quilting draw-in, diagonal movement, and differences between the flannel and the quilt top.
For longarm quilting, a practical minimum is 8 inches wider and 8 inches longer than the quilt top, which gives 4 inches of overhang per edge. Confirm the exact intake requirement with your longarmer, since professional frame standards can range from 4 to 8 inches per side. The extra fabric isn't a fudge factor. It's insurance against mismatched stretch and shrinkage.
What you'll need
Set out the materials before cutting:
- Prewashed flannel: Wash and dry it in a way that resembles the care the finished quilt will receive.
- Measuring tools: Use a long quilting ruler, a clean cutting mat, and a tape measure for checking the full backing.
- Batting: A flannel backing isn't automatically a replacement for batting. Compare loft, weight, warmth, and drying needs before choosing the sandwich.
- Seam supplies: Keep a quality thread, sharp pins or clips, and an iron nearby for a flat, stable join.
- Frame information: Ask your longarmer about overhang, seam placement, and fabric acceptance before purchasing yardage.
Flannel is a good match for a cozy quilt, but it rewards planning. A top made from unwashed cotton can still change size differently from a preshrunk flannel back, so either preshrink the major fabric components or deliberately accept coordinated shrinkage after quilting.
Choosing the Right Flannel for Backing
The prettiest flannel on the bolt isn't always the easiest flannel to quilt. Start by examining the nap, or the direction in which the brushed fibers lie. Run your hand across the fabric in both directions. One direction may feel smoother, while the opposite direction feels rougher or changes the way the color reads.
A solid or low-contrast flannel gives you more freedom to rotate the fabric. Plaids, stripes, and directional prints need more care. If the nap runs visibly from top to bottom, keep every panel oriented the same way. A rotated panel can look lighter or darker even when it's the same fabric. The selvage can help you identify the lengthwise grain, but don't assume the printed design is perfectly square to it.
For more fabric-selection ideas, browse this guide to flannel fabric by the yard.
Weight affects the whole sandwich
Avoid relying only on labels such as “lightweight” or “heavyweight.” Compare the hand of the flannel with your batting and quilt top. A dense flannel paired with thick batting can create a heavier quilt that takes longer to quilt and dry. A loosely woven flannel may feel soft at the cutting table but can stretch, fray, pill, or distort more readily during handling.
Weight also affects needle and thread choices, stitch visibility, and quilting density. A longarm operator may prefer a test seam before loading an unfamiliar flannel, especially when the backing has a raised nap or a lofty hand.
Width and weave change the cutting plan
A 108-inch wideback can eliminate several seams, but wide fabric still needs to be washed, dried, checked for distortion, and squared. Regular flannel bolts require piecing, which adds seam bulk and creates more places for panels to stretch at different rates.
Printed flannel typically places the design on the surface, while yarn-dyed flannel builds color into the yarns. That difference changes how the fabric looks from either direction and how carefully you need to align stripes or plaids. Select based on the finished quilt's use, not softness alone. A gift quilt that will be washed often needs a backing with enough stability for repeated handling.
Prewashing, Drying, and Squaring the Flannel
Prewashing is the foundation of a reliable flannel backing. Cut a small swatch from the fabric, mark its dimensions, and wash and dry it with the same process you plan to use for the full backing. Measure it again after drying. That test gives you useful evidence about the specific fabric in your hands, which is more reliable than treating every flannel as identical.
Wash the full piece before cutting, then dry it completely. If you're uncertain about colorfastness, use a color-catcher sheet and inspect the water and fabric after the first cycle. Press the flannel flat while it still has a little moisture, or use enough steam to relax wrinkles without stretching the cloth. The aim is a dry, stable piece that can be measured accurately. This guide to preshrinking fabric provides additional preparation context.
Use the wash cycle as a measurement test
Measure the flannel in both directions before washing and after drying. Record the difference, then calculate the usable dimensions. The commonly cited 3% maximum shrinkage benchmark for flannel comes from quilting instruction, but individual results vary. A small test sandwich is worthwhile when the quilt is oversized, valuable, or intended for frequent laundering.
If the quilt top is unwashed, washing only the flannel can create dimensional differences between the layers. You have two sound choices:
- Preshrink the major components: Wash the flannel and, when appropriate, the quilt-top fabrics before construction.
- Accept coordinated shrinkage: Leave compatible components unwashed and plan for the finished quilt to change after quilting.
Neither choice is automatically right. A deliberately crinkled finish may be part of the design, while a flat, precise quilt may call for more complete stabilization.
Square the fabric before cutting
After drying and pressing, lay the flannel on a large cutting surface. Find a true crosswise line, then align the fabric's grain with the mat. Widebacks and loosely woven flannels can emerge from washing with a skewed edge, so don't use the raw cut edge as your only guide.
For a longarm finish, begin with the quilt-top measurement and add 8 inches to the width and length, providing a minimum 4-inch overhang on each edge. Check the backing at several points, not only at the center. If the fabric hasn't been tested, a practical budget buffer is at least 5% extra yardage, as recommended in independent quilting guidance.
Piecing Panels or Picking a 108-Inch Wideback
There are two dependable routes. You can piece standard-width flannel into a custom backing, or you can choose a 108-inch wideback and reduce the number of joins. The right choice depends on quilt size, print direction, available yardage, and how much seam bulk your machine or longarm frame handles comfortably.
A single wideback often loads faster and avoids a seam crossing the center of the quilt. Piecing still makes sense for a custom design, a directional arrangement, or a backing built from stash and remnants. Keep nap direction consistent across every panel so the surface reads evenly when the quilt is turned over.
| Factor | 108-Inch Wideback | Pieced Standard Flannel |
|---|---|---|
| Seams | Few or none, depending on quilt size | One or more seams, with added bulk |
| Cutting | Efficient for broad quilt dimensions | Requires panel planning and seam allowances |
| Design | Best for large-scale prints or simple backs | Better for custom backs, plaids, and scrap use |
| Loading | Fewer ridges to manage on the rollers | Seams need careful pressing and placement |
| Risk | Can still distort after washing | Panels may stretch at different rates |
A longarm backing generally needs 4 inches of overhang on every side, but the exact intake specification belongs to the operator. The verified preparation guidance recommends checking the backing at multiple points and adding 8 inches to each quilt-top measurement before cutting. Don't assume nominal fabric width will remain usable after shrinkage.
For a wideback option, review 108-inch flannel quilt backing. For smaller quilts, a well-prepared pieced back may be the better use of your stash. For larger quilts, fewer seams often mean less handling, less bulk, and a smoother time on the frame.
Seams, Pressing, and Loading on the Frame
Build the backing so it lies flat before it reaches the rollers. Remove selvages from seam areas, then join panels with a firm seam allowance between 1/2 and 5/8 inch, following the preparation guidance for longarm quilting. Backstitch at the seam ends, use a shorter stitch length, and handle the flannel gently so the seam doesn't ripple.
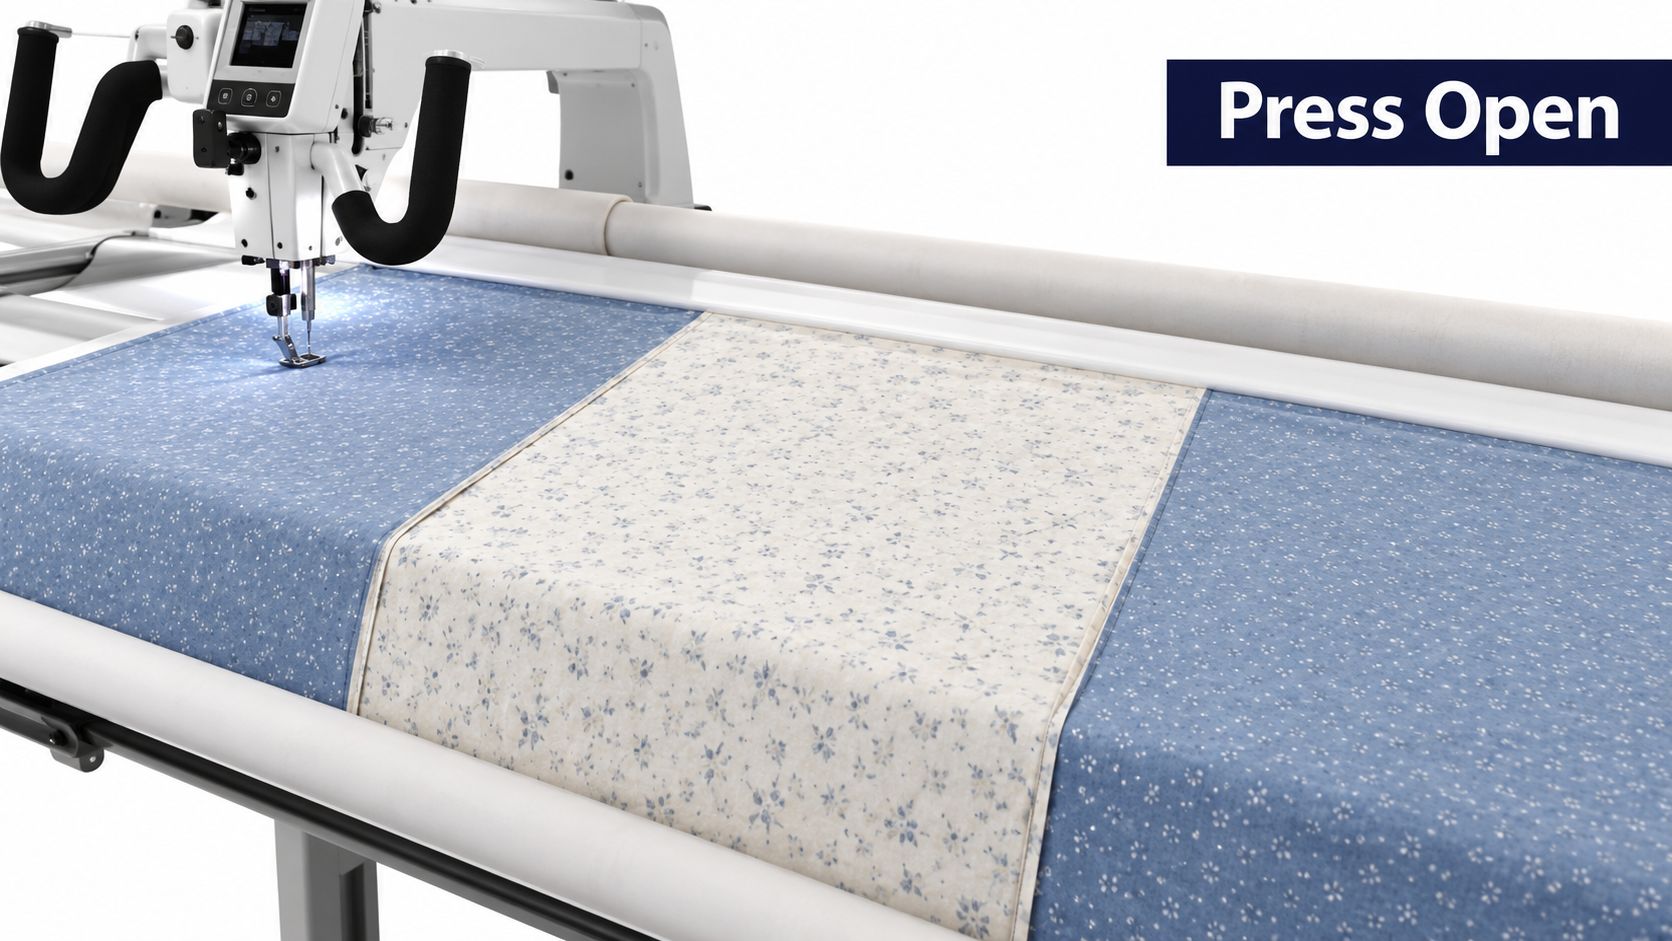
The backing needs a smooth, stable path from the cutting table to the quilting frame.
Keep seams flat and predictable
Whenever possible, place a horizontal seam parallel to the quilt's top and bottom edges. Longarm preparation guidance notes that this orientation lies flatter on the rollers. A vertical seam can roll into a thicker ridge and create a localized tension problem.
Press the completed seam thoroughly. The correct pressing direction depends on the flannel's bulk and the longarmer's preference, but the finished backing must lie flat without a raised ridge, fold, or loose thread. Keep the seam count low. Every additional join increases bulk and creates another area where fabrics may stretch differently.
Mark the top edge with a temporary label. Then spread the backing on a clean floor or large table, square the corners, and check that it extends at least 4 inches beyond the quilt top on all sides. Inspect the seams for skipped stitches, loose threads, and unpressed areas before loading.
Attach the backing to the leader cloth evenly. Roll slowly, keeping the grain straight and watching for diagonal tucks. Minor loading wrinkles may relax, but deep folds can remain trapped and cause puckering or uneven stitch regulation.
The video below shows the kind of frame movement and panel handling worth watching before your first flannel-backed project.
Basting and Quilting Through Brushed Flannel
Flannel's nap can grip the batting and shift as you baste. Work from the center outward, smoothing the backing as you go. For domestic-machine quilting, use baste pins or a temporary adhesive such as 505 at 4- to 6-inch intervals, then check the back after each section has been stitched.
A longarm frame needs the same attention even when the backing is mounted. The brushed surface can create more drag than smooth quilting cotton, so denser basting may help. One independent quilting recommendation uses approximately 2-inch basting intervals for flannel backs. Test the method on a scrap or small sandwich before committing to the full quilt.
Match the quilting design to the nap
A brushed surface can hide fine quilting texture. Medium meanders, gentle curves, and open crosshatching usually allow the flannel to settle without forcing too much movement into a small area. Tight quilting can restrain the layers unevenly and make puckering more visible after washing.
Thread and needle choices should follow the actual flannel weight and batting loft. Use a fresh needle suited to the combined thickness, then test the thread path and tension on a sample. If the nap grips the thread, a small tension adjustment may help, but change one setting at a time and inspect both sides.
Practical rule: Test the sandwich, not just the fabric. Flannel, batting, thread, needle, and quilting density interact.
Remember that flannel is not automatically a substitute for batting. Adding it as another insulating layer changes loft, weight, stitch spacing, and drying time. A thin batting layer may still give the quilt the structure and texture you want.
Finishing Tips to Prevent Stretching and Pilling
The last inspection should happen before binding, not after the first wash. Lay the quilt flat and look across the flannel side for ripples, diagonal pulls, trapped folds, and areas where the backing has drawn in more than the top.
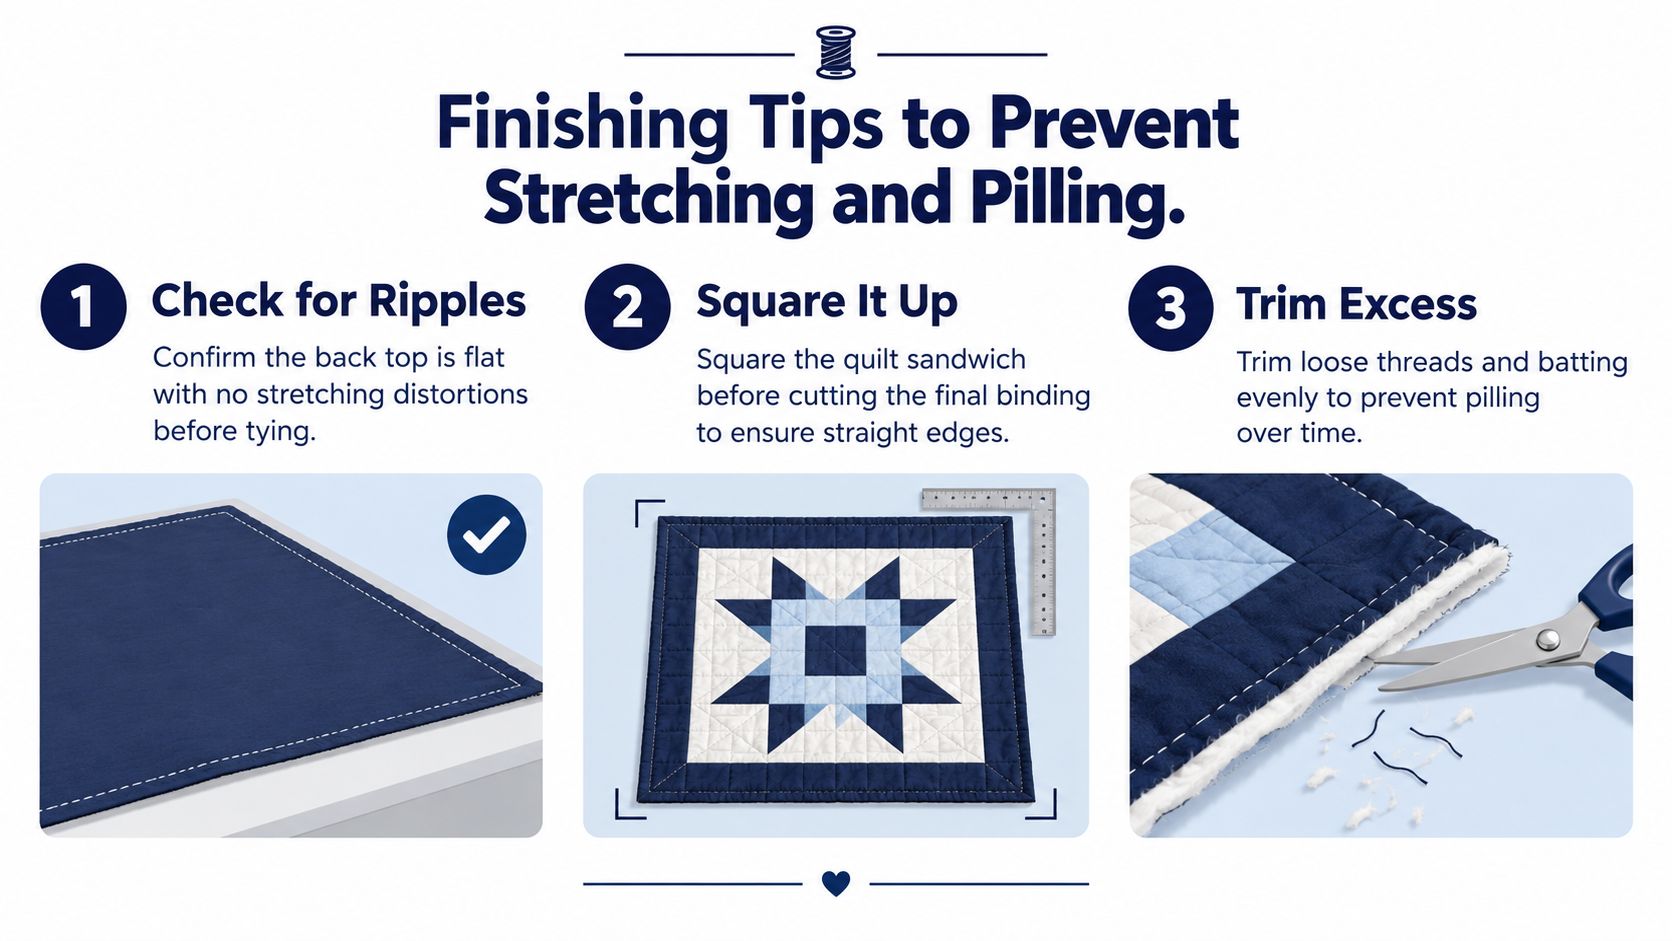
Use this finishing checklist to review the backing before trimming and binding.
Finish with a simple checklist
- Check for ripples: The backing should lie flat without stretching distortions or deep folds.
- Square it up: Square the quilt sandwich before cutting the final binding. Straight edges begin with a stable sandwich.
- Trim excess: Trim loose threads and batting evenly so they can't work into surface pills during laundering.
- Follow the grain: Load the backing with the lengthwise grain running predictably through the frame. Avoid placing a bias edge where it will carry unnecessary tension.
- Handle the nap gently: Repeated brushing, dragging, and rough handling can disturb the surface fibers.
- Relax, don't flatten: Steam the back to ease quilting distortion, but avoid pressing aggressively over the brushed surface.
- Control the dryer: Use low heat, keep the tumble time short, and remove the quilt while it's slightly damp when the care label and fabric allow.
Loose threads should be clipped rather than pulled. A lint roller can remove surface fuzz before the first wash, which may reduce the loose fibers available to form pills. For more care guidance, see how to prevent pilling.
Quality matters as much as preparation. Quilter reports describe flannel shrinkage in the range of approximately 3% to 11%, with fabrics from the same vendor and purchase sometimes behaving differently. Those reports are practical observations rather than controlled testing, but they reinforce the central point: measure your fabric, test the sandwich, and confirm the longarmer's requirements before cutting the full backing.
When the backing is washed, squared, seamed, and loaded with care, the project becomes much more predictable. The next quilt will go faster because your measurements, seam placement, and finishing decisions won't be guesses.
The Fabric Company carries flannel by the yard, 108-inch quilt backings, batting, thread, and other supplies for preparing a stable quilt sandwich. Visit The Fabric Company, including our Springfield, Tennessee showroom, to choose backing materials for your next quilt, then shop our latest flannel collection and join The Weekly Thread for more tips and 10% off your first order.