

One Saturday I measured and cut squares until lunch and still hadn't sewn a seam. The next weekend I opened a sealed pack and was piecing within the hour. That gap is why so many quilters keep precuts on hand.
Why Quilters Reach for Precut Fabric Squares
The first practical question is what a precut pack saves, and what it costs you in flexibility. Precut fabric squares are coordinated pieces sold in matched sets, including 5-inch Charm Packs and 10-inch Layer Cakes. They arrive ready to press, sort, and sew, with no initial square cutting.
A pack works like a recipe kit with measured ingredients: the prints are coordinated and the pieces are trimmed, while you still choose the pattern and do the sewing.
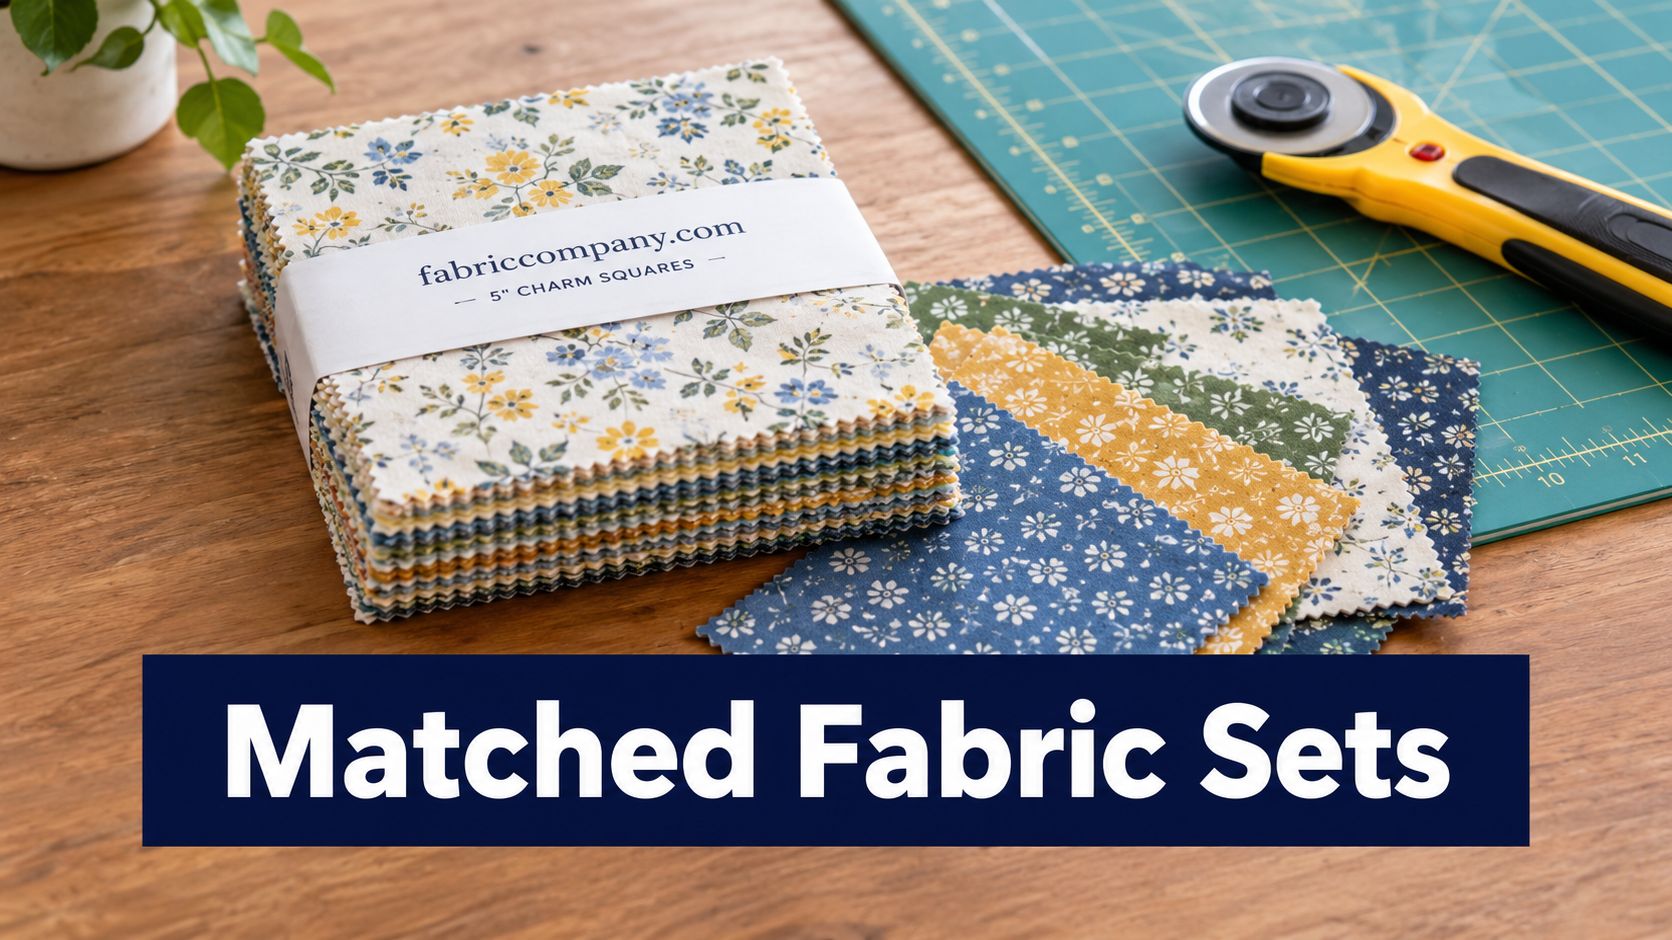
The trade-off: You save cutting time and the effort of choosing prints from one fabric line. In return, you get a fixed piece size. Check that the pattern uses that size, or allows you to subcut it, before buying.
Square-based patchwork remains a familiar way to build quilt blocks. Precut packs suit layouts such as four-patch, nine-patch, checkerboard, and half-square triangle designs, where repeated squares provide a straightforward starting point. Handmadelytics' overview of precut history and square-based patchwork discusses this format without making it a requirement for every quilt.
Your choice depends on the fabric you already own, the pack price, and the time you want to spend cutting. Compare the cost per yard with yardage, then use the square count and sewn-width math to check how many usable pieces your layout needs and what finished size they can make. That check helps you decide whether the convenience is worth the price before you buy.
Precut Fabric Square Sizes and Piece Counts at a Glance
Pack labels give you two quick checks: the square's cut size and how many pieces you get. Use both to estimate whether a format fits the pattern and how much fabric is in the bundle.
| Format | Cut size | Typical count | Approx. yardage | Best for |
|---|---|---|---|---|
| Mini charm | 2.5-inch squares | About 42 | Small amount, check label | Mini quilts, borders, small blocks |
| Charm pack | 5-inch squares | 40 to 42 | About 0.70 to 0.75 yard | Four-patch, nine-patch, scrappy quilts |
| Layer cake | 10-inch squares | 40 to 42 | About 2.75 yards | Half-square triangles, larger blocks, subcut charms |
| Jelly roll | 2.5-inch strips | About 40 strips | About 2.5 yards | Strip quilts, string piecing |
| Fat quarter | 18 by 21 inches | 1 piece | About one-quarter yard | Appliqué, pillows, binding, small projects |
A 5-inch pack with 42 squares contains approximately three-quarters of a yard. A pack of 42 10-inch squares contains approximately 2.75 yards. These standardized dimensions and bundle counts are summarized in QuiltKit's reference on standardized precut dimensions and bundle counts. Treat the figures as a useful comparison, then check the label: manufacturers may vary the contents.
Matching a Format to a Pattern
Start with the pattern's required cut size. A pattern calling for 5-inch squares can use a Charm Pack directly. For larger blocks or triangles, a Layer Cake gives you more fabric per square to work with, though subcutting changes how many usable pieces you get.
The 42-piece convention makes it easier to compare bundles and estimate project needs, but it is not a guarantee for every pack. Check the piece count before buying, especially if your block plan uses every square.
Browse the Precuts collection at fabriccompany.com to compare Charm Packs, Layer Cakes, Jelly Rolls, and Fat Quarters with your pattern list.
Quick test: Match the cut size to the pattern, then check that the pack has enough pieces for your blocks and a few spares.
One sizing detail matters during planning: the cut size is not the finished block size. Seam allowances reduce the sewn dimensions, so use the finished measurement when checking whether a layout will fit.
Precuts Versus Yardage Cost Time and Waste
A pack can save cutting time and offcuts, but its cost per yard depends on the format. Compare the figures before choosing, and remember that pack prices and yardage costs vary by fabric and seller.
| Criteria | Precut squares | Yardage |
|---|---|---|
| Cost per yard | About $17.90 for a 5-inch pack; about $12.70 for a Layer Cake | Compare the bolt's price per yard with the pack's equivalent |
| Cutting time | Ready to sew, unless subcutting is needed | Requires cutting to the pattern's sizes |
| Color coordination | Curated by the designer | Selected print by print |
| Waste and remnants | Few offcuts | Leftovers can be saved for later projects |
| Design flexibility | Set square and strip sizes | Cut to the shapes and sizes the pattern needs |
| Best fit | Scrap quilts, gifts, coordinated palettes | Large quilts, backings, single-fabric designs |
Running the Per-Yard Math
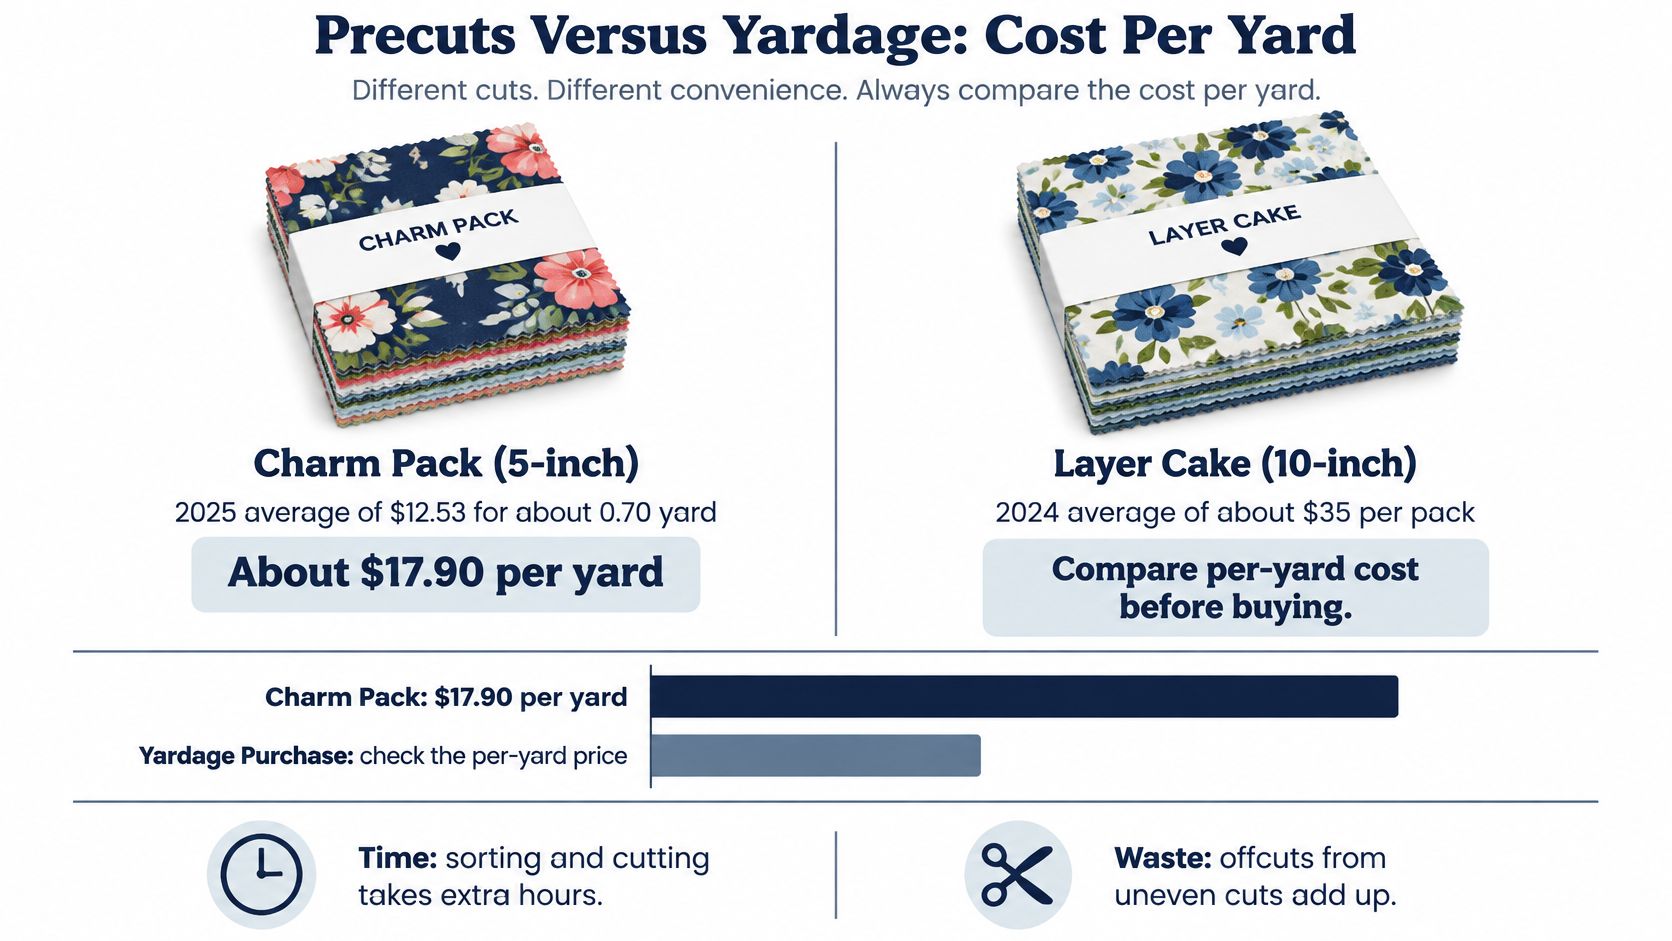
A 2025 average 5-inch precut pack cost $12.53 and contained approximately 0.70 yards, according to Quilting Room with Mel's 2025 average for 5-inch precut packs. Dividing the pack price by its yardage gives about $17.90 per yard.
A Layer Cake worked out lower per yard in the 2024 figures. The average price for a pack of 40 to 42 squares was approximately $35, according to ZipDo's 2024 average layer cake price. At about 2.75 yards per pack, that is roughly $12.70 per yard. These figures cover different formats and years, so compare like with like when shopping.
For another reference point, a 10-inch pack of Moda Bella Solids retailed for $14.99 and contained 42 squares in 2024, according to Handmadelytics' 2024 Moda Bella Solids pack price. Prices vary by brand, line, and whether the fabric is solid or printed. For yardage, check the guide to buying fabric by the bolt, then compare the bolt's price per yard with the equivalent pack cost.
The Verdict by Situation
- Choose precuts: For scrap quilts, time-limited gifts, or a coordinated palette without searching through your stash.
- Choose yardage: For large quilts, single-fabric designs, borders, and backings. Its price advantage depends on the bolt price, so run the per-yard comparison first.
- Use both: Pair precuts for a varied top with yardage for the background, binding, or a 108-inch backing to avoid piecing a large quilt back.
Precuts trade cutting work and fabric selection for a set format and a pack price. Yardage gives you control over cut size, with cutting and leftover fabric to manage. Compare the numbers, then weigh those trade-offs against the time and flexibility your project needs.
Sewn Width Math for Accurate Precut Layouts
| Cut size | 2 squares | 3 squares | 4 squares |
|---|---|---|---|
| 2.5-inch | 4.5 inches | 6.5 inches | 8.5 inches |
| 5-inch | 9.5 inches | 14 inches | 18.5 inches |
| 10-inch | 19.5 inches | 29 inches | 38.5 inches |
Use this formula for any row: total width equals number of squares times cut size, minus one-half inch for each seam between them. Each sewn edge consumes 1/4 inch, so a piece joined on two sides loses 1/2 inch from its finished dimension, as explained in this lesson on 1/4-inch seam allowance as dimensional control.
Two 5-inch squares joined on one edge should measure about 9.5 inches wide. If yours measure less, your seam is eating too much fabric.
Why Small Errors Grow
A seam only 1/16 inch wider on each adjoining edge removes an extra 1/8 inch from that unit. Across a row of blocks, you repeat that loss at every join until intersections visibly drift.
Pinked edges add another trap. Peaks and valleys don't sit on the same line, so measure from the same point, peak or valley, on every precut fabric square you check.
A 10-inch square sewn with a quarter-inch seam on all four sides produces an approximately 9.5-inch sewn unit, as noted in Quilt Keeper Studio's explanation of cut size versus finished size. Check pattern requirements against unfinished and finished dimensions, not the size printed on the pack.
The Test-Sew Routine
- Sew a test pair: Join two squares you'd be willing to sacrifice.
- Measure the unit: Compare it with the table above.
- Adjust the guide: Shift to a scant or full 1/4-inch setting until the unit measures right.
Pressing direction helps seams nest at intersections. It can't correct a seam allowance that's systematically wrong, so fix the guide before you assemble the whole top.
Prewashing Precuts Without Losing Precision
A test square can settle the prewashing question before a full quilt is at risk. Washing may remove excess dye and help control later shrinkage, but small precut squares can fray, curl, or lose their exact dimensions in the process. The trade-off is between handling fabric before sewing and keeping the factory-cut size intact.
Cotton can shrink differently along the warp and weft. One study measured warp-direction shrinkage of approximately 1.29 to 1.71%, compared with 0.002 to 0.045% in the weft, according to this Manchester-hosted study of warp and weft shrinkage in cotton. That difference can leave a square slightly rectangular or skewed after washing.
Raw cotton shrinkage estimates range from 5 to 10%, but treat that as a range to test, not a promise. QuiltKit's guidance on prewashing precut squares and shrinkage ranges discusses those estimates. Your fabric and care method affect the result.
Batting changes the outcome too. If Batting, whether needle-punched cotton with scrim or a loftier blend, shrinks at a different rate from the quilt top, laundering can leave puckers.
A Decision Framework You Can Use
- Prewash a test piece: A baby quilt or everyday throw will likely be washed often, so testing helps you see how the fabric behaves.
- Skip prewashing: Keep precuts intact when the pattern leaves little cutting margin or the project is a wall hanging that will not be laundered.
- Keep fabric histories consistent: Washed and unwashed squares can shrink differently later. Do not mix them in one quilt.
- Plan for the backing: Decide whether to wash a large 108-inch backing along with the top.
If you choose to prewash yardage, use these steps for how to preshrink fabric before cutting borders or backing pieces.
The Test and Measure Routine
- Choose one square: Pick a color that may bleed or a print repeated in the pack.
- Measure before washing: Record its width, length, and both diagonals.
- Wash and dry: Use the care method planned for the finished quilt.
- Measure again: Compare each measurement with the original.
- Check the diagonals: Unequal changes point to distortion that can affect a larger layout.
A washed test square gives you a practical estimate of size loss before you commit the rest of the pack. If preserving the manufacturer's cut matters more, leave the precuts unwashed and accept controlled shrinkage in the finished quilt. Let the test, rather than a blanket rule, guide your choice.
How to Subcut a Layer Cake Into Charm-Size Squares
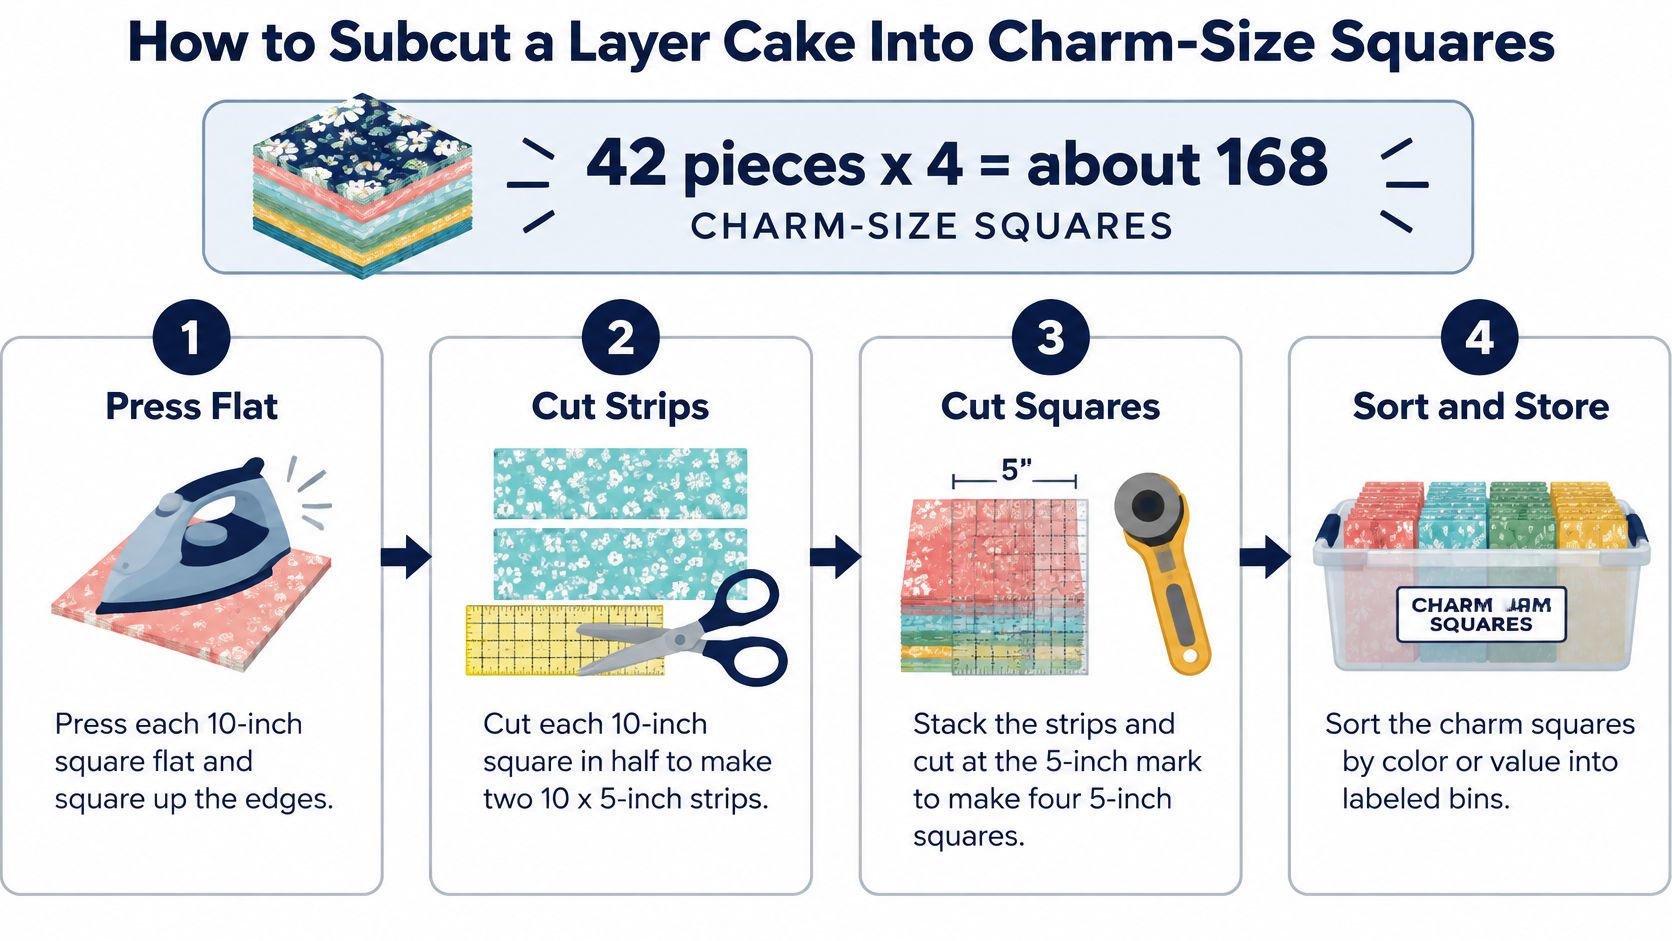
A Layer Cake square gives you four charm-size pieces, provided the factory cut is accurate and your ruler stays aligned. Each square measures 10 inches by 10 inches, while a Charm Pack square measures 5 inches by 5 inches, according to Moda's Precuts 101 guide to Layer Cake and Charm Pack sizes. A 42-piece Layer Cake can yield about 168 charm-size squares. Before buying one to subcut, compare its cost per yard with ready-cut squares, then check whether you also want the larger pieces.
Cutting steps
- Press and measure: Flatten each square, then check all four sides. Factory cuts can vary, so confirm the usable size before cutting.
- Stack a small group: Align edges carefully. Keep each print's squares together if you want to preserve the bundle's pairings.
- Set the ruler: Line the 5-inch mark of a square ruler up with the stack's bottom edge.
- Cut two strips: Slice across the stack to make two 10-by-5-inch strips from each square.
- Make the squares: Cut each strip at 5 inches. Each original square should now yield four pieces.
- Check alignment: Square up a sample every few cuts. If the stack drifts, later pieces can come out skewed.
- Sort and label: Store squares by print family or value so you can find coordinated pieces later.
A sharp blade helps keep stacked fabric from shifting or dragging. If the cutter catches, review this guide to choosing a rotary cutter for quilting for advice on blade size and handle fit.
Keep stacks short. A tall stack can shift under the ruler, leaving the bottom squares out of square. Smaller stacks take longer, but reduce the need to trim uneven pieces.
Subcutting makes sense when you want larger units and charm squares from the same coordinated fabric line. If you only need charm-size pieces, compare the Layer Cake's cost per usable yard with a ready-cut Charm Pack, including the time and fabric lost to inaccurate cuts.
How Many Precut Squares Your Quilt Needs
Start with the block layout and the unfinished block size. For a throw with 3 by 4 nine-patch blocks, each 14 inches unfinished, the top measures 42 by 56 inches before borders. That sewn-width calculation gives you a more useful estimate than the finished size shown in a pattern photo.
Count the pieces: Twelve blocks with nine squares each require 108 charm squares. Add about 10% for trimming and mistakes, bringing the target to roughly 119 squares. Three 42-piece Charm Packs provide 126 squares, leaving a small cushion.
For Layer Cakes, one 10-inch square can be subcut into four charm-size squares. A 42-piece pack therefore yields about 168 units if you subcut every square. Compare that piece count with your layout before choosing between ready-cut charms and larger squares.
Keep borders, binding, and backing separate from the precut count. Estimate those yardage needs on their own with this walkthrough on how to calculate fabric yardage. For a quilt over twin size, plan on a 108-inch backing rather than relying on leftover squares.
Check your stash before buying the buffer. Unused squares from another pack may already cover those extra pieces.
Projects That Make the Most of Precut Squares
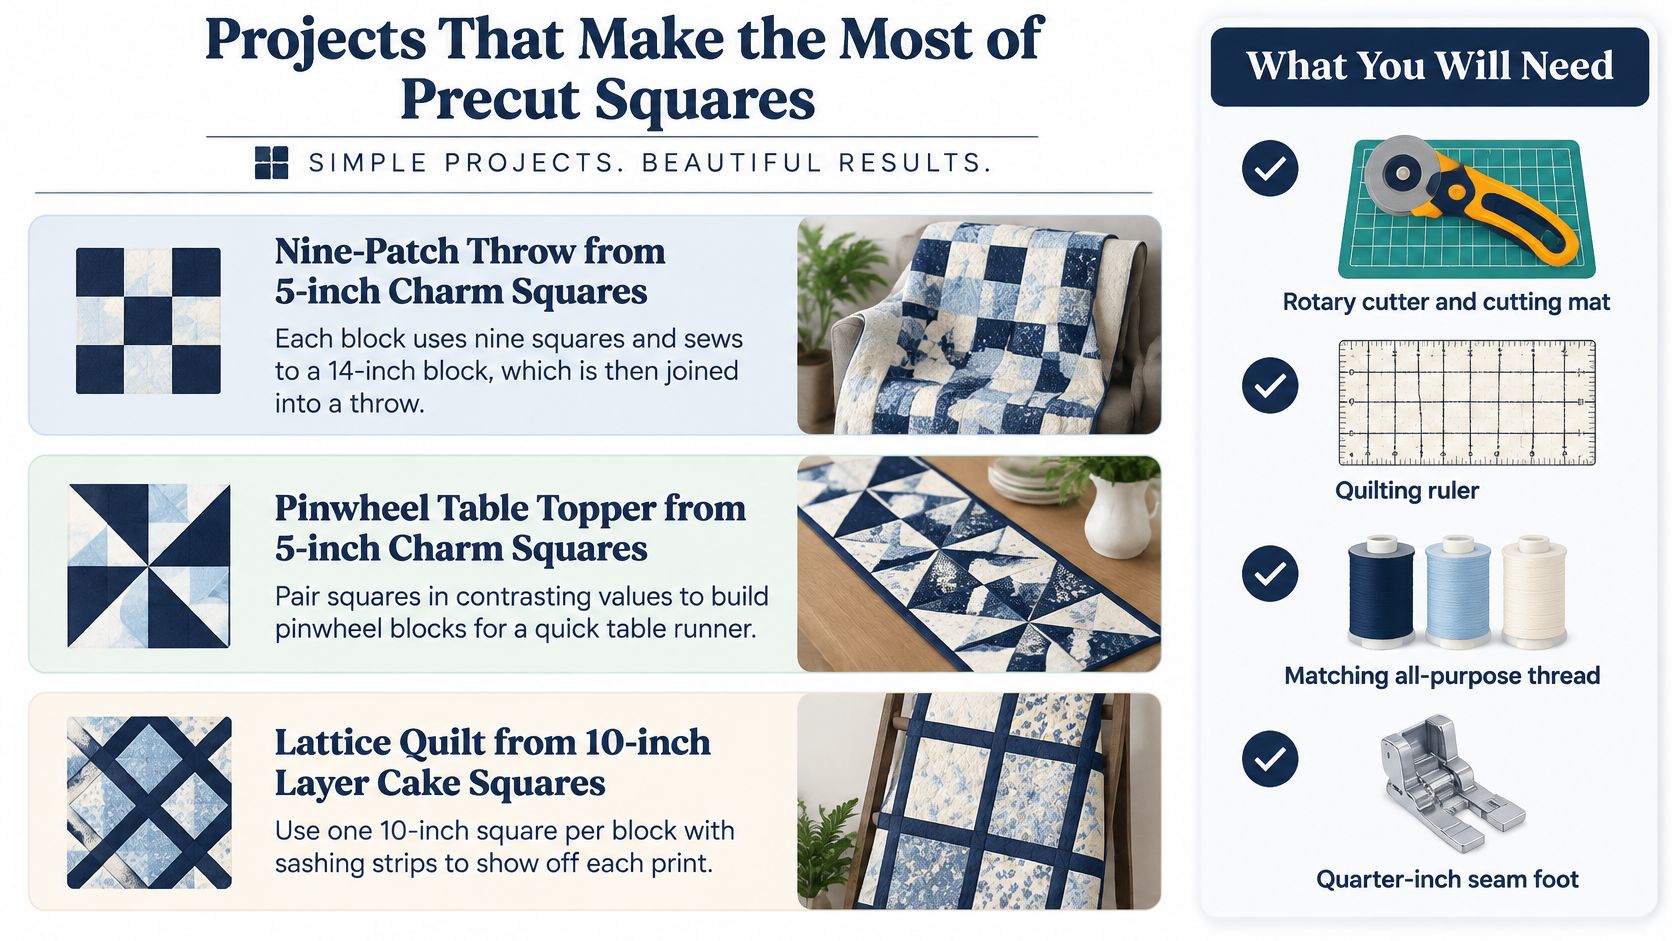
Choose a project by matching its piece count to the pack, then check the sewn width before cutting. These examples use the earlier square-count method: blocks or units needed, multiplied by pieces per unit, with a little extra for trimming.
Nine-Patch Throw From 5-Inch Charm Squares
For a 42-by-56-inch unfinished top, make 12 nine-patch blocks measuring 14 inches unfinished. Each block uses nine 5-inch squares, so the top takes 108 Charm Squares, plus a buffer for mistakes and trimming. Borders and binding require separate yardage.
- Sort the squares into light and dark values, keeping enough contrast for each block.
- Arrange nine squares in three rows of three, then repeat for all 12 blocks.
- Sew each row with a consistent quarter-inch seam and press neighboring row seams in opposite directions.
- Join the rows, nest the seams, and assemble the blocks in a three-by-four layout.
Half-Square Triangle Table Runner From a 10-Inch Layer Cake
A 3-by-4 layout of half-square triangle units finishes at about 24 by 32 inches, assuming each unit finishes at 8 inches. Use 12 print squares and 12 solid 10-inch squares to make 24 units. The method below yields two units from each print-and-solid pair; extra fabric is needed for trimming and binding.
- Pair one print square with one solid square, right sides together.
- Mark a diagonal, sew a quarter-inch seam on both sides of the line, then cut along the marked line.
- Press the units open and trim each to 8½ inches square.
- Arrange in a zigzag or diamond layout, sew rows, then join the rows. See these easy layer cake quilt patterns for more layout ideas.
Strip Quilt From a Jelly Roll
A 40-by-48-inch unfinished top can be built from 20 strips, each cut to 40 inches long and sewn along the long edges. Each strip starts at 2½ inches wide and finishes at about 2 inches, giving 40 inches across when the strips are joined. A Jelly Roll's strip count varies, so check the pack and reserve extra strips for trimming and binding.
- Choose and order the strips, then sew them together along their long edges.
- Press the seams in one direction, keeping the top flat.
- Square the short ends with a ruler and rotary cutter, trimming the joined panel to 40 inches long.
- Add borders from yardage if you want a larger top, then use the remaining strips for binding if there is enough.
What You Will Need
Tools: Rotary cutter, cutting mat, square ruler, sewing machine, and an accurate quarter-inch guide. Check the guide by sewing two test squares together, then measure the unit against the pattern's unfinished size.
Precuts: Charm Squares, Layer Cake squares, or Jelly Roll strips in the quantities each project specifies.
Yardage: Separate fabric for any background, borders, binding, and backing. Choose batting that suits how the quilt will be used and quilted. Low-loft batting keeps a flatter profile; higher loft adds more dimension and can make dense quilting harder to manage.
Set the materials beside their project steps before sewing. This makes missing yardage or an undersized backing easy to catch before the quilt top is assembled.
Checklist for Buying Precut Squares and Your Next Step
A few checks before checkout can keep a good-looking pack from becoming a stalled project.
- Confirm the label: Check the piece count and cut size in inches. Packs commonly contain 40 to 42 squares.
- Count from the pattern: Use the calculator steps above, then allow about 10% extra for trimming and mistakes.
- Match dye lots: Choose pieces from one fabric line and dye lot to avoid visible shade shifts.
- Check availability: Make sure the line is still available before planning a large quilt around it.
- Store flat: Keep squares in labeled bags, out of direct light, to protect color and limit creasing.
- Log your leftovers: Record unused pieces in your stash so you can plan them into a future project.
For a practical next step, compare the Charm Packs and Layer Cakes in The Fabric Company's Precuts collection with your pattern's required cut size. Then use your square count to check whether the pack has enough pieces before buying.
You already have the size chart, cost-per-yard comparison, and sewn-width math to weigh a pack against yardage. Check the piece count, calculate the finished layout, and choose the option that fits your project and budget.