

You've found a quilt kit with a beautiful cover image, but you're still wondering what “easy” really means. A kit can remove the hardest fabric decisions while leaving backing, batting, quilting, and binding in your hands. The key is to treat the kit as a layered promise, then check which layers are included before you buy.
What Makes a Quilt Kit Easy and What You Actually Get
A quilt kit usually brings three helpful ingredients together: fabric for the quilt top, a written pattern, and instructions for that specific design. Many kits also include fabric for the binding. That combination removes much of the uncertainty that makes a first quilt feel intimidating. You don't have to stand in front of a fabric wall wondering which prints belong together, calculate every piece of yardage, or turn a cover photo into a cutting plan by yourself. Beginner quilt kits simplify the first project by pairing coordinated materials with guided steps.
The word “easy” doesn't mean the quilt sews itself. It usually means the kit has already handled several decisions:
- Fabric selection: The prints and colors were chosen to work together.
- Cutting plan: The pattern tells you which shapes and measurements the design needs.
- Construction order: The instructions show how small units become blocks, rows, and a quilt top.
- Binding plan: Some kits include binding fabric, while others only tell you how much to purchase.
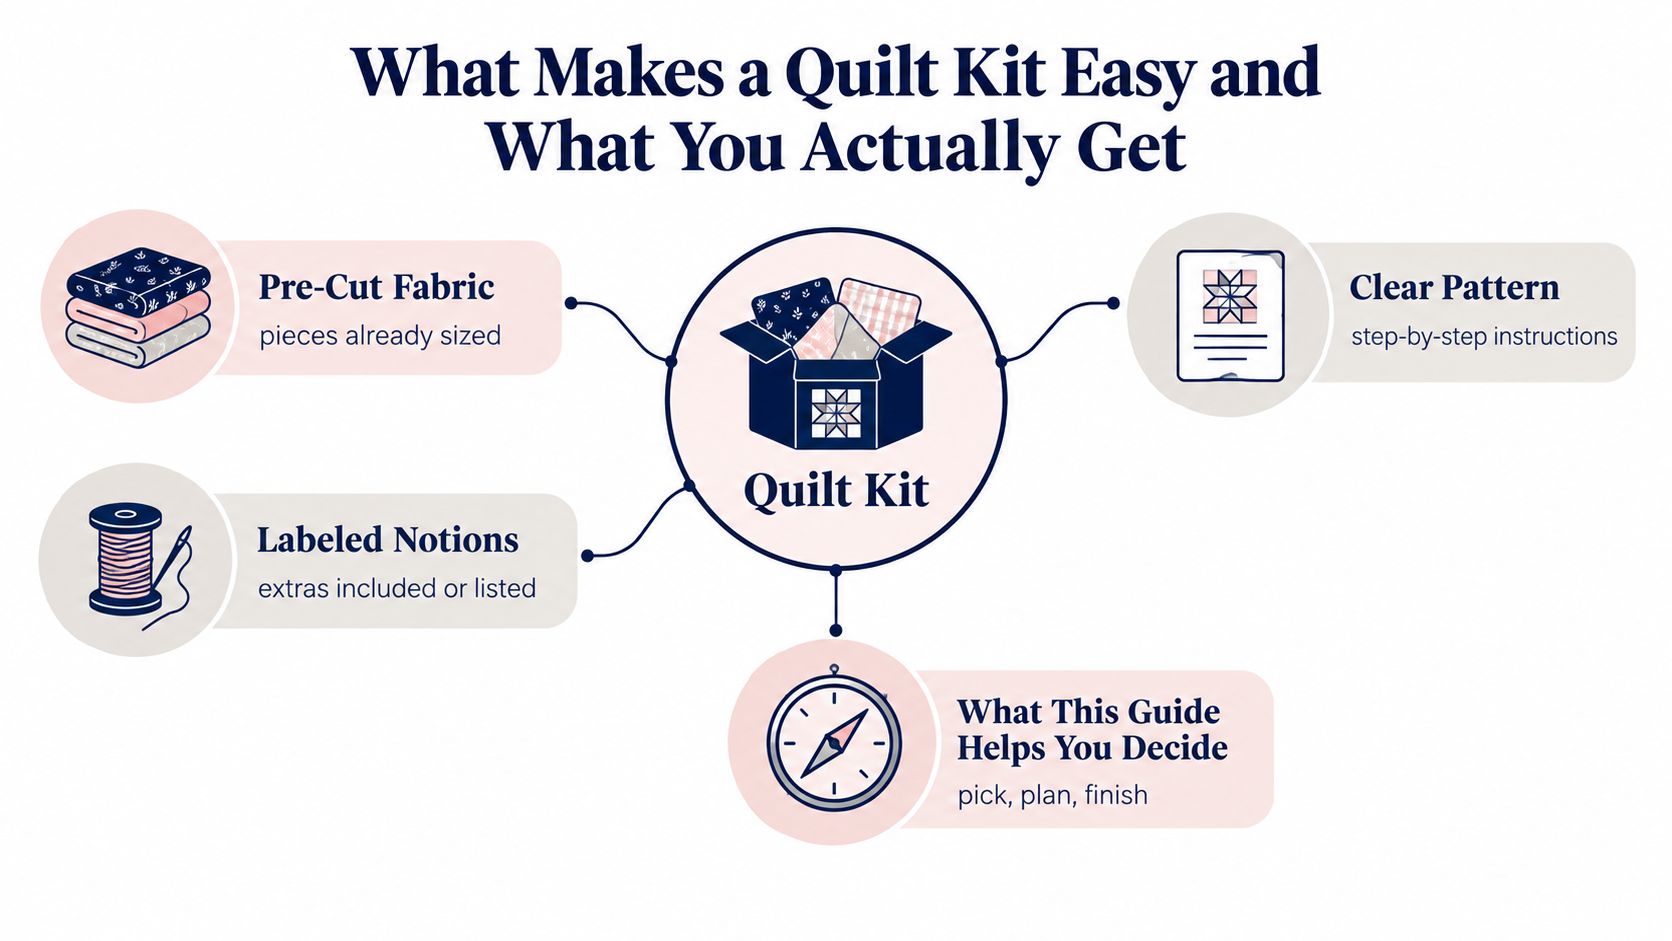
What may be missing from the box
The most important label to find is the contents list. A standard kit commonly includes the pattern and fabric for the quilt top and binding, while batting and backing are often separate purchases. Some kits are more complete, but you shouldn't assume that a photograph of a finished quilt represents everything inside the package.
You may also need to supply:
- Batting, the insulating layer whose loft affects warmth, drape, and texture.
- Backing fabric, which covers the underside of the quilt.
- Thread, ideally suited to piecing and quilting.
- Notions, such as pins, clips, a seam ripper, rotary cutter, ruler, mat, and sewing-machine needle.
- Finishing equipment, including an iron, basting supplies, and possibly a walking foot.
That distinction matters because an easy kit may be easier to start than to finish. The rest of your decision comes down to the kit format, pattern complexity, skill match, finishing supplies, and the pace you can maintain without rushing.
Complete Kits, Beginner Kits, and Precut-Friendly Kits Compared
Not every easy quilt kit removes the same work. A complete kit aims to bundle nearly everything, including top fabric, binding, backing, batting, thread, and sometimes a needle. Your job then centers on following the pattern, sewing accurately, quilting the layers, and finishing the edges.
A beginner kit usually takes a lighter approach. It often supplies the quilt-top fabric, pattern, and possibly binding, but leaves backing and batting for a separate purchase. That isn't necessarily a flaw. Some makers want to choose a personal backing print or select a batting with a particular loft.
A precut-friendly kit builds around ready-sized units such as Charm Packs, Layer Cakes, or Jelly Rolls. The pieces are already bundled and measured, but the pattern may expect you to understand layout, pressing, chain-piecing, and accurate seam allowances. You can review the basics of this format in what a Layer Cake means in quilting.
Easy Quilt Kit Formats Side by Side
| Kit Type | What's Included | You Still Need to Buy | Best For |
|---|---|---|---|
| Complete kit | Top fabric, binding, backing, batting, pattern, and possibly thread or a needle | Basic tools and any omitted notions | Gift-makers and quilters who want one coordinated purchase |
| Beginner kit | Quilt-top fabric, pattern, and sometimes binding | Usually backing, batting, thread, and tools | First-time makers who want guidance and some finishing choice |
| Precut-friendly kit | Charm Packs, Layer Cakes, Jelly Rolls, or other prepared fabric units with a pattern | Often backing, batting, binding, and basic notions | Makers comfortable with layouts and consistent seams |
A true beginner usually benefits most from a beginner kit with large, simple shapes and clear instructions. Precut-friendly kits can feel wonderfully fast, but they aren't automatically effortless. They still require you to read the layout carefully and keep repeated units oriented correctly.
Features That Make Any Quilt Kit Easier to Finish
A kit earns the word “easy” through its details. Before buying, inspect the pattern photograph, contents list, and instruction sample rather than relying only on the product title.
Pattern clarity
Look for large full-color diagrams, numbered steps, and fabric labels such as Fabric A through Fabric D. Measurements in both inches and centimeters can help makers who use different rulers or follow international patterns. A good pattern makes the next action obvious, whether that means joining two squares or assembling a complete row.
The instructions should also identify pressing directions, seam allowances, and the finished quilt size. If the pattern only shows a finished photograph with no construction preview, you'll have less support when the pieces leave the cutting table.
Fabric preparation and assembly
Precut pieces with labels reduce sorting mistakes. Foundation-pieced panels can also help, provided the pattern explains how to use them. For a first project, strip quilts, big-block designs, and patterns with few or no Y-seams usually create a calmer learning curve than designs filled with tiny angles.
A Charm Pack uses 5 by 5 inch squares, a Layer Cake uses 10 by 10 inch squares, and a Jelly Roll uses 2.5-inch-wide strips, as summarized in this reference on common precut quilting units. Those fixed formats can shorten cutting, but you still need to confirm that the pattern matches the precut size.
A shopping checklist you can copy
- Pattern support: Full-color diagrams, numbered steps, and clear measurements.
- Fabric organization: Labels, sorted bundles, or a cutting map.
- Skill match: A stated beginner rating and no surprise specialty techniques.
- Construction style: Large blocks, repeated units, and limited Y-seams.
- Finishing help: Quilting, binding, and pressing guidance through the final step.
- Equipment notes: A clear list of rulers, thread, needles, and feet you must provide.
If you plan to quilt with a walking foot, review this walking-foot quilting guide before choosing a pattern that depends on straight-line quilting.
Matching a Kit to Your Skill Level and Pattern Comfort
The prettiest cover isn't always the friendliest first project. A kit should match your comfort with cutting, quarter-inch seams, pressing, layout, and fabric placement. A square-and-stripe design may look simple because it uses familiar shapes, while an appliqué pattern can demand careful placement even when the fabric arrives prepared.
| Skill Tier | Pattern Complexity Markers | Typical Notions Included |
|---|---|---|
| True beginner | Large squares, broad strips, repeated blocks, few angled seams | Cutting diagram, pressing guide, seam-allowance reminder, labeled fabrics |
| Advanced beginner | Smaller repeated units, half-square triangles, more detailed layout | Assembly chart, pressing directions, trimming guidance, fabric codes |
| Intermediate | Appliqué, Y-seams, intricate repeats, many directional fabrics | Specialty technique notes, detailed diagrams, templates, alignment guidance |
A precut strip kit illustrates the difference well. The strips may be ready to sew, but the pattern can still ask you to build repeated rows and maintain a consistent quarter-inch seam. A Charm Pack project may look even simpler because it uses squares, yet small squares expose every inconsistency in seam allowance. The pieces don't have much room to disguise a seam that wanders.
Use the cover photo as a quick gut check
Count the fabrics that your eye must separate to understand the design. If the cover photo needs more than five fabrics to read clearly, the pattern may have moved beyond the easiest starting point. That's not a strict rule, but it's a useful pause before buying a kit based only on color.
Ask yourself three questions:
- Can I identify the repeated unit?
- Does the pattern show the block before it becomes a full quilt?
- Would I feel comfortable unpicking one seam and trying again?
Complex appliqué and Y-seams can intimidate a confident newcomer because they demand different skills from straight piecing. Choose a project that stretches you slightly, not one that asks you to learn every technique at once. Your first quilt should build trust in your hands.
Planning the Backing, Batting, and Notions the Kit Skips
The finishing layers determine how your quilt feels and behaves. Batting controls loft, warmth, weight, and post-wash texture, while backing affects stability, appearance, and the amount of piecing required. Cotton, polyester, wool, silk, and blends all behave differently, so the right choice depends on whether you want soft drape, visible texture, warmth, or dimensional stability.
Cotton batting typically shrinks about 3–5% after washing, creating the crinkled texture many quilters like, while polyester batting has minimal shrinkage and helps preserve dimensions. You can learn more about how fiber and construction affect durability with Lewis and Sheron Textiles batting in this batting-fabric guide.
Choose batting with the finished use in mind
For a first quilt, low-loft cotton or a cotton blend can offer a soft hand and manageable drape. Polyester may be a better fit when you want less shrinkage or a puffier appearance. Read the package for loft, fiber content, width, and quilting-distance guidance.
A kit listing that says “top only” creates a second shopping trip. Add the batting before you begin piecing so you can keep the finished size and quilting plan in view.
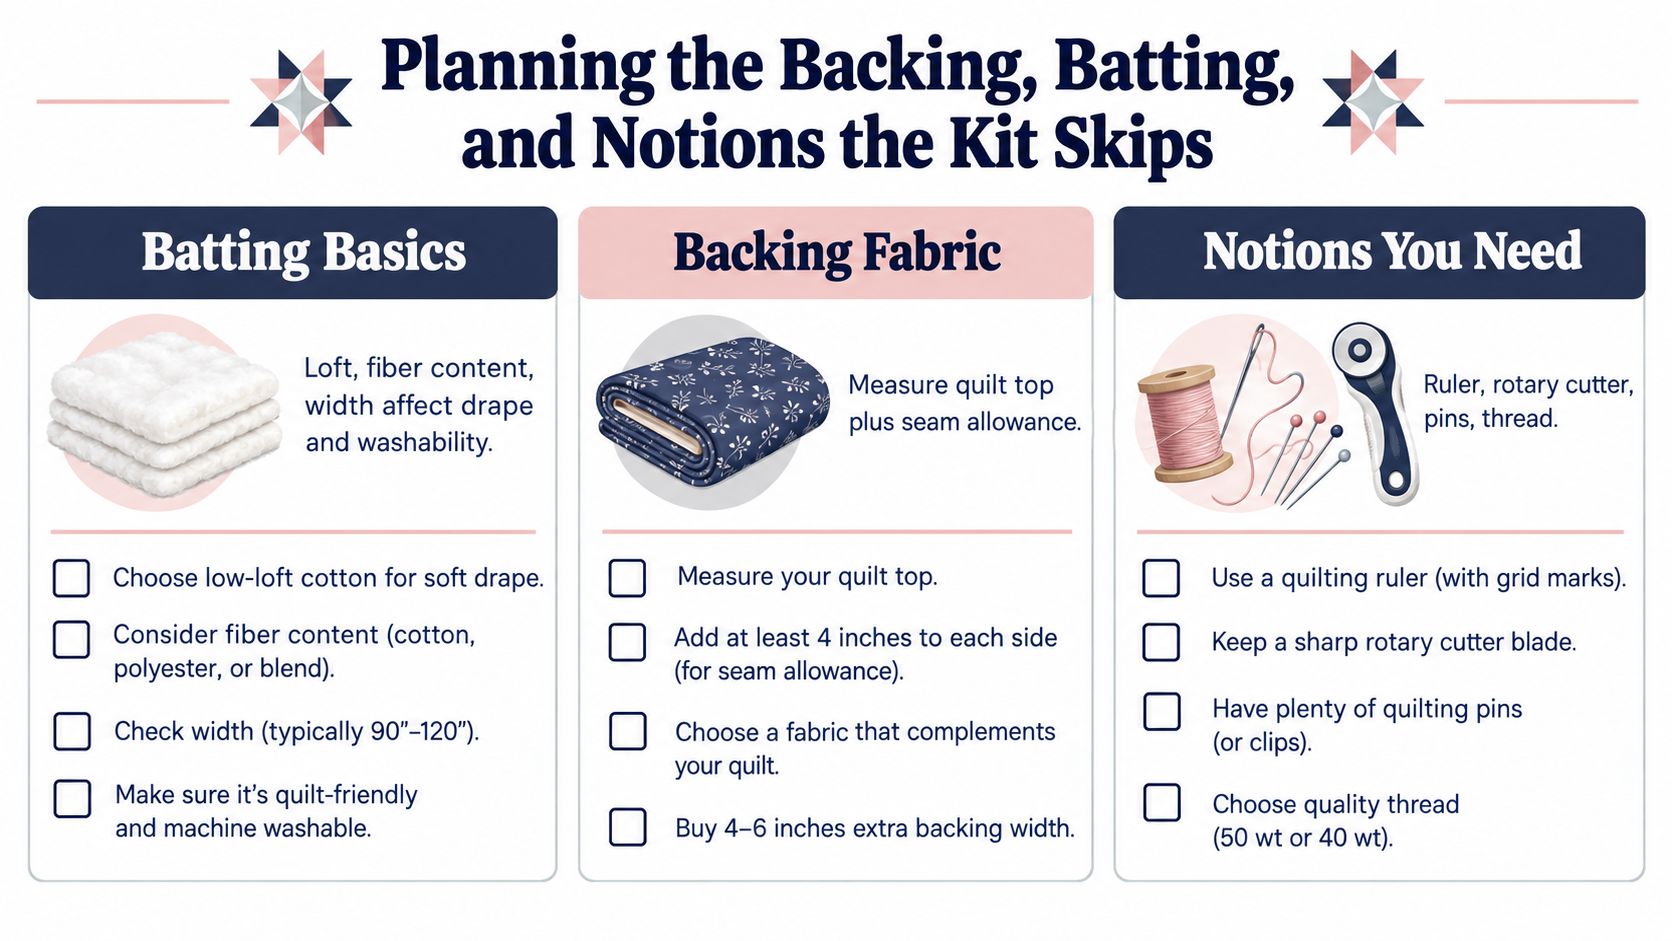
Work out the backing before you cut
Wide quilt backing is often about 108 inches wide, compared with approximately 43 to 45 inches for standard quilting cotton, so a wide-back fabric can reduce or remove the need for a center seam. Start with the quilt-top dimensions, then add the overhang required by your quilting method.
For longarm quilting, backing should extend about 6 to 8 inches beyond the quilt top on every side, according to longarm backing guidance. Another backing reference notes that a 108 by 108 inch piece can cover a quilt top of about 100 by 100 inches with a four-inch margin, so always compare the specific requirements of your quilter with the fabric width.
Backing planning is simple when you write it down:
- Measure the quilt top: Record length and width after the top is complete.
- Add quilting allowance: Use the margin requested by your longarm quilter or quilting plan.
- Check fabric width: Confirm whether one continuous cut will cover the top.
- Buy binding separately if needed: Pre-made binding can shorten the last stage.
- Gather notions: Add thread, pins or spray baste, ruler, rotary cutter, needles, and a walking foot.
For a practical walkthrough of arranging the three layers, use this guide to make a quilt sandwich.
A Realistic Start-to-Finish Plan for Your First Easy Kit
A first quilt doesn't need to consume an entire weekend in one anxious push. Give the project separate jobs, and your hands will have time to learn each one.
Saturday morning and afternoon
Begin Saturday morning by opening the kit and checking every fabric against the contents list. Read the pattern from beginning to end before cutting. Look for directional prints, labels, repeated blocks, and any instruction that says to make more units than you think you'll need.
Use a 90-minute block for pressing and cutting. Press gently if the pattern or fabric preparation allows it, then sort pieces into labeled stacks or small trays. Keep the fabric codes visible. A simple sorting system prevents the common mistake of sewing a background square where a feature print belongs.
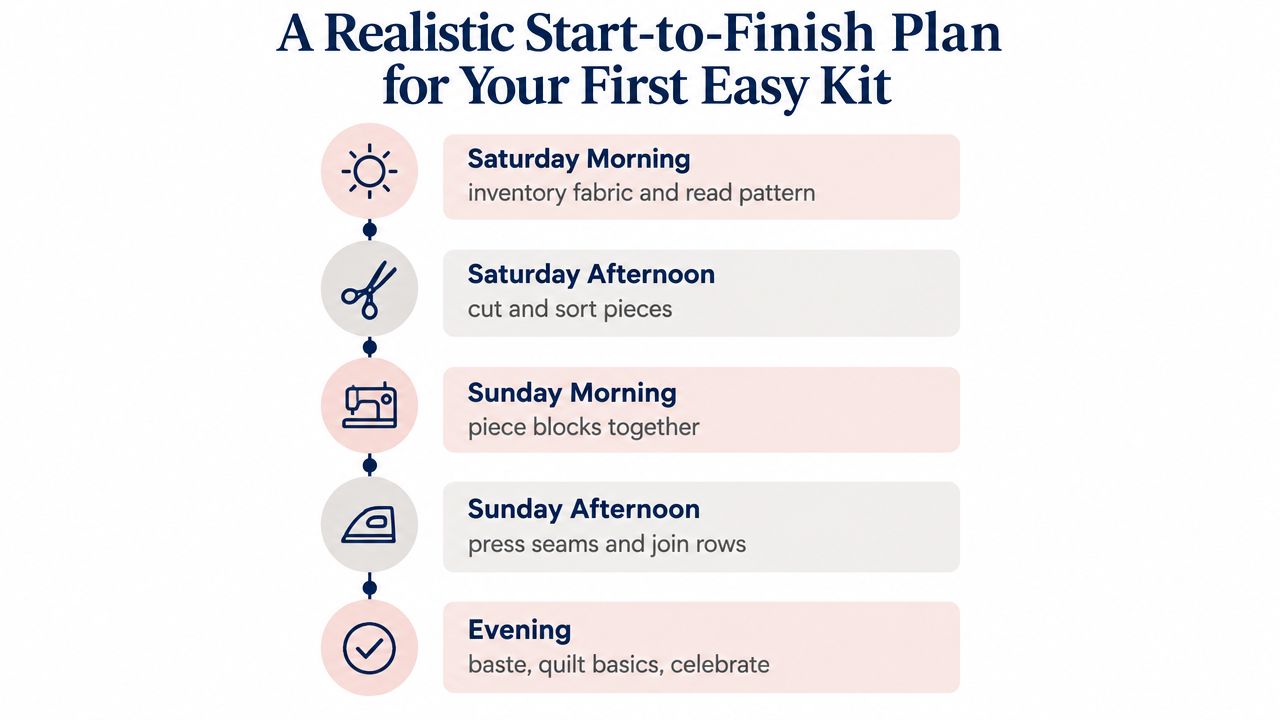
Don't skip the pressing step. Pressing sets seams and helps blocks lie flat, while trimming loose threads keeps dark threads from showing through pale fabric. If the instructions call for seams to one side, follow that direction because opposing seam directions can help nested joins line up.
Sunday sewing
Start with a test seam on scrap fabric if the kit uses a quarter-inch seam allowance. Sew a few repeated units, then check their size before continuing. Chain-piecing can speed assembly by allowing you to sew one unit after another without cutting the thread between every pair.
The goal for a beginner is steady progress, not an imaginary finish line. Many makers can complete the piecing by mid-afternoon, then leave basting, quilting, and binding for later. Binding is often best treated as a separate midweek task, especially if you want to stitch it by hand.
A few habits protect your patience:
- Press as you go: Don't wait until the full quilt top is assembled.
- Trim with purpose: Remove thread tails that could become bumps or shadows.
- Check orientation: Repeated blocks can accidentally rotate during chain-piecing.
- Pause after a mistake: Unpick one seam calmly rather than forcing the next row.
- Celebrate completion: Matching points improve with practice, but the first quilt's job is to be finished, not flawless.
Buying Checklist and Where to Shop the Right Supplies
Before you purchase, read the listing as if you're checking a recipe. The photograph shows the finished meal, but the contents list tells you whether the ingredients are in the bowl.
Use this five-point check:
- Pattern complexity: Look for large shapes, repeated units, and limited specialty techniques.
- Included notions: Confirm whether the package contains only fabric and instructions or also includes binding, templates, thread, or needles.
- Precut type: Identify whether the design uses Charm Packs, Layer Cakes, Jelly Rolls, Fat Quarters, or yardage.
- Fabric quality: Check the fiber content, manufacturer, and whether the colors suit your intended recipient.
- Finishing requirements: Calculate backing, choose batting, and list the tools needed before you start.
Pair the kit with backing, batting, and thread in the same planning session. The quilting supplies for beginners guide can help you identify the tools you still need without turning a simple project into an overflowing cart.
A local quilt shop can offer hands-on advice when you want to compare batting or hold backing fabrics beside the kit. Larger craft stores can be convenient for basic notions, while online retailers such as Fat Quarter Shop, Missouri Star, and Etsy offer broad pattern and precut selection. Our Springfield, Tennessee showroom gives local makers another place to ask questions and compare supplies in person.
Commit to one manageable kit rather than stockpiling materials. The best first purchase is the project you'll open, understand, sew, and finish.
The Fabric Company offers quilt kits, precuts, 108-inch quilt backings, batting packages and rolls, thread, patterns, and quilting notions for the steps an easy kit leaves to you. Visit The Fabric Company online or stop by Our Springfield, Tennessee showroom to choose a coordinated kit and finish the project with support from experienced quilters.